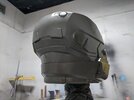
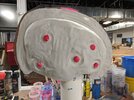
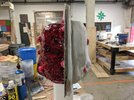
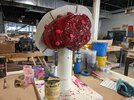
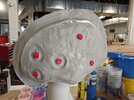
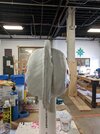
Reach Gungnir helmet build

Status
Not open for further replies.
Progress looking great!
After I build my DMR I plan on taking a second shot at the gugnir helmet. I figure if the helmet's built it'll encourage me to finish my HUD app xD
 
so for the helmets that cut out visibility I would recommend you to have the helmet have parts that can be removed. So for Gungnir, I would say the "box" part that holds the lens be able to pop off via magnets. I did something similar with my saint 14 build which rendered my 95% blind.

Yep, that was a consideration. Another is vacforming the entire "top" and treating it like an EVA Helmet, except instead of gold, using the chosen armor color. Honestly, it is out of scope for now.


Progress looking great!
After I build my DMR I plan on taking a second shot at the gugnir helmet. I figure if the helmet's built it'll encourage me to finish my HUD app xD

I hear that. Honestly a big part of posting a build thread here is y'all will keep me accountable and moving on the project. You're now witnesses.

This build looks amazing! I can't wait to see how this comes together!

Thank you!
 
Update: first priming

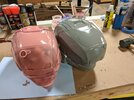
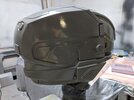
With the first round of sanding done, it's time to prime and see if I see where we're at. The helmet has some legendary company.

IMG_20200904_202110.jpg

But first, the helmet must be cleaned of any lingering dust, fingerprints, and other stuff that could be on the surface. I clean it with a cloth dampened with acetone, and then use an air compressor to blow away the rest.

IMG_20200904_203409.jpg

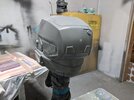
Then it is on to priming, where all my sins will weighed and exposed. Will I be spending time in sanding church to atone?

Looks pretty good so far!

IMG_20200904_205825.jpg
IMG_20200904_205854.jpg

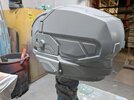
Upon closer inspection however, there is still some work to do. Thankfully, these flaws are all very minor and won't require too much time to address.

# 1: this area by the collar has some slight holes to fill, and a few striation marks where the supports printed into the surface.
IMG_20200904_210413.jpg

#2: this area by the cheek greeblie completely got by me- didn't even see it when sanding. This one I'll have to think about carefully. The detail is mostly hidden, but it is visible but it is also in a tough place to fix.
IMG_20200904_210424.jpg

#3: this are I put a "?" on as the seam line has been addressed, however there is a noticeable "speed bump" where you can tell a shift from one side to the other. This is a challenge. I could leave it as is. I could add more material and blend it so it is a longer slope. I could sand it down and blend it in that way, the inverse essentially. Decisions, decisions.
IMG_20200904_210629.jpg

Aside from that, the rest is looking really good. The rest of the seam lines are gone, with the exception of a couple small pin holes that honestly, will probably disappear when more primer is added.
IMG_20200904_210619.jpg

Still, there is work to do before I can move on to a higher grade of sanding. So, I'll have to go back to the areas that need attention, fill, sand, prime, weep, fill, sand, prime etc .

We'll see what I can get done this weekend. I'm juggling a couple things, like those legendary kits in the back- gonna take a leap and put a couple on etsy and see what happens.
 
Update

I spent an hour or two working on the small flaws from the post above and am happy to report that they are 90% fixed. A second round of priming and this guy is looking near perfect :)
IMG_20200910_190934.jpg

IMG_20200910_190957.jpg

Before I can move on to the next level of high grit sanding, I need to spend some time on the back of the helmet and the collar piece. One side didn't quite line up correctly, so I spent some time very, very very carefully heating it with a heat gun and bending it into shape. It worked! Things line up very nicely now.

I've decided to go the magnet route for joining the two halves. To do that, I need to make the lips where they join larger so I have space to incorporate the magnets. I took some apoxie sculpt and added a bead to both halves.

IMG_20200910_200232.jpg

IMG_20200910_200237.jpg

It'll take 24 hours to cure. At that point, I'll inspect how well they match up, and make any adjustments such as sanding away or adding material as needed until such time that the parts are lined up as best they can reasonably be. Then, onto drilling some holes for magnets and testing them out.
 
Update time

Been busy on some other stuff but have been working on this in spurts. Let's catch up!

I sanded down the beads of apoxie I added to the perimeter of the collar zone and then re-joined them together. The result wasn't bad, but there was juuuuust enough of a gap that I decided to take another pass at it. So, I sanded down the area a bit, and then grabbed some FreeForm Air (another epoxy dough) that I had on hand and tried something.... different.

I sprayed the crap out of the collar with release agent, then added a bead of the dough to the helmet where it joined, and sandwiched the pieces together (read : SMOOSH). You can see in the image below where the epoxy dough extruded out.


Not to worry! We want this to happen.

I took my clay tools (made of silicone) and easily removed the excess material, while keeping the new seam line nice and smooth.

Then I had to let the pieces sit joined for 24 hours to cure.
IMG_20200914_171505.jpg


I returned the next day to unjoin the pieces and it totally worked! Thanks to the heavy amount of release agent I used, the collar came off easily, revealing a clean seal. The parts now match up precisely :)

I then began to work on the magnet system. I have many of these neodymium magnets from a previous project, about a quarter inch in diameter. I measured the depth, grabbed a corresponding drill bit, then taped it off so as to not go too deep. I then marked about where I wanted them to be, and drilled the holes.

It came out nice and clean.

IMG_20200916_175333.jpg


In the image below, I was test fitting the magnets in. They fit snugly enough, but on a few of them I had to make another pass with the drill to get them more flush.

IMG_20200916_175513.jpg


Once I was happy with the placement on one side, I grabbed some paint and made a dot on each magnet.

IMG_20200916_175641.jpg


While the paint was wet, I then attached the collar piece.

IMG_20200916_175746.jpg


The paint leaves a mark on the collar piece where each magnet corresponds on the other half. This helps me know where to drill.

IMG_20200916_175837.jpg


The holes were then drilled on the collar, and the magnets inserted. Everything matched up perfectly! With that done, I could not resist doing a test fit, so here it is:


IMG_20200913_143139.jpg


"My name's GUNGNIR and I can't see ****!"

IMG_20200913_143108.jpg


I'm still cleaning up some small details, so for now I have to wait for stuff to finish curing. Final priming is not far away!

I'm already starting formulate plans for molding. Hopefully I have the first casting pulled by mid October!
 
Hey, this project looks so great! If you want to try and see better... I've been working on a little bit of engineering to help. My current helmet has a door peephole, but also a little visor in the faceplate, which really helps with vision for mobility.

IMG_20190914_202453.jpg
IMG_20190914_202503.jpg


For my next helmet I plan to vacuum form and tint a visor whole black section under the bill

46fef9fa779f2b73ef3fc1ce7fd1e916.jpg


Anyways, I can't wait to see this build come along!
 
Hey, this project looks so great! If you want to try and see better... I've been working on a little bit of engineering to help. My current helmet has a door peephole, but also a little visor in the faceplate, which really helps with vision for mobility.

For my next helmet I plan to vacuum form and tint a visor whole black section under the bill

Anyways, I can't wait to see this build come along!

Very cool!

I briefly flirted with vac-forming the light-gray section; the limitation there though would be that you'd pretty much have to stick with the silver color scheme.

I don't have any updates this week, we've got a bunch going on at home so no shop for me for a bit.
 
Update

Been busy the past couple of weeks moving but finally that is done and I can work on fun stuff again.

I was able to get to my makerspace and progress a little more. While I was away, it seems some residue of some kind got on the helmet (I'm assuming from a neighboring workspace, but dunno for sure) and unfortunately for me it it wouldn't wipe off so I have to strip it and re-sand.

Ugh.

Oh well.

Got that done, then had to re-prime &
it
is
ready
to
mold!

IMG_20201007_200514.jpg
IMG_20201007_200520.jpg

Glossy <3

IMG_20201007_200549.jpg
IMG_20201007_200558.jpg

I've picked up my materials order, and will be aiming to get an armature built up so I can begin molding this weekend.

At this point, the helmet is at a point where I get in every project where if I keep fussing with it, I make something worse and should just let it go. So that is to say, it might not be 100% flawless. It might be 95% or even 99% and I just have to tell myself

No.

No touchy.

Learn from my fails fellow builders. Know where this 'line' is for you, and when to call it "good enough".

More SOON.
 
Update

I put together a super basic helmet stand that I can work off of, just a couple pieces of melamine with a hole drilled for a 4 inch PVC pipe piece. It'll do for now.

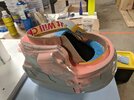
Started to seal up the bottom of the helmet in preparation for molding.


Here I have the carboard I'm using, roughed in and secured with hot glue. The cardboard is about 1/4 -1/2 an inch below the brim.
IMG_20201010_141919[1].jpg

Here I have the area sealed up with clay. This will prevent the silicone from seeping into the helmet and wasting material.
IMG_20201010_144809[1].jpg

Here I've erected an inner perimeter wall, about 1/2 inch from the helmet brim. What this does is keep the silicone from spilling over the edge to an area where it isn't needed. I've learned from prior helmet molds I've done in the past to make the "inner" brim a little wider than I think it needs to be- that way when I go to roto-cast, I reduce the chances of having resin spill out the side.
IMG_20201010_154026[1].jpg

With the perimeter up, I cut a hole where the pvc stand needs to go for when I flip the helmet back over on top. For this mold, I want to start with the bottom first. This is so all the undercut details (thankfully there are not many on this specific helmet) can be captured first, without having silicone simply roll off if I started top -> down.
IMG_20201010_161609[1].jpg

Here is the helmet on the stand. We are about ready to go. I need to give it a quick wipe down with alcohol to remove any residual finger prints and clay from when I was handling it earlier.
IMG_20201010_161847[1].jpg

Right now it is about 5PM my local time, and I'm debating if I want to start brushing up rubber now. Once you start, you cannot stop until it is done, and this process is going to take about 7-8 hours, or an hour per layer. Essentially, I'll be brushing on silicone in batches of increasing thickness. In order to ensure each layer bonds to the next, I have to let each layer partially cure, which can take anywhere from 45min to 1.5 hours depending on the environment.

So, lots of stop\starting.

We'll see if 'ol Rev feels like pulling an all-nighter. I'd like to get this done over the 3 day weekend.
 
Update

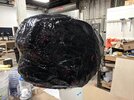
I decided to go for it. I was at the shop until about 4am Saturday night (Sunday morning) and things went well.

Layer 0
To start, I flipped the helmet over and applied a layer of Rebound 25. The purpose of this layer is to capture detail that would otherwise be much more difficult to capture with the helmet standing correctly. You want the first layer of a brush on mold to be thin so it captures all the details before building up subsequent, thicker layers. Often times, this is call a 'print coat' I let this layer cure for about 90 minutes, so that when I flip the piece over the silicone won't sag.
IMG_20201010_181933.jpg

Layer 1 & 2

This is the print coat for the rest of the helmet. Still Rebound 25. At this stage, you mix up a small batch, pour it on the top and as it creeps over the sides, take a brush and stipple it all over, taking care to ensure that it is pushed into any thin, recessed detail areas and making sure you pop any surface bubbles that may occur that would mar the finish. I did this layer twice.

(Off camera: I poured some silicone into an ice cube tray to use later for registration keys. I pour these first because by the time I'm on the 5th-7th layer, the Silicone should be cured enough to handle but tacky enough that they will bond)
IMG_20201010_203653.jpg

Here is a close up of the front. You might notice on the "fang" that there is an object- that is a hair from the chip brush. When using cheap brushes, you want to be really mindful that you remove as many loose bristles as you can, and if any get on the surface, you pull them off. Otherwise, they might cause a flaw on the surface that could be present on every casting you pull. Once you get past the print layer, you don't really have to worry about this as much.
IMG_20201010_204240.jpg

Layer 3

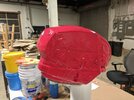
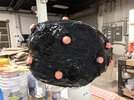
This layer I ran out of Rebound 25 and swapped over to DragonSkin 10 (my shop was out of Gallon units of Rebound, so I had to compromise). DragonSkin is translucent by default. When doing a brush on mold, one helpful thing you can do is add pigment to each layer to help you see where you need more coverage in a given area. As you can see here, I added some red pigment, and then brushed on another liquid layer.
IMG_20201010_214756.jpg

Layer 4

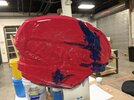
This was the smallest batch. This layer is about filling in any indents to level the model out before going to the next layers. To thicken they silicone so it adheres to a vertical surface, I added Thi-Vex. I also tinted this layer blue, so I could see it easier against the red. For this helmet, there aren't many areas to fill except some details. The consistency should be like cake frosting.
IMG_20201010_223854.jpg
IMG_20201010_223911.jpg

Layer 5

This layer is a repeat of layer 3, but with the silicone tinted purple (since I had red & blue on hand, I mixed them. At this point, I was waiting about 45 min in between layers.
IMG_20201010_233539.jpg

Layer 6

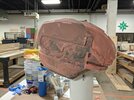
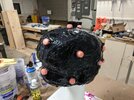
This is the biggest layer, a double batch of silicone, thickened with a lot of Thi-Vex until the silicone is at a consistency like peanut butter. At this stage, you basically trawl it on with a spreader, or in my case, a paint stir stick. I had some black pigment, so that made it really easy to contrast against the last batch. When you spread it on, you want to take care that you are squeezing out any air pockets that might be trapped in each dollop you put on. It is better to go a little bit at a time and smooth it out as best you can with your tool. You don't want it to be spiky.
IMG_20201011_005031.jpg

Layer 6.5

Once applied, it's time to add the registration keys from the first layer. I demold them from the ice cube tray, and press them gently into the thickened layer.
IMG_20201011_015044.jpg

Then with the remaining batch of material, I spread it around the keys, sealing them to the surface and creating a strong hold. The purpose of these keys is to give the outer mold shell (or mother mold) something to lock into so the halves line up correctly each time.
IMG_20201011_015050.jpg

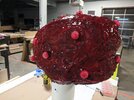
Layer 7

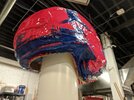
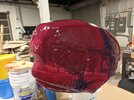
The final layer. This layer is the same as layer 3, and also tinted red. The silicone is not thickened, and is poured\brushed all over the model and keys, sealing and smoothing everything.
IMG_20201011_025923.jpg

By this point in the night it was 3am, and I had to do some clean up. Here are all the cups I used for each batch to give you an idea of the material. Each batch was about 6oz of silicone except for the black layer, which was 18oz.
IMG_20201011_030540.jpg
 
Update

So after that long night, Rev got some sleep until a brisk 1pm, and then headed back to the shop. The silicone is cured, but we aren't done just yet- we need to make the mother mold so the silicone has something to hold the shape when the master is removed.

For this part, I'll be using FreeForm Air epoxy dough. I also use fiberglass, it just depends on what I have on hand and what works best for each project.

Step 1: build a mohawk.

I take a shapie and down the center of the model, make a line where I want the parting seam to be. Once on, I cut up some card stock into strips and tape it into the rough shape of the perimeter, all the way around the silicone.
IMG_20201011_153229.jpg

Step 2:

Transfer that mohawk to something stronger. I had plenty of cardboard on hand, so I used that. I trimmed the paper mohawk to a 2 inch flange, traced it onto cardboard and using a scroll saw, cut out the shape.
IMG_20201011_165424.jpg

It fits pretty well, though not the cleanest job I've ever done. Just didn't feel like worrying about making sure it was super tight for this build.
IMG_20201011_161702.jpg

Step 3:

Apply a release agent to the cardboard (I used Sonite wax) and then start mixing up batches of dough and cover the surface with anywhere from 1/4 to 1/2 inch of material. A nice feature of Free Form Air is that you can smooth it out with water. Oh, wear gloves. This stuff is super sticky. I applied the first layer all the way around, and didn't completely cover the registration keys. I do this because during demolding, If I need to, I want to be able to push here for leverage if needed.
IMG_20201011_180447.jpg

50% there. Unfortunately, this stuff has a cure time of 24 hours. So, nothing to do but wait until Monday.
IMG_20201011_180507.jpg

Then monday came

Step 4:

Remove the cardboard divider, then apply a couple layers of release agent to the half of the cured mother mold where the seams will meet. The nice thing about silicone is that nothing sticks to it, except itself so no release agent is needed there for the epoxy dough.

Then, you just repeat applying the second half, doing your best to squish it into tight areas and smooth it out once it is roughed in.
IMG_20201012_133003.jpg
IMG_20201012_142416.jpg

By the end, it looks like this.
IMG_20201012_142424.jpg

Then ya gotta wait another 24 hours....
 
The casting is getting close! Thanks for sharing these steps, I've never considered letting the keys pop through so you can push on 'em if needed.

Sure! The keys popping in\out depends on your preference really. I like having them visible so I can see that the silicone is seated correctly into the mother mold. There are certainly reasons you might not want to do that, such as thickness issues and stuff like that. I had a helmet with mechanical lock one time because I covered the keys and thats why I change it up every now and then
 
Update time!

So I've been working on this on\off all week but have not had time to post, so I'll catch up.

Last I left, I had just applied the second half of the mother mold and needed to wait 24hrs for it to cure. So I did that and came back the next day to de-mold, and see if everything came out OK. Arguably, this is the most nerve wracking part of the process for me, because when you demold you want to see that everything went right, you don't have any bubbles or surface imperfections and that you didn't waste a bunch of silicone.

So I took the helmet off the stand, and before I separate the halves, I drill in holes where I where bolts will be inserted so that the halves re-join exactly as they need to. I didn't use too many for this bucket, as it didn't seem like I'd need to. I can always add more later tho. Just make sure you do this BEFORE you demold.
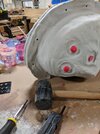
IMG_20201013_182636.jpg

With the hole drilled, I then carefully separated the mother mold shells. Because I used a release agent, the halves did not bond to each other and came off pretty easily with some minor use of a hammer and chisel. Just want to gently pry them apart.
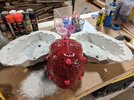
IMG_20201013_183021.jpg

After that, we move on to removing the rubber. This part can be a royal pain the first time, depending on the item you are molding and the configuration setup. For this helmet, my goal was to take advantage of the properties of ReBound 25 & DragonSkin and do a seamless mold. If you do it right, and keep the silicone just thin\thick enough, you should be able to roll it up gently as you go, and invert the mold.

The reason I went that route for this case, is that the Gungnir helmet doesn't really have any undercuts, or major protrusions that would risk tearing the mold. This results in a casting that needs WAY less cleanup, as there are no seam lines. (Another reason I went this route, is that if I find I can't demold it as a seamless mold, THEN I can make a cut in the rubber with a razor knife, if I need to. Worth a shot to give it a try)

The tradeoff though, is that you generally get less castings out of the mold, total. Why? Well you are asking a lot of the silicone to invert itself repeatedly. So it can do it, but it shortens the life of the rubber. If I did a two part mold, I could probably pull double the amount of castings, but there would be slightly more clean up work.

So it depends! It depends on the piece, the mold, the results you want, and what your time is worth.

Here I am, carefully demolding the master. Thankfully it rolled up rather easily.
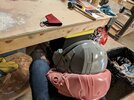
IMG_20201013_184051.jpg

Ta-da! An inverted Gungnir!

Ringung, if you will.
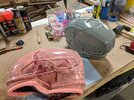
IMG_20201013_184213.jpg IMG_20201013_184327.jpg

Now. To inspect the fruits of my labor. What flaws await me, the amateur...

Only a couple, and thankfully they aren't deal breakers!

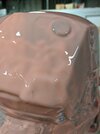
On one of the side details, it looks like a small air bubble got trapped. You can see it below. This means that every time I pour a cast, this will result in a blemish that will need sanded off. There are also a couple in what I would call the 'trenches' of some of the details where silicone just didn't fill in, or air got trapped. That's the game tho. It happens. Certainly not worth making a fuss over in this case.
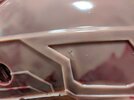
IMG_20201013_184224.jpg

So I'll call that successful! I'm a happy maker. Time to try some castings and see how they go.
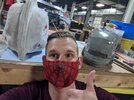
IMG_20201013_185729.jpg

So what are your guys' thoughts? How do you feel about 'quality' on something like this, where there is a high chance of error, or minor flaws? Does that deter you from wanting to keep going? How about when you think about offering something for sale? Do you get in your head about minor flaws?

I'm trying to get better about it, but would love to hear your opinions.
 
Last edited:
Status
Not open for further replies.
Back
Top