Moar updates
Don't hate me for the double\triple posts lol
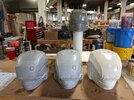
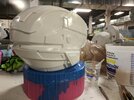
The first casting pull.
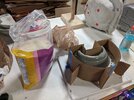
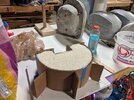
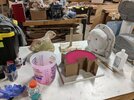
So now the helmet has been demolded successfully, it's time to reassemble the mold and figure out the casting process.
- How much resin will I need?
- How many layers?
- What areas might require extra care?
- What 'order' do I go in?
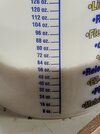
These are things you have to learn as you go, and will vary from mold to mold. For this mold, I have an *idea* for how much resin I'll need for a robust casting based on some previous molds that were slightly smaller. So I start there, and compare notes (always save your notes) and get a tentative process written down.
The first casting, I don't expect it to be 'successful'. This purpose of this one is to pull out any gunk that might still be stuck in the mold, like bits of primer, dust, etc. It might be too thin, it might have pooling in some areas as you sling it around like a mad man, etc. You won't bother with mold release or baby power on the first pull. You want to "clean" the mold with this casting.
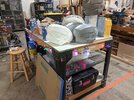
So here I am, adding layers of SmoothCast 300, bit by bit, building thickness. SC300 cures bright white. It is not designed for rotocasting, and smoothon is pretty vocal on their documentation about NOT using it for that purpose (they want you to use 65D, which is designed for rotocasting.
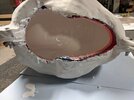
Does this mean you should not use SC300, or SC 320, or even onyx? Nope!!
The reason SmoothOn advises you not to use those for rotocasting, is that those resins are all "snap cure", meaning that once the pot-life expires, the resin basically starts to cure all at once, and that can result in pooling, 'lava' effects, and just general mess. With practice, you CAN use these resins for rotocasting, so long as you practice practice practice and respect the cure times and properties, and realize that you are taking a risk. If you look at other established builders , you'll see they do just fine with these resins for roto-casting.
Is there anything wrong with 65D? Not really. It just tends to be more sensitive to heat, and warps easier compared to the others. Onyx cures super fast, resists heat, but if too thin is very brittle.
You gotta pick the right material for the right application. It isn't set in stone.
OK. That said.
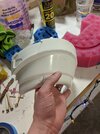
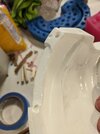
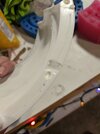
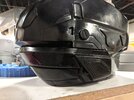
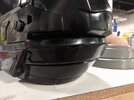
Here are some close ups of my first pull
The cheek flaw that will be on every casting.
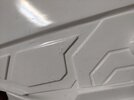
The 'trench' flaw that will be on every casting.
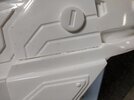
Some primer that got pulled off the master, that got pulled out of the mold (thanks, sacrificial first casting!)
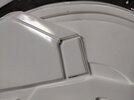
A thin area on the brim where I didn't slush enough material. Again, you learn these as you go.
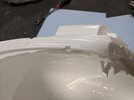
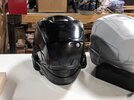
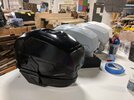
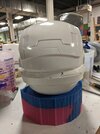
Here is the first pull next to the master
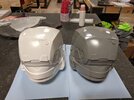
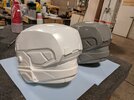
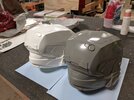
Very shiny! Honestly, the first casting isn't a dud. It needs a little work, but is still totally useable. I'll probably offer it up for a discount once I get my first "good" pull to use for my giftee's replica.
The good news is I also dialed in the perfect amount of resin to use, I just need to tweak the order and technique for pouring.
Here is the 2nd casting a pulled. For this one, I sprayed mold release into the mold, and dusted in baby powder. I also tinted the resin light grey.
The mold release helps release the cast from the rubber, extending the life of the mold. The baby powder assists with pulling resin forward to the silicone, and reducing the chance of surface bubbles on the casting. The casting comes out a little more 'matte' though, as a result.
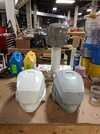
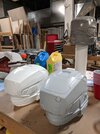
This casing came out better than the first but also has some small flaws, a couple air bubbles on some sharp edges, and a little warping on the rear collar that occurred when I didn't have the rubber seated correctly (d'oh). Another discounted bucket for someone.
I'll post more pictures soon. So far, everything has been successful and I just need to keep pulling and dialing it in to get the process right.
I also, still need to mold the rear collar. Completely forgot to do that. So, I'll be doing that soon.
Thanks for reading and I'd love your feedback\comments!
Don't hate me for the double\triple posts lol
The first casting pull.
So now the helmet has been demolded successfully, it's time to reassemble the mold and figure out the casting process.
- How much resin will I need?
- How many layers?
- What areas might require extra care?
- What 'order' do I go in?
These are things you have to learn as you go, and will vary from mold to mold. For this mold, I have an *idea* for how much resin I'll need for a robust casting based on some previous molds that were slightly smaller. So I start there, and compare notes (always save your notes) and get a tentative process written down.
The first casting, I don't expect it to be 'successful'. This purpose of this one is to pull out any gunk that might still be stuck in the mold, like bits of primer, dust, etc. It might be too thin, it might have pooling in some areas as you sling it around like a mad man, etc. You won't bother with mold release or baby power on the first pull. You want to "clean" the mold with this casting.
So here I am, adding layers of SmoothCast 300, bit by bit, building thickness. SC300 cures bright white. It is not designed for rotocasting, and smoothon is pretty vocal on their documentation about NOT using it for that purpose (they want you to use 65D, which is designed for rotocasting.

Does this mean you should not use SC300, or SC 320, or even onyx? Nope!!
The reason SmoothOn advises you not to use those for rotocasting, is that those resins are all "snap cure", meaning that once the pot-life expires, the resin basically starts to cure all at once, and that can result in pooling, 'lava' effects, and just general mess. With practice, you CAN use these resins for rotocasting, so long as you practice practice practice and respect the cure times and properties, and realize that you are taking a risk. If you look at other established builders , you'll see they do just fine with these resins for roto-casting.
Is there anything wrong with 65D? Not really. It just tends to be more sensitive to heat, and warps easier compared to the others. Onyx cures super fast, resists heat, but if too thin is very brittle.
You gotta pick the right material for the right application. It isn't set in stone.
OK. That said.
Here are some close ups of my first pull
The cheek flaw that will be on every casting.

The 'trench' flaw that will be on every casting.

Some primer that got pulled off the master, that got pulled out of the mold (thanks, sacrificial first casting!)

A thin area on the brim where I didn't slush enough material. Again, you learn these as you go.

Here is the first pull next to the master


Very shiny! Honestly, the first casting isn't a dud. It needs a little work, but is still totally useable. I'll probably offer it up for a discount once I get my first "good" pull to use for my giftee's replica.
The good news is I also dialed in the perfect amount of resin to use, I just need to tweak the order and technique for pouring.
Here is the 2nd casting a pulled. For this one, I sprayed mold release into the mold, and dusted in baby powder. I also tinted the resin light grey.
The mold release helps release the cast from the rubber, extending the life of the mold. The baby powder assists with pulling resin forward to the silicone, and reducing the chance of surface bubbles on the casting. The casting comes out a little more 'matte' though, as a result.


This casing came out better than the first but also has some small flaws, a couple air bubbles on some sharp edges, and a little warping on the rear collar that occurred when I didn't have the rubber seated correctly (d'oh). Another discounted bucket for someone.
I'll post more pictures soon. So far, everything has been successful and I just need to keep pulling and dialing it in to get the process right.
I also, still need to mold the rear collar. Completely forgot to do that. So, I'll be doing that soon.
Thanks for reading and I'd love your feedback\comments!

