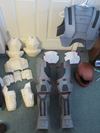
rino's odst build (WIP)

Status
Not open for further replies.
Thanks Shaymin Sky! And thank you for the plasti-dip suggestion, thats what I ended up getting a little while ago. Ive yet to try it out but it seems like thats what everyone suggests!
 
That's super clean man. Nice Foam chest!

Thanks man!

Here's another update. Decided to change how I built the thigh pieces. Decided to go with foam instead of the pep.

And here's some pics.

IMG_1199.jpg

IMG_1202.jpg

IMG_1206.jpg
 

Attachments

  • IMG_1199.jpg
    IMG_1199.jpg
    90.1 KB · Views: 228
  • IMG_1202.jpg
    IMG_1202.jpg
    113.6 KB · Views: 241
  • IMG_1206.jpg
    IMG_1206.jpg
    92.6 KB · Views: 235
yea it look awsome...it i live in nyc . so u know it cold i here . i have a spair room in my apartment and thats where i do my work
 
Those foam thighs look cool, I can't wait to see more updates! Are you thinking about using foam for any more parts?
 
The helmet and foam work looks awesome! We're pretty much doing the same build as you, and we're going to use foam for the thigh armour, did you use Hugh's pep as reference for the thighs or just by eye? Again, looking sweet!
 
Those foam thighs look cool, I can't wait to see more updates! Are you thinking about using foam for any more parts?

I'm not sure what else i'll be using foam to build. Definitly the knees and I might see if theres a way i could make the boot out of foam.

if so where do you get your foam?

Hell Razer, i get my foam from Harbour Freight Tools. Its sold as floor mats.

The helmet and foam work looks awesome! We're pretty much doing the same build as you, and we're going to use foam for the thigh armour, did you use Hugh's pep as reference for the thighs or just by eye? Again, looking sweet!


I used hughs file again. I had already built his file so I cut it into a couple pieces and then traced it onto foam. The inside part(the slats) I did myself.


Thanks to everyone for the words of encouragement! Got some supplies to make a heat box so pregress should pick back up. :)
 
Hey 405th!
Its been a long time since I've had an update for you all. Its been a super busy spring semester so my progress has slowed somewhat :( Butttt as summer is almost here my progress should pick up again :)

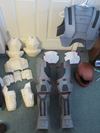
I Just thought I'd post a picture showing how far I am in the build and some of the progress I've made since my last post.

IMG_1257-1.jpg


The parts circled in red are what I've done since my lasy post. They include the knees, the hip plates, and a visor for my helmet (thanks to Sean Bradley for that). I also changed some stuff on my chest core. I changed the shoulder straps somewhat and added the "neck seal".

Only two more things to pep and then i need to figure out what Im going to do for the boots. Then on to hardening and painting!

More updates to come :)
 

Attachments

  • IMG_1257-1.jpg
    IMG_1257-1.jpg
    93.9 KB · Views: 236
Wow you should make a tutorial video for foam building techniques because it can help those who aren't able to provide expensive materials such as bond, resin etc. And also because foam can be alternative for parts that may feel uncomfortable to users.

Great job and can't wait to see the updates.
 
ShojiSan92
I might think about doing one once summer break is here, once i have a little more time. Thanks!

thorn
thanks for the words of encouragement!

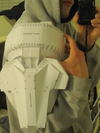
Well here's a small update. I've decided to change from a "Halo 3" odst character to a "Halo 3: ODST" type character. So basically I'm just changing the shoulders.

Thanks to Hugh for the shoulder mounting idea
IMG_1264.jpg


New shoulders. Thanks to Kirrou for the file for the shoulder on the left and 1ManBattalion for the QC shoulder.
IMG_1267.jpg


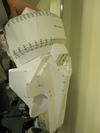
I'm thinking I should make another normal shoulder and mount the CQ shoulder to that. I'm pretty sure that's how its supposed to be and I think it looks pretty cool mounted on the normal shoulder. lol

IMG_1268.jpg

IMG_1269.jpg


What do you all think?

More updates to come!

rino626
 

Attachments

  • IMG_1269.jpg
    IMG_1269.jpg
    86 KB · Views: 212
  • IMG_1268.jpg
    IMG_1268.jpg
    61.8 KB · Views: 239
  • IMG_1267.jpg
    IMG_1267.jpg
    125.1 KB · Views: 213
  • IMG_1264.jpg
    IMG_1264.jpg
    99.7 KB · Views: 242
Hey 405th!

IMG_1257-1.jpg


Hahaha....man that is some good looking stuff!

Core looks alot like mine... Neck seal is great idea, and your looks great!

Shins look very similar to mine as well... nice work. How much trouble did you have with doing the back calf half of those?

You also have the thighs... That is one part of all this armor that scares the frak out of me.... How well did they go together?

Looking great brother.....keep at it! Can't wait to see more of your progress....

cujo3131
 

Attachments

  • IMG_1257-1.jpg
    IMG_1257-1.jpg
    93.9 KB · Views: 225
HFH!!! that pep work is, its, beautiful, i would never take a picture that close to the rubbish i come out with! wow!
though if you were to mount the two shoulders on top of one another, how would you do it, as if you were to do each shoulder individualy that would be a (small) waste of materials, or will you splice the two together?
 
Status
Not open for further replies.
Back
Top