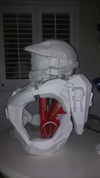
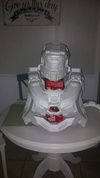
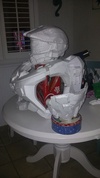
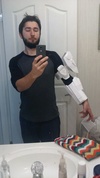
SBG's Halo 4 MC build.......

Status
Not open for further replies.
Thank you! Man to be honest, one of the kids just woke me up. Gonna have to set the alarm for 5a.m. for work. I usually take 40 to 50 minutes of my lunch at work to work on some of the pepping. Gonna sacrifice some sleep to get some stuff printed since I fell asleep on the couch. Which was my intentions to do that just that. The build must go on!

Now you are starting to sound like me. It is a slippery slope. You know it has gone to far when your wife starts tells you to stop and look up for a minute as she is making props for your daughters birthday celebration at 4 am with you while working on files to get them ready for pep.
You start a big ol' fight, your daughters(mine) wake up and take your wifies side. Now you got 3 chickies against you and they are giving you the dirty harry stare. Then you realize you were dreaming because you fell asleep at your comp and you wake up with the letter t key stuck to your face. Then you head over to the 405th for a quick fix.
 
That armor looks great! Just the motivation I needed to start on my first build. Will be waiting to see your finished product! :thumbsup
 
That armor looks great! Just the motivation I needed to start on my first build. Will be waiting to see your finished product! :thumbsup

Thanks! I know its been a while but, finally wrapping up on the torso! Thrusters are taking a little longer do to being totally enclosed on there back sides. So what of a pain. Might leave a few tabs unglued until I'm ready to resin them. Have to be gentle with them, to much pressure in certain spots causes them to get out of shape. By leaving a few tabs unglued that allows me to stick a ruler in the thruster to poke it back into shape. Once there completely done, I'll attach them to the rest of the torso for more photos. For now, here are the thrusters.

20151226_234551_zpsz65dra0i.jpg

20151226_234508_zpsevvlboc0.jpg
 

Attachments

  • 20151226_234551_zpsz65dra0i.jpg
    20151226_234551_zpsz65dra0i.jpg
    175.8 KB · Views: 230
  • 20151226_234508_zpsevvlboc0.jpg
    20151226_234508_zpsevvlboc0.jpg
    171.4 KB · Views: 230
20151227_212651_zps4bxgch5l.jpg

20151227_213729_zpsthwuzqfl.jpg

20151227_212735_zpsxkyccbii.jpg
 

Attachments

  • 20151227_212651_zps4bxgch5l.jpg
    20151227_212651_zps4bxgch5l.jpg
    425 KB · Views: 256
  • 20151227_212735_zpsxkyccbii.jpg
    20151227_212735_zpsxkyccbii.jpg
    443.3 KB · Views: 230
  • 20151227_213729_zpsthwuzqfl.jpg
    20151227_213729_zpsthwuzqfl.jpg
    475.8 KB · Views: 245
Now you are starting to sound like me. It is a slippery slope. You know it has gone to far when your wife starts tells you to stop and look up for a minute as she is making props for your daughters birthday celebration at 4 am with you while working on files to get them ready for pep.
You start a big ol' fight, your daughters(mine) wake up and take your wifies side. Now you got 3 chickies against you and they are giving you the dirty harry stare. Then you realize you were dreaming because you fell asleep at your comp and you wake up with the letter t key stuck to your face. Then you head over to the 405th for a quick fix.


Wow.....I thought I was the only one that that happens to..........but for me it's the "B, N, M and the space bar".
 
how are you able to pep without fold lines and edge id omg. looks epic!

Actually edge ids aren't needed. If you have your computer in front of you. You can see where the parts go. When gluing pieces together just make sure the edges line up on the ends. Hopefully my bondo skills will be just as good, and thanks!
 
I've been following along with my identical build and I would like to know how you connected the small pieces between the torso parts and added the side piece to the jetpack. Love following your work! :)
 
I've been following along with my identical build and I would like to know how you connected the small pieces between the torso parts and added the side piece to the jetpack. Love following your work! :)
Sorry I didnt reply sooner. Watched a movie with d wife, and fell asleep. For the pieces on the thrusters, they're just glued on with hot glue with three little dabs here and there. And, for the pieces in between I free handed 2 extra faces on either side of each individual piece. In the second to last pic if you look closely I left one side of it open. So its not totally closed. Mainly the side you can't see when wearing the torso. Hope this makes sense?

- - - Updated - - -

And thanks for the comments guys!
 
alright thanks... I had already free-handed the in between spaces but wasn't sure if there was another way and i will do that with the side pieces
 
I cut a hole in the back of my thrusters to get in so i can fibreglass them. Your pep work is great, do you use a craft knife to cut your pieces?
 
I cut a hole in the back of my thrusters to get in so i can fibreglass them. Your pep work is great, do you use a craft knife to cut your pieces?

Yes, and no. Almost finished with the opposite (RIGHT) shoulder/bicep. The first (LEFT) shoulder/bicep was done with x-acto knife along with the helmet, FRONT torso, and the 2 parts that sit over the shoulders. The rest was done with Silhouette Cameo. That includes the rest of the torso, and the (RIGHT) shoulder/bicep.
 
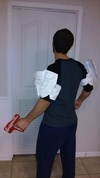
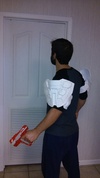
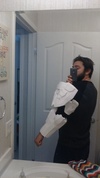
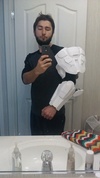
Not to big of a update, but it's definitely progress! Kinda slacked off a little since the middle of January. Managed to finish the other bicep/shoulder. Although, I did get permission to modify his forearm file. All I did was changed some of the geometry to make it more simple. Then I gave it back to Masterbuilder to clean up some of the topology, then back to me. Ended up translating the elbow piece off to the side of the forearm to help with the scaling in pepakura. Did that so it wouldn't interfere with the measure/distance tool in pepakura. Basically the file is more like a test fit file. My first one came out way to big after assemble. Will post a pic of that once I get the sizing right. Which I only have like 3 more pages to run through the Cameo, then folding, and gluing. And finally, assembling the 2nd forearm tester file.

b65fa667-542e-458d-b1f6-791aca2ac388_zpstvrkq3tw.jpg

20160222_201556_zpsgkato6ue.jpg

20160222_201648_zpsbkhondfg.jpg

Also, here is a pic of the tester file Unfold. Significantly reduced the amount of parts to put together for assembly.
Untitled_zpsgog7kpuc.png
 

Attachments

  • b65fa667-542e-458d-b1f6-791aca2ac388_zpstvrkq3tw.jpg
    b65fa667-542e-458d-b1f6-791aca2ac388_zpstvrkq3tw.jpg
    438.3 KB · Views: 233
  • Untitled_zpsgog7kpuc.png
    Untitled_zpsgog7kpuc.png
    181.4 KB · Views: 236
  • 20160222_201648_zpsbkhondfg.jpg
    20160222_201648_zpsbkhondfg.jpg
    176.9 KB · Views: 223
  • 20160222_201556_zpsgkato6ue.jpg
    20160222_201556_zpsgkato6ue.jpg
    173.1 KB · Views: 229
20160227_124455_zpsb8xzo7ij.jpg
20160227_123905_zpsqbpq4jlj.jpg
20160227_124156_zpscyoxo7z8.jpg

Tell me what you guys think? I think the second tester was a success. I also, took both files into a modeling program. After that I scaled them both until they were just about the same size. After rotating the veiw I noticed that from one particular angle the original hd model was a little more narrow getting towards the midway point down to the wrist area. Although the tester was derived from the oringinal hd model, the elimination of details being replaced by more simpler geometry, caused the tester file to look a little blocky, or wider in some areas. So what I'm hoping is with the original hd model, it will shrink some. The tester was unfolded horizontally with a lot less parts to assemble(39 parts). In the case of the hd model its about (105 parts), and unfolded vertically. So in my theory, once the hd model is pepped it will have a less blocky, more narrow look.
 

Attachments

  • 20160227_124455_zpsb8xzo7ij.jpg
    20160227_124455_zpsb8xzo7ij.jpg
    385.3 KB · Views: 209
  • 20160227_123905_zpsqbpq4jlj.jpg
    20160227_123905_zpsqbpq4jlj.jpg
    463.1 KB · Views: 213
  • 20160227_124156_zpscyoxo7z8.jpg
    20160227_124156_zpscyoxo7z8.jpg
    462.7 KB · Views: 210
Status
Not open for further replies.
Back
Top