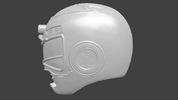
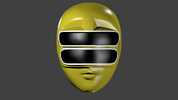
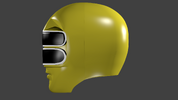
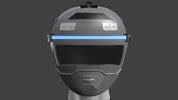
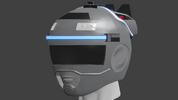
Update Time!

...

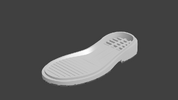
Making an outsole for a boot is hard work!

As much time I looked at how it's crafted, there's not enough information out there when it comes to making it with the research I've done. Either there's not enough information on it or the reason why is because not enough people have actually tried to making it from home. It's actually harder to refine the process than the actual suit and helmet combined!
When it comes to making the outsole of the boot, I have to come across 2 actual factors.
Factor 1 is that I have to come across a design that is slip resistant. I had to take a look at what it looks like on the recent pair of boots I made and tried to understand the design. Some how I got it to work with the mock up.

Negative 2.png


Of course, I will need to make more groves for the liquid to channel through.

Factor 2 is the part where I will have to create the "crate" or "ribs" section of the boot. This will reduce the weight of the boot and prevent it from making it one gigantic solid piece of rubber. I have not made that yet and more research is needed in order to make that part. I'll have to dive into the internet again to hopefully find the answer to it.

Anyway, that's all for now. The process of the boot continues onward and maybe, I'll have something more to show on the next update.
See you later for now!
 
I bought some gauntlets on Etsy from someone with the same user name, is that you? Also hurry up with this Turbo build already.
 
I bought some gauntlets on Etsy from someone with the same user name, is that you? Also hurry up with this Turbo build already.
No. Sorry. That's not me. I don't have a store front page on Etsy. Also, something like this can't be rushed. I have to gather funds and do research before moving into the next step so I know it won't be a total waste of time and effort.
 
No. Sorry. That's not me. I don't have a store front page on Etsy. Also, something like this can't be rushed. I have to gather funds and do research before moving into the next step so I know it won't be a total waste of time and effort.
Understandable, loving the progress!
 
It's been way too long. Far to long to be exact. Anyway, I have plunged deep into the internet once again only to resurface. What I observed is that when it comes to making boots, there is very little instruction on how to make it. I barely can find any on the internet that's not really tacked behind a pay wall. I understand that type of knowledge isn't free. As usual, I am going to have to reverse engineer the process like I did with the helmet and suit.

So what have I have actually done since the last post? Well, I took time out to buy a lot of stuff related to this part of the thread.
I bought the machines in order to build the pressure pot and vacuum chamber. I bought the materials needed to make the visor and the actual outsole for the boots. I bought the tools and some of the materials for the boots. So far, I have spent over 1,200 bucks to get this point and had I known it was going to cost me this much, I would have bought this stuff sooner before the pandemic.

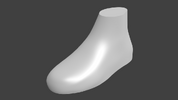
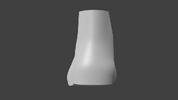
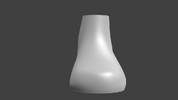
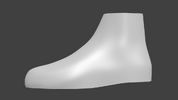
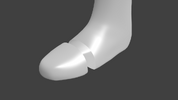
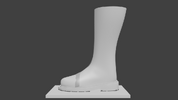
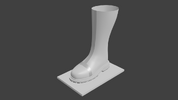
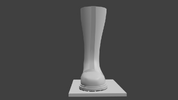
While I was stock piling the materials, tools and equipment, I went through the process of studying how to make patterns for boots and creating a boot last to match the outsole. Here are my results of this creation.

Angle Shot.pngBack Shot.pngBottom Shot.pngFront Shot.pngSide Shot.png
These images are showing the boot last. This needed in order to create the shape of the boot.

Boot Pattern 1.pngBoot Pattern 2.pngBoot Pattern 3.pngBoot Pattern 4.png
This shows the pattern of the boot that I am going to make. When it comes to boots that look like the design from the show, There's always the strip that goes across the boot and down the shaft of the boot.

Outsole Update 1.png
I modeled the ribs in order to make contact of the last. I had to really try and create a similar design to make sure that the surfaces make contact when it's time to glue every thing together.


I'll continue to provide more consistent updates as I finalize everything for the creation of the boots. Until the next update, see you around.
 
Update Time! Today, I would like to show the items I have obtained over the past few months.
Let's start with the tools.

20230211_210939.jpg

From the top to the bottom are the items listed and all are from Amazon.

Tandy Leather Leather Scissors from UpwardMerchandise.
It's exactly what it is going to be used for; cutting leather. The only downside to keep it dry so it won't rust.
The next item is Steel Leathercraft Cobbler Pliers Pincers with Hammer made by REAMTOP. This item wind up being a 2 in 1 tool. The hammer is that small flat surface near the top of the pincers.
The next one is Kiridashi Craft Pocket Knife Japanese Steel Blade Plastic Handle with Sheath by Product of Gifu Japan. This item will be used to trim and shave off the back of the leather for the creation of the boots.

The most important item is this.

20230211_211440.jpg


This is the Singer Heavy Duty 4452 sewing machine. This will allow me with sew the leather once it's prepped and cut out.


Next is the materials.


20230218_145121.jpg


This is the type of leather that will be used for making a certain part of the boot. Let me tell you, it's a lot of cow!


20230218_144849.jpg


20230218_144833.jpg


20230218_144828.jpg


20230321_140325.jpg

20230321_140319.jpg

20230321_140139.jpg

I also got it in white as well. This will be used to make the uppers. The pattern is also ready to go, but I need to make a few adjustments first.
I am also going to make a 3d printed last instead of buying one.
It's going to be a moment before I get started with the process since the weather has been nuts so far.
For now, this the current status I have and until next time, see you around!
 
Hey, I haven't seen this thread in a minute, making your own boots is pretty awesome, insane, but awesome, there are a couple of boot patterns on Etsy for sale
 
Hey, I haven't seen this thread in a minute, making your own boots is pretty awesome, insane, but awesome, there are a couple of boot patterns on Etsy for sale
True, but since I made the pattern to the suit, making a pattern for the boots has been created using the same process. Of course, it doesn't hurt to take a look. Thanks for the suggestion.
 
It's Update Time!
It has been a very difficult time period this past month trying to get to the next step. First, I had an issue with the printers trying to get the print bed leveled. I got that issue resolved. I then moved forward with printing the 1st part of the last I call the North Last.

20230407_115302.jpg


20230422_102727.jpg


20230407_115648.jpg

This part took 13 hours 29 minutes to print. Easy.
I wish I could say the same about the southern part of the last...
UGGGGGGGGGGGGGGGGGGGGGGGGGGGGGGGGGGGGGGHHHHHHHHHHHHHHHHHHHHHHHHH!
Never in my life have I had so many failed attempts in making 1 3d printed part since I first tried to make the helmet over 4 years ago. I lost count to the number times after the 5th one when each one was just too small to wear.
20230426_153318.jpg

Be it the supports lacking stability, layer shifting, poor quality in the supports, or not getting the filament to stick to the bed, I have failed 16 times...

20230426_154405.jpg


Just to obtain this 1 item and that didn't come out unscathed! This is a combination of 17th failed print and I had to recover from where the print ran out of filament. I gambled, lost and recovered just to make it!

20230426_154734.jpg

And then I had to plastic weld the two together so I didn't have to try and print it all over again... at least for this size.

SO! With these two pieces placed together, the biggest question is will they fit to become one whole piece?

20230426_163703.jpg


Yes, it did fit after I had to sand the surfaces down a bit. Originally, it created too much friction and got stuck to a certain point because the surfaces made contact in certain spots.
20230426_154708.jpg

I also printed the matching boot outsole for this last. However, I came across 1 hiccup.

20230426_164517.jpg

The inner chamber of the outsole doesn't fit the last. SO! What I forgot to do was to check the clearance in Meshmixer and this is my punishment.
The actual boot last length is 11.7 inches in length. The length of the area inside of the outsole, from "toe to heel" is 11.5 inches.
That means that I was off by merely .20 of a millimeter... I should have double checked, but it's not a complete loss. All I have to do is to shave off from the outer wall on the last about that much with an orbital sander and I should be fine. Always check for clearance, kids!
Anyway, the end goal is to create a mold out of all 3 pieces before I create the leather boots.
That's all for now. Until next time, talk to you later.
 
A minor update on the boot last. It turns out that the measurement is off when I am making this boot last to fit inside the space on the outsole.
Even if I am able to sand the bottom of the last down to 11.5 inches, it will still clash with the inner walls of the outsole. So, I will have to make a compromise. Here are my options.


Option A: I would stick to the original plan and sand down the last together as one piece to get a uniformed fitting into the outsole.
Option B: I will have to sand down the walls on both the last and the inner walls of the outsole so I can fine tune the fitting of the two parts.


In the end, I may have to wind up using both options in an effort to get this going into the next stage, the molding process. I'll post an update in the future to share the results.
 
SO! That was a bust! I had a feeling that it was going to be an issue, but neither option is viable. At this time, I am making adjustments to the outsole model so it has enough clearance to properly fit the last inside of it. After that, I will print it again and it should fit the last. For the silver lining, I suppose, I have another version to build off of if a someone needs a pair for a 11.5 size foot. Yaaaaaay?
 
Author's Note: I thought I had a previous draft saved, but I was never able to recover it... Oh, well!

It's the 5th anniversary of this thread and it's long over due for an update.

First things first.
Last time, I was talking about making a boot last for making a pair of boots. The idea is still on going and after taking a second look at the combined length of the last, it turns out that I made it to be 11 3/4 inch long. It's also 5 inches wide which is more than enough for me to move around in with out dealing with any discomfort. In order for me to make this happen, I will need to print the outsole again, but this time, I have to make sure that the space between the 2 is increased by 1 millimeter. Second, I had to buy a larger pressure pot and compressor for 2 reasons. Reason 1 is that the previous setup I have which is 1 3 gal compressor and 2.5 gallon pressure paint pot tank that was converted for resin only. However, it wasn't enough for the job I had planned. I was planning on making a resin visor to add on to the newly designed helmet I made over the spring season.

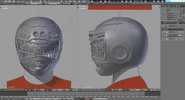
This is what it look like before.
2019-08-28 22_50_16-Blender_ [O__Cosplay Folder_Super Sentai_Carranger_Carranger Red Ranger He...png

Once again, this images above represent the current design of the helmet I am wearing now.

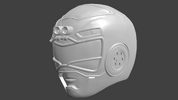
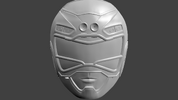
This is what the new design looks like.

Angle Shot.pngFront.pngSide Shot.png

Now, it doesn't look like much, but I changed the design just a bit so it would resemble more to the design on the show. For starters, it now has a breathing slot on the side where I overlooked before. It allows me to breathe more in hopes to prevent the use of any chemical usage that could reduce the amount of the fog on the visor. Also, I designed the helmet where I can install separate switches to run 2 systems; one for the lights and one for the fan that I will install later.

And printing that helmet, the current update took me through a roller coaster of emotions.

20231013_134858[1].jpg

This image is just an example of 6 out of the 14 attempts of making this helmet. I had to replace the Z screw on the printer and I had to try and change the settings on the slicer in order to improve the print quality, but you when you go through so many failures, it starts to take its toll on you mentally. I was able to print it out, but this version will not be ready for the convention in about 2 weeks. After the convention? Definitely.

20231013_135014[1].jpg

Any way, I bought a new and larger paint pressure pot to convert...

20230901_112056[2].jpg
It's a larger 10 gallon pot and I was able to get it on sale! I also bought a larger compressor to accommodate.

1697227044593.png

So with the combination of these 2 items, I can make at least up to 2 resin visors at a time. Again, do to the amount of prep work I have to do in order to make it happen, it won't be ready for the convention.

What's the plan? At this time, all I can do is make repairs for this 1 boot 1 more time and finalize the wiring of the current helmet. Don't count me out yet. I have a lot I have done over the summer and will post more later.

Take care.
 
Update time!

I'm going to have to make a confession on some of the reasons why I have been sidelined on posts for this thread. One of them was I was in the middle of printing another Power Ranger Helmet for someone and the progress of it was difficult to deal with.
Front V 3.pngSide V 3.png

So, this helmet is the Zeo Ranger 2 helmet and printing this thing out was somewhat of a nightmare. Failed about 9 time before I was able to print it out, and then it suffered under extrusion, broke around the area where the visors were suppose to go and recently, I was able to print out a stable version of the helmet. More on that for another time.

The second reason I was slacking off in the updates was because there was another idea I had that I mentioned earlier. Remember this idea I posted in this thread?

Delorean Ranger Frontal View.pngDelorean Ranger Profile View.png

This was my idea of creating the Delorean Ranger. However, I have since redesigned it and will post a animated demo of the new design at a later time.

Moving on to the actual reason I decided to make this update. During the time I was printing out the Zeo Ranger 2 helmet, I was getting frustrated with the power going out. I was stuck with 2 options; either I start over from scratch and print again or I make an accurate guess and modify the G Code of the file to print where it was cut off. Both decisions were time consuming and frustrating to deal with.

About a month and a half ago, I ordered and obtained the largest and fastest FDM printer on the market, the Anycubic Kobra 2 Max.

20231024_132542[1].jpg

And this thing is massive! This machine has a print bed of 420*420*500mm, the max print speed is 500mm/sec, it has auto resume capability in the event of power loss, and it has an auto leveling feature...

And the only thing I printed was an effing Benchy.

So here's the rub. I have tried 3 different slicers to print the upgraded version of the Delorean Ranger helmet as my next future print. Here's where things gets complicated.

The AnyCubic Slicer that came with the printer is showing an error where part of the helmet will not print despite the fact that I modeled it with the Mirror Modifier in Blender. The same can be said Prusa Slicer.

On the Cura Slicer, the program I have used since I started on this journey, I had no issues.
In order for me to test its capabilities on how fast I can take it, I will have to take the G Code to its maximum print speed allowed of 300mm/sec and max out the speed to 500 on the printer. The Cura Slicer program states that it can print my helmet in 55 hours. I'm going to see if I can cut that in half.

After the convention. I want to be able to cut it off in case something goes bonkers when I'm at home.

Anyway, that's all for now. Until next time, see ya!
 
Hi, again I search a lot for the stl of the helmet of the red ranger and I cant find it, I want to know if you sell your desing? Or maybe you can share it, please
 
Hi, again I search a lot for the stl of the helmet of the red ranger and I cant find it, I want to kwon if you sell your desing? Or maybe you can share it, please
 
Hi, again I search a lot for the stl of the helmet of the red ranger and I cant find it, I want to kwon if you sell your desing? Or maybe you can share it, please
I have posted a listing of a version of the Red Lightning Turbo Helmet on CG Trader. It's currently on sale for a limited time only. After the offer expires, I'm increasing the price.


Your message may be considered spam for the following reasons:

If you wish to reply despite these issues, check the box below before replying.
Be aware that malicious compliance may result in more severe penalties.
Back
Top