Sigma Makes A MK VII

SigmaProps

BCO
405th Regiment Officer
Member DIN
S149
Hey all, goofy blue man here, and I am making a Mark VII suit before C2E2 thanks to a very special JTF4!

This post will serve as the baseline with the concept and scaling for this suit. Enjoy!

Part 1: Basic Design Choices

To start I went ahead and booted up Infinite and made a spartan I'd like to make, sadly before cross-core shoulders, but that will come later! I did limit myself to a certain pool of choices however, as I will be using TurboCharizard's Mark VII files, I limited myself to the attachments and models he has available. Here's that mock up:

Screenshot 2024-02-11 234007.png


Part 2: Scaling and Helmet Choices

As 2024 has been dubbed "The Year of the Deadeye," I'll be doing both a Mark VII and Deadeye helmet for this build. Also, as I am a very indecisive man, I'll be making multiple chest attachments to easily swap out for this one. Here's the Armorsmith model!

Screenshot 2024-02-11 234114.png
 
Join mk VII gang!!!

I can forgive not being on the red team but the lack of cat ears is absolutely unacceptable! You could always add magnetized ones on… take ‘em off any time. Literally no downsides. Think about it… 0.0
 
Continuation commence!
Part 3: Let's Build Some Knees!

As nearly every one of my build starts with, I started a print for a part that'd be less noticeable to do some weathering and paint testing, and for this I decided to go with the knees! As it's pretty much the most important step aside from scaling, I started by printing out the pieces, and making sure the prints looked nice, and I'd say these ones turned out pretty nice, eh?

IMG_0858.jpg


I'll be getting into the paint choices specifically later, but for now I'd like to show off the finished product of these knees as I'm a man that can't keep a secret, and love to show off finished pieces. If you're interested in the sanding and finishing processes, worry not as I'll be going over those steps in depth when yours truly remembers to take more pictures!
IMG_0876.jpg
 

Attachments

  • IMG_0873.jpg
    IMG_0873.jpg
    2.4 MB · Views: 76
Part 4: Paints, Primers, Prototyping.

First thing's first ya'll, let's take a look at the prototype I whipped up in Blender for this suit. When it comes to making your spartan in Blender it's very simple, and if you know how to use Blender well enough, then making your Spartan is a breeze! When I did mine, I had Infinite open as well and referenced the in game coating to plan out the colors on the actual suit. Here's the result:

Screenshot 2024-02-14 200446.png
Screenshot 2024-02-14 200500.png


The next step was to find the paint I wanted to use, which ended up for the most part pretty simple as I chose to use the same colors and paints from my last build, the Rakshasa suit. I chose to use Rustoleum chalked for the gray and blue, Rustoleum Metalic Silver for my base, and Gorilla Glue Rubberized Sealant Spray for the rubber bits! As for priming and smoothing I'm using Rustoleum 2 in 1 Sandable Filler Primer and Black Matte Automotive Enamel.

IMG_0880.jpg
 
Don't listen to Monker. Gray with a pop of color wins the day. We need more of those.
Really liking that look. Don't know how I didn't notice originally the different color knees and top of the calves.
 
Part 5: Holy Heck It's Been A Minute

Now I know it's been nearly a year since my last update on this suit, and yes I missed the C2E2 2024 deadline, but I won't let this be the third Mark VII I abandon!

Onto what this update actually is about - the chest plate and start of the attachments!

As stated before, I'm using Skookum Props' files which were an obvious choice due to the modularity that comes alongside the file set. Most of the raw prints came off of my Ender 5 Pro, which thanks to the files being sliced for a smaller bed, made them super easy to print. Some of you reading this may be thinking "Why would you print on a smaller machine when you have not one, but two, Ender 5 Pluses?" I want this suit to be a an example to those who come across this thread, that even with a smaller machine, with less than stellar prints, or with a schedule that leaves little time to work on projects, it is very much possible to make your dream suit.

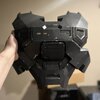
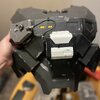
Now for the photos, my suit is following the "Slate Coast" armor coating from Infinite which ultimately means my chest plate is more or less just gray. That sounds bad, I know, but when you do your weathering and accenting right it can really make a dull piece pop. Photo one is showcasing the base of the chest plate, with the mounting points left open as a way for ya'll to visualize the way Skookum designed the files!

IMG_0874.jpg


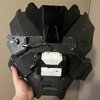
Below you'll find the chest with attchment on and off the chest plate. More to come my friends, thanks for reading!

IMG_0878.jpg IMG_0909.jpg IMG_0918.jpg
 
Hey all, goofy blue man here, and I am making a Mark VII suit before C2E2 thanks to a very special JTF4!

This post will serve as the baseline with the concept and scaling for this suit. Enjoy!

Part 1: Basic Design Choices

To start I went ahead and booted up Infinite and made a spartan I'd like to make, sadly before cross-core shoulders, but that will come later! I did limit myself to a certain pool of choices however, as I will be using TurboCharizard's Mark VII files, I limited myself to the attachments and models he has available. Here's that mock up:

View attachment 341984

Part 2: Scaling and Helmet Choices

As 2024 has been dubbed "The Year of the Deadeye," I'll be doing both a Mark VII and Deadeye helmet for this build. Also, as I am a very indecisive man, I'll be making multiple chest attachments to easily swap out for this one. Here's the Armorsmith model!

View attachment 341985
Get ittt!! Can't wait to see this thing realized!
 
Just a small update, as it’s late here and I’m stuck to mobile at the moment.

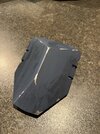
I’ll be going with a different color scheme, the gray and blue is classic, but frankly it’s a little too generic for my tastes these days. Instead I’ve gone ahead and whipped this guy up. Paints have been acquired for testing, so hopefully I’ll have some more progress to share soon!

image.png
 

Your message may be considered spam for the following reasons:

If you wish to reply despite these issues, check the box below before replying.
Be aware that malicious compliance may result in more severe penalties.
Back
Top