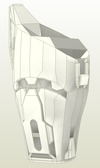
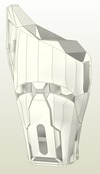
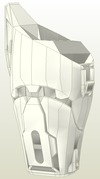
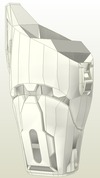
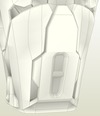
SirPalesAlot’s MK VI WIP: You’re still not done yet?

Status
Not open for further replies.
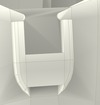
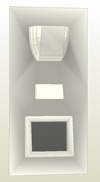
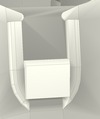
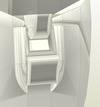
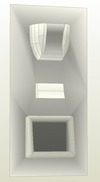
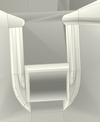
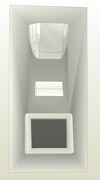
Each forearm got an update of the antecubital detail and “T” detail. Each version is slightly different than the others. Also, the LD, MD, and HD versions do not include the inner antecubital detail in the model. Those are included in the model for viewing the positions, but are actually separate and on a flat plane to the side. This would make it easier to build each part and clean them up before securing them in position.

Here are the different versions of the antecubital detail in the model along with the detail that is located on the flat plane to the side.


LD Antecubital Detail
Forearm_AD_LD_zpsd1a3b175.png
Forearm_AD_LD_Add_Ons_zpsff3e5619.png


MD Antecubital Detail
Forearm_AD_MD_zps71d08f48.png
Forearm_AD_MD_Add_Ons_zps45541764.png


HD Antecubital Detail
Forearm_AD_HD_zps7376cae3.png
Forearm_AD_HD_Add_Ons_zpsbe995537.png


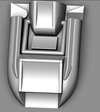
The Ultra Detail version has a higher polygon count antecubital detail, and the inner detail is included in the model rather than additional pieces.


UD Antecubital Detail
Forearm_AD_UD_zpsef7a3dde.png


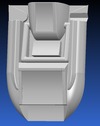
An additional version was created for those who wish to 3D print the antecubital detail. This version has a pocket in the area where the 3D printed antecubital detail would be inserted.


3D Printed Antecubital Detail pocket
Forearm_AD_Insert_zpse149ba16.png


The antecubital detail was modeled for 3D printing to include extra material on the back so it can easily be inserted as a whole part into the forearm. The model was modified in a surface modeling program and was exported as an .stl file. I can export the file into other file types if needed, but only have an .stl file prepared for now.


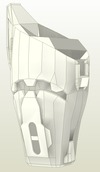
This is a shot of the Antecubital Detail in a rendered view.
Forearm_AD_For3D_Printing_Render_zpsc13b72a0.png


This is a shot of the Antecubital Detail in its original form in a standard view in the software.
Forearm_AD_For3D_Printing_Shaded_zpsd47f5d5f.png


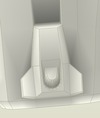
The “T” detail comes in two forms. On the LD and MD files the “T” detail is rather plain.
Forearm_Final_MD_T_Detail_zpsc7917734.png


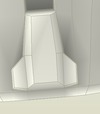
This is the version found on the HD, HD for 3D printed AD, and UD versions.
Forearm_Final_HD_T_Detail_zps50e9c474.png
 

Attachments

  • Forearm_AD_LD_zpsd1a3b175.png
    Forearm_AD_LD_zpsd1a3b175.png
    132.6 KB · Views: 199
  • Forearm_AD_LD_Add_Ons_zpsff3e5619.png
    Forearm_AD_LD_Add_Ons_zpsff3e5619.png
    85 KB · Views: 181
  • Forearm_AD_MD_zps71d08f48.png
    Forearm_AD_MD_zps71d08f48.png
    136.3 KB · Views: 175
  • Forearm_AD_UD_zpsef7a3dde.png
    Forearm_AD_UD_zpsef7a3dde.png
    158.3 KB · Views: 182
  • Forearm_AD_HD_Add_Ons_zpsbe995537.png
    Forearm_AD_HD_Add_Ons_zpsbe995537.png
    98.7 KB · Views: 197
  • Forearm_AD_HD_zps7376cae3.png
    Forearm_AD_HD_zps7376cae3.png
    122.8 KB · Views: 182
  • Forearm_AD_MD_Add_Ons_zps45541764.png
    Forearm_AD_MD_Add_Ons_zps45541764.png
    85.6 KB · Views: 186
  • Forearm_AD_Insert_zpse149ba16.png
    Forearm_AD_Insert_zpse149ba16.png
    123 KB · Views: 183
  • Forearm_AD_For3D_Printing_Render_zpsc13b72a0.png
    Forearm_AD_For3D_Printing_Render_zpsc13b72a0.png
    409.9 KB · Views: 184
  • Forearm_Final_HD_T_Detail_zps50e9c474.png
    Forearm_Final_HD_T_Detail_zps50e9c474.png
    79.6 KB · Views: 179
  • Forearm_Final_MD_T_Detail_zpsc7917734.png
    Forearm_Final_MD_T_Detail_zpsc7917734.png
    44.4 KB · Views: 197
  • Forearm_AD_For3D_Printing_Shaded_zpsd47f5d5f.png
    Forearm_AD_For3D_Printing_Shaded_zpsd47f5d5f.png
    105.7 KB · Views: 204
Now to the final shots of each version.

LD MK VI Forearm
Forearm_Final_LD_zps30bad243.png


MD MK VI Forearm
Forearm_Final_MD_zpsf9cd5af9.png


HD MK VI Forearm
Forearm_Final_HD_zpsf0fb16cf.png


HD MK VI Forearm for 3D printed antecubital detail
Forearm_Final_HD_3DP_AD_zps0b394d00.png


UD MK VI Forearm
Forearm_Final_UD_zpsb3c94440.png


Posting this again here due to uploading new files.

______________________________________


Note to the original creators of the models: I did message the original creators (that I could find) to ask for permission to release the modified files. I received no replies. I am releasing the modified files here under the condition that I give you proper credit, and stop distribution of the files if you ask me to do so. The files will be placed onto my 4shared account, and they will also (probably) be put into the 405[SUP]th[/SUP] database. Thank you!


Original creators of the files include

Robogenesis – Shoulder

Nugget - Forearm

______________________________________


The new files can be found here:

MK VI Forearm Pack

MK VI Shoulder Pack


Well, that is the end up this update. There should be no need to take the files down again (I hope). Now it’s on to the next file. I think it might be the helmet.


If you find any errors in any of the files don’t hesitate to let me know, and I’ll get them fixed as soon as I can. Hopefully I got everything right this time.


Thanks for stopping by!
 

Attachments

  • Forearm_Final_LD_zps30bad243.png
    Forearm_Final_LD_zps30bad243.png
    106.6 KB · Views: 198
  • Forearm_Final_MD_zpsf9cd5af9.png
    Forearm_Final_MD_zpsf9cd5af9.png
    106 KB · Views: 184
  • Forearm_Final_HD_3DP_AD_zps0b394d00.png
    Forearm_Final_HD_3DP_AD_zps0b394d00.png
    109.1 KB · Views: 182
  • Forearm_Final_HD_zpsf0fb16cf.png
    Forearm_Final_HD_zpsf0fb16cf.png
    130.6 KB · Views: 196
  • Forearm_Final_UD_zpsb3c94440.png
    Forearm_Final_UD_zpsb3c94440.png
    133.9 KB · Views: 204
We did good! The models look great! The .stl version of the antecubital detail is awesome! Quick, grab some cardstock and glue - must make these!!
 
Im so excited to start working on these. I already have the Torso, Thigh, and Shoulder printed. Though I might reprint the shoulder due to your changes, but whichever I choose im keeping them the same. Thanks for putting in a file for us 3D printing people too. I was not looking forward to doing those in paper.
 
Im so excited to start working on these. I already have the Torso, Thigh, and Shoulder printed. Though I might reprint the shoulder due to your changes, but whichever I choose im keeping them the same. Thanks for putting in a file for us 3D printing people too. I was not looking forward to doing those in paper.

He's reworking the thigh, so you might hold off on building that one.
 
He's reworking the thigh, so you might hold off on building that one.
Gah! I get so excited on building them, but you keep reworking them haha. Ah well I can wait...are you/he messing with the torso at all? I might start that after Im done with the two helmets on the bench.

Also im sorry I didnt catch your comment on RobotChicken's thread SirPalesAlot but the Stl. file you threw into the pack will be just fine. In fact I needed it anyway so you saved me some steps! All I have to do is get a measurement based on my personal scale.
 
Im so excited to start working on these. I already have the Torso, Thigh, and Shoulder printed. Though I might reprint the shoulder due to your changes, but whichever I choose im keeping them the same. Thanks for putting in a file for us 3D printing people too. I was not looking forward to doing those in paper.

I'm glad someone will get some use out of the 3D printer version. It should be pretty easy to scale the antecubital detail to match the scale of the forearm. All you really need to do is pull the number for the top of the pocket on the forearm and scale the top of the antecubital detail to match.

Gah! I get so excited on building them, but you keep reworking them haha. Ah well I can wait...are you/he messing with the torso at all? I might start that after Im done with the two helmets on the bench.

Also im sorry I didnt catch your comment on RobotChicken's thread SirPalesAlot but the Stl. file you threw into the pack will be just fine. In fact I needed it anyway so you saved me some steps! All I have to do is get a measurement based on my personal scale.

I actually have plans to rebuild each part now. I consider the torso, shoulder, and forearms complete as of now. I have no more plans to go back and mess with them. If anything needs to be changed on them it shouldn't be anything major. You should be safe to build those files now.

I mentioned before that I wished the shin model was a bit smoother, and I finally went back and remodeled the main body of the shin to make it happen. It's going to get the full multi-file treatment as well.

Here is an old image of the shin I had already uploaded. The shin has more work done to it than this shows, but I figured I'd show you guys something.

Shin_Detail_1_zpsa4a162e8.png


After going back and looking at the other files so much I decided to get a better look at the thigh, and I decided to remake it as well. I haven't got much done on it as of now. That file will be my first from scratch model. I tried to use the one I had as a base model, but it was proving to be more difficult that way. Right now I have the base shape modeled up and I have to begin adding the details to it. I plan to make multiple files for this one as well, and I also plan to include one that has the inner portion removed for those who prefer their inner thigh to be made of foam.


My plan is to have the rest of the models done by the end of March so I can begin building everything again. My first deadline I'm shooting for is DragonCon, but if I can't make it in time for that I plan for Halloween to be my backup.


Awesome work guys! Thank you for your hard work and dedication! GOD bless you!

Thank you!
 

Attachments

  • Shin_Detail_1_zpsa4a162e8.png
    Shin_Detail_1_zpsa4a162e8.png
    323.7 KB · Views: 183
So I might have jumped the gun when I said the file was done. When I was looking for more reference images (for the helmet) something kept catching my eye. I noticed the front pocket I had was incorrect. I liked the way the first version I had looked, but since I was going for a more game accurate version I decided to go ahead and make the changes to the model. I also made changes to the wrist opening as well. The wrist opening isn't anywhere near perfect, but it is certainly closer to what it should be than before.


Here is a shot of the changes made.
Forearm_Final_V2_Updates_zps789cb14f.png


There were a few other things that are not correct when compared to the game model, but I'm letting those things go for now. Far too many items are tied into the piece that needs modification for it to be a quick fix. As of right now I have not intention of messing with this file again unless there is something wrong with the model. When I say something wrong I don't mean visual inaccuracies vs. the game model. When I get done making the other models there is a possibility I may come back and make a version 3 of the model with all of the corrections I wanted to add, but as for now I'm not going to force myself to do it. I want to try and have my suit finished in time for DragonCon, and I need to hustle with the rest of the models if I want to give myself enough time to finish (without that pre-con panic mode).

Hopefully I haven't ruined anyone's day with this update. I am keeping the original versions of the files in the forearm pack, and the newer files are labeled with a V2. I updated the links in the previous post. There is a lesson to be learned from all of this. Study the reference material more thoroughly and double check everything.


Now to continue sifting through the 834 page screenshot gallery. Only around 500 more pages to go! Wooo!
 

Attachments

  • Forearm_Final_V2_Updates_zps789cb14f.png
    Forearm_Final_V2_Updates_zps789cb14f.png
    243 KB · Views: 181
Now to continue sifting through the 834 page screenshot gallery. Only around 500 more pages to go! Wooo!

Why not just take the in-game models and textures, and reference from those? Surely it would be easier having the reference material to hand and on demand rather than having to go through a huge gallery of potentially hundreds of thousands of images? At least with the references to hand you can triple-check before publishing your files.
 
Why not just take the in-game models and textures, and reference from those? Surely it would be easier having the reference material to hand and on demand rather than having to go through a huge gallery of potentially hundreds of thousands of images? At least with the references to hand you can triple-check before publishing your files.

Last year I managed to find a game rip of the model (without textures). My plan then was to use them as a base to remodel the parts more accurately. They really didn't do me any good. If I could get a hold of the game model with the textures in place that would probably be better than being forced to use images.

So, in the middle of typing my reply I tried to find something useable...and I didn't come up with much of anything. In most cases I could find the ripped model, but most of the textures were garbage. I found some pretty good textures, but they were modified versions made to look better. They might have looked better, but that doesn't mean they accurately portray the source material. I did find one pack with the models and game textures, but they put both the MK VI and V in the same .obj file and they are inside one another. I can't comment on how the texture would be on that one because I can't do anything with the model to begin with. I've never really messed with texturing models so it would be another learning experience.
 
I can probably get you the model and textures you need. I'll PM you when I've got things together.
 
Are you still working on this? Your work amazes me!

Thank you! Yes, I am still working on this. Right now I'm in the process of finishing up a remake of the forearm file. This version is about as game accurate as it gets. Only one more detail is left that needs to be added in, and those files will be good to go. As soon as it's done I'll post everything up.

I am also in the process of remaking the cod from scratch. Since I went ahead and made a forearm from scratch this time I thought I would try my luck on the cod as well. So far it is going pretty well. I have the entire main shape of the cod modeled, and I have most of the details added onto the back of it. After I get done adding the details to the front it will be next in line (behind the helmet) to have the details fine tuned.

Later this afternoon I may whip up a picture of the cod to show how it's coming along. I think my thread has seen enough of the in-progress versions of the forearm lol.
 
So, what im understanding from your last post, is your currently adding details to the helmet, also?

Yes. Each part is going to get an overhaul by the time it's all said and done. The helmet was pretty accurate in its base form so I didn't have to add much to it. After the forearm is completed I will be going over the helmets details with RobotChicken to fine tune everything to be as accurate as possible. This is the same process that the forearm has been going through.
 
I'm a bit meticulous about details (as you can see in my own thread), and I can honestly say that the forearm model SirPalesAlot and I are working on is indeed "as game accurate as it gets". There's just one more detail to model in, which was originally planned to be omitted because it's so minor, but considering all the other details present on the remake it just doesn't seem right to leave it out. If the cod turns out as awesome as the torso and forearm then it will be another masterpiece. My son is eager for me to start looking over the helmet because that's the most exciting and recognizable piece of the armor.
 
As promised, here is a shot of what I've got so far on the cod. It is very very far from finished, but it's coming along nicely.

COD_13_zpsd2910287.jpg

COD_12_zps2809c4fe.jpg
 

Attachments

  • COD_13_zpsd2910287.jpg
    COD_13_zpsd2910287.jpg
    65.3 KB · Views: 150
  • COD_12_zps2809c4fe.jpg
    COD_12_zps2809c4fe.jpg
    63.8 KB · Views: 157
Status
Not open for further replies.
Back
Top