First Build - Halo Reach Armor

spartan114x

Jr Member
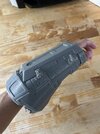
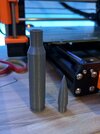
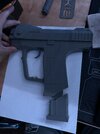
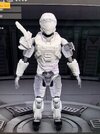
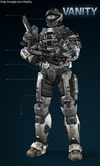
The first step of many! This week I borrowed my buddy’s 3D printer and this morning I figured out my first test prints. I met the 405th at the WA Gaming Expo for the first time in 2024 where I was inspired by what I saw and encouraged by the members there who took the time to explain and show off their gear. I’m honing my printing skills with small accessories before I move to bigger things. Two print hours down, a million more to go! The end goal is a full suit of armor that is a recreation of my final Halo Reach multiplayer outfit!

*Updated title and first message to be full build thread.
 

Attachments

  • IMG_9059.jpeg
    IMG_9059.jpeg
    1 MB · Views: 41
Last edited:
Next print up, still working on smaller parts as I figure out what armor I want to go with and making sure I’m comfortable with my printer and its settings. Had a slight hiccup on the smallest piece of this project, but really happy with it overall.
 

Attachments

  • IMG_9071.jpeg
    IMG_9071.jpeg
    1.4 MB · Views: 32
I started out the exact same way lmao, borrowed my mom's cookie cutter printer to make a Destiny knife. Welcome to the club sir, happy to have you!
 
Can anyone tell me if I should just keep posting build updates here or start a new “First Build” thread and update that as I go? Don’t want to start too many new threads, but I’m in that “just started excited” phase and I want to share a lot lol.

Anyway, first bicep piece fully printed and it fits which is a great success. Thanks Armorsmith!

Ran into the mintemp bed error on my Prusa 80% through half the print, but managed to cut it right at the point of failure and reprint the remainder. Should be a great way to develop sanding skills!
 

Attachments

  • IMG_9078.jpeg
    IMG_9078.jpeg
    1.9 MB · Views: 46
Found a set of armor files from NerdForgeDesigns that I liked better and had more detailing so I reprinted the bicep piece with that model. It’s also a lot thicker and has significant infill so it should hold up a lot better than the thin shell of the initial model.
Also got the assassination knife printed which I almost forgot about because they don’t have it in Vanity!
Finally, here is my almost accurate Armorsmith mock-up. Still have a couple models to lock in and buy. Plenty of time to look around while I print the main suit of armor. I’m aiming for Tier 2, which might be a little ambitious but it’s nice having something to work hard for.
 

Attachments

  • IMG_9107.jpeg
    IMG_9107.jpeg
    1.6 MB · Views: 39
  • IMG_9106.jpeg
    IMG_9106.jpeg
    1.9 MB · Views: 38
  • Armor_Mockup1.png
    Armor_Mockup1.png
    823.1 KB · Views: 37
  • IMG_9126.jpeg
    IMG_9126.jpeg
    1.9 MB · Views: 34
Hey man! The parts you've made so far look clean for a first build, keep doing what you're doing.
i wouldn't worry about making a new thread, you're fine with this one (y)
 
Hey man! The parts you've made so far look clean for a first build, keep doing what you're doing.
i wouldn't worry about making a new thread, you're fine with this one (y)
Awesome, thank you!

Made a rookie mistake last night and forgot to apply my Armorsmith scaling to the print model. Lesson learned! And now my four year old has a fun new toy.
 

Attachments

  • IMG_9137.jpeg
    IMG_9137.jpeg
    1.7 MB · Views: 26
Experienced the dark side of 3D printing today with some layer shift. It was almost salvageable but then did it again farther up the piece in the same direction. Lightning bolt dagger sheath? Will reorient it and go again. Scrap bucket!

IMG_9206.jpeg
 
relax buddy it is looking great so far i have yet to do my reach armor that i want. but i think if you kep at it you will be one of the great ones on here i can just see it..
 
Hand plates done!

IMG_9210.jpeg

Need to go back to Armorsmith and do some resizing of other parts. My forearm measurements are correct, but it’s displaying them weirdly on the avatar. The printed piece far exceeds what it should even with the correct model. I just learned how to non-uniform scale so it’s back to the drawing board. It’s a process!
 
Its a learning curve for sure. All new skills and softwares are. You didn't become an expert at driving a car on your first outing, but you got there. Same here. I promise there is light at the end of the tunnel.
1726111214694.png
 
Totally. I’ve got some trash prints piling up (too big) but the more I work in Armorsmith and PrusaSlicer the more I’m learning how to make sure things really will fit the first time. Starting to practice priming and painting some of the bad pieces so I can feel comfortable with it when the real work begins!
 
Totally. I’ve got some trash prints piling up (too big) but the more I work in Armorsmith and PrusaSlicer the more I’m learning how to make sure things really will fit the first time. Starting to practice priming and painting some of the bad pieces so I can feel comfortable with it when the real work begins!
Armor smith is very picky for when it wants to work and when it wants to waste your money. If you're unsure of if the prop will be a good fit then I recommend printing at very low infil just to not waste any material. That way you have a test fit item that maybe is worth 3 dollars instead of 20. I print which thicker walls and 3% on infil myself. Hope that helps!
 
Armor smith is very picky for when it wants to work and when it wants to waste your money. If you're unsure of if the prop will be a good fit then I recommend printing at very low infil just to not waste any material. That way you have a test fit item that maybe is worth 3 dollars instead of 20. I print which thicker walls and 3% on infil myself. Hope that helps!
Whoa 3%? Wow I thought I was tempting fate at 10%. How many perimeters do you do? Totally down to try this. Oh wait - this is just for test prints? I’ve also thought about just printing a slice of it to check the circumference at the widest or narrowest spot.
 
Whoa 3%? Wow I thought I was tempting fate at 10%. How many perimeters do you do? Totally down to try this. Oh wait - this is just for test prints? I’ve also thought about just printing a slice of it to check the circumference at the widest or narrowest spot.
No I straight up print my props at 3% I fil LOL, my walls are 5 layers thick. A friend of mine does 0% infil with 10 wall layers, if you think I'm crazy he's NUTS in comparison. But I figured you'd waste less on test prints if you didn't print them so thick
 
No I straight up print my props at 3% I fil LOL, my walls are 5 layers thick. A friend of mine does 0% infil with 10 wall layers, if you think I'm crazy he's NUTS in comparison. But I figured you'd waste less on test prints if you didn't print them so thick
Hooooly cow Okay I’m gonna have to try this more walls less infill business for sure. Curious to see how it affects my print times!
 
When sizing, I highly recommend playing around with the transparency and colours of the pieces too. It makes it a lot easier to see how things look on the model. Too big, clipping, little tweaks here and there...
 
When sizing, I highly recommend playing around with the transparency and colours of the pieces too. It makes it a lot easier to see how things look on the model. Too big, clipping, little tweaks here and there...
So I’ve been doing this but I’m struggling to see where it’s actually clipping with the body parts. I colored the body pieces and use 50% opacity. It didn’t help me realize my foot wasn’t going to fit through my shin/calf piece though
 

Your message may be considered spam for the following reasons:

If you wish to reply despite these issues, check the box below before replying.
Be aware that malicious compliance may result in more severe penalties.
Back
Top