1st Build The Red ODST Halo: Reach build log.

Status
Not open for further replies.
Another update, have had some time to tinker in the workshop.

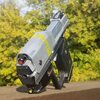
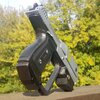
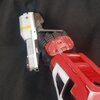
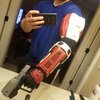
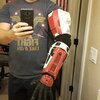
I managed to get my phone holding case printed and assembled, after some problem solving with hot glue and a dremel tool, I was able to get this to work. Luckily I also found some nuts and screws that I kept after taking apart an old computer case(Like I had these screws in a tool box since 2010 or something, ironic considering the anniversary of Reach and what my build is) and they just happen to fit the nuts I had. They also allowed me to drill holes that would hold them tight, so now I can remove the phone holder from the arm piece whenever I need to, no permanent gluing on this one.
fJaHuUD.jpg


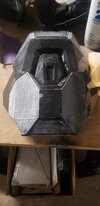
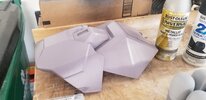
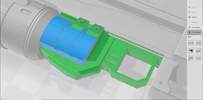
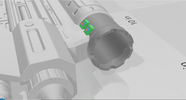
I have a few screencaps of the design I was working on in my first two posts, but this gives a much better view at how it looks on my arm and the simple pieces that make it work.
SdxmJnY.jpg

7wwEw0o.jpgdGbfQYF.jpg68yIqRn.jpgDZnpHJ4.jpg

And of course, just to prove that it holds my phone adequately, a selfie. The top part of the camera kinda blurs, but that's fine I dont intend on taking a bunch of selfies with my phone while it is in this holder.(or maybe I should...)
yYHlYiIcopy.jpg
 

Attachments

  • vadOch0.jpg
    vadOch0.jpg
    939.2 KB · Views: 236
Another update, have had some time to tinker in the workshop.

I managed to get my phone holding case printed and assembled, after some problem solving with hot glue and a dremel tool, I was able to get this to work. Luckily I also found some nuts and screws that I kept after taking apart an old computer case(Like I had these screws in a tool box since 2010 or something, ironic considering the anniversary of Reach and what my build is) and they just happen to fit the nuts I had. They also allowed me to drill holes that would hold them tight, so now I can remove the phone holder from the arm piece whenever I need to, no permanent gluing on this one.
View attachment 296868

I have a few screencaps of the design I was working on in my first two posts, but this gives a much better view at how it looks on my arm and the simple pieces that make it work.
View attachment 296871
View attachment 296872View attachment 296873View attachment 296874View attachment 296875

And of course, just to prove that it holds my phone adequately, a selfie. The top part of the camera kinda blurs, but that's fine I dont intend on taking a bunch of selfies with my phone while it is in this holder.(or maybe I should...)
View attachment 296876
Phone holder! AMAZING
 
Alright so it has been a while since I have updated, I will try to add more stuff to the main post but here I would like to highlight Two things.

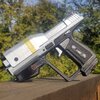
One: I made a pistol. It has a magnet in it for use on the thigh armor which is currently printing. Started a 5 day print and the heating tube on the printer died halfway through. Ugh, got it fixed and back up again.
20201104_151400.jpg20201104_152126.jpg20201104_152207.jpg


Two: the way I have configured my arm pieces is nearly complete, there is not as much mobility as I would like but I think there are some ways to work around that. More later.
qat6Poh.jpg

20201104_152851.jpg20201104_152858.jpg20201106_125517.jpg
 
Hey man what type of padding did you use for your leg armor? I am looking to to pad the inside of my armor build to help center the armor and keep it from falling down.
 
Hey man what type of padding did you use for your leg armor? I am looking to to pad the inside of my armor build to help center the armor and keep it from falling down.
@BuckDenali
20201112_215529.jpg


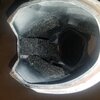
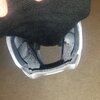
The top part of my calf/shin armor is glued together along with the knee pad to a knee sleeve, bought mine here*, I also bought some elbow sleeves from the same company that I glued to my bicep armor.


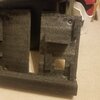
The foam I used is literally just packing foam that came with my 3D printer, there is a ton of it and I have been slowly cutting away at it for all the armor parts I have made so far. Attached I also have some photos of what it looks like inside my calf/shin armor to give you an idea of what I am doing. It's pretty straightforward, cut a piece and hot glue it where you think it's needed. The issue becomes that hot glue is the ideal temperature for bonding to PLA plastic without melting the plastic, but the foam I am using can melt away if applied too quickly to freshly squeezed hot glue(New Freshly Squeezed Hot Glue, from Florida Natural). So just take your time applying hot glue.

Another option would be checking out your local Michael's or Joann's Fabric retailer, Joann's always has a heavy stock of foam pads in different sizes that are primarily used for clothing and furniture, those foams will likely have a bit more "give" and softness compared to the packing foam I am using.

20201112_215502.jpg20201112_215616.jpg20201112_215556.jpg
 
Last edited:
View attachment 299250


The top part of my calf/shin armor is glued together along with the knee pad to a knee sleeve, bought mine here*, I also bought some elbow sleeves from the same company that I glued to my bicep armor.


The foam I used is literally just packing foam that came with my 3D printer, there is a ton of it and I have been slowly cutting away at it for all the armor parts I have made so far. Attached I also have some photos of what it looks like inside my calf/shin armor to give you an idea of what I am doing. It's pretty straightforward, cut a piece and hot glue it where you think it's needed. The issue becomes that hot glue is the ideal temperature for bonding to PLA plastic without melting the plastic, but the foam I am using can melt away if applied too quickly to freshly squeezed hot glue(New Freshly Squeezed Hot Glue, from Florida Natural). So just take your time applying hot glue.

Another option would be checking out your local Michael's or Joann's Fabric retailer, Joann's always has a heavy stock of foam pads in different sizes that are primarily used for clothing and furniture, those foams will likely have a big more "give" and softness compared to the packing foam I am using.

View attachment 299253View attachment 299252View attachment 299251
Thanks for the help brother! I was thinking about padding the inside with 2mm Eva foam, but may go a different route now.
 
Thanks for the help brother! I was thinking about padding the inside with 2mm Eva foam, but may go a different route now.
Cheers, good luck with the build.

It really just comes down to comfort. I'll be wearing a full body suit, and Im thinking about using duct tape to cover the foam to make the surface a bit more slick, but for me I think it will be Ideal. Do what works for you, there are plenty of options out there and figuring it out is part of the fun.
 
I only now find out that you can only do 50 images for one post... SO I'm going to try and rearrange my post in the future to try and collapse everything into one concise finished project, but for now I'll just post in the thread for any major updates and just link them from the first two posts.

Anyways, update for Shoulders and arms.

Shoulders
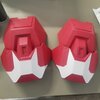
This is one of the most important parts of the whole suit, just because it gets the look right. The ODST Shoulder pads along with the Helmet have to look right, and I think so far I have pulled everything together nicely.

Printing each shoulder pad was easy, align them vertically and print from the bottom up. The whole part in one piece.
20201001_091310.jpg

The design of the shoulder pads gave them a structural weak point where the top and bottom halves meet, I made sure to epoxy those parts heavily on both the inside and out, but even then while sanding I did end up with a crack, glued them back together and epoxied more. No issues.
20201021_204231.jpg20201023_153613.jpg

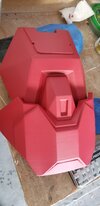
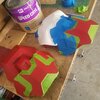
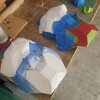
Painting was very straightforward, clean up the epoxied pieces, paint, tape for white parts, paint again.

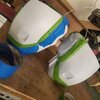
20201024_172248.jpg20201030_130639.jpg20201105_133448.jpg20201105_135244.jpg20201105_140447.jpg20201105_150956.jpg20201105_151137.jpg

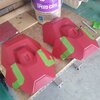
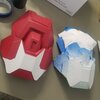
Detailing was essentially the repeat of the process I have been using for each part of the whole suit, I have been doing additive weathering using silver paint pens, pencils, alcohol pens, and some pencil shading sticks(those rolls of paper that are good for smudging pencil marks). The only thing different I did was lightly sanding the white parts of the shoulder pads to give them a really nice weathered look, I think it turned out great.
20201106_192305.jpg

20201113_191731.jpg

Even after all of this work, I don't think the shoulder pads are done. I still plan to do some more weathering, and then adding decals later on .


Forearms and Bicep
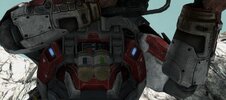
Luckily I was able to print each part of the arms in single pieces, there was quite a bit of trimming to get them fitted properly, but so far they fit comfortably. One of the things I decided to do was drill holes for the screw heads that are part of the armor trim in-game, I think it looks really good.
20200716130210_1 - Copy.jpg20201022_173118.jpg

Basically same process as everything else, paint, detail, fit.
20201024_172244.jpg20201103_141204.jpg20201104_144119.jpg20201104_144129.jpg20201105_144413.jpg20201105_145156.jpgqat6Poh.jpg

And of course a POV gun in arm pic, I think it's great.
20201104_152948.jpg


That's it so far, more later!
 
Last edited:
Random update because I am bored.

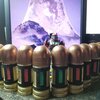
Printed Some grenades(The throwing kind)
20201123_130939.jpgHere they are with some primer.

Also worked on painting other grenades(The Launching kind)
20201123_151325.jpg

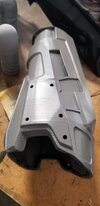
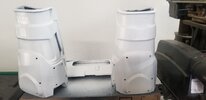
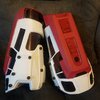
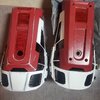
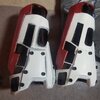
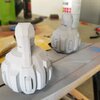
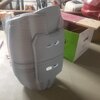
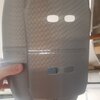
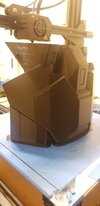
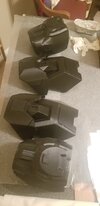
I printed out the thigh armor, it was kind of a pain. Both of them messed up or stopped printing half way through.The first thigh armor, I was able to edit the 3d model and print from where it left off. The second one was not extruding properly, so a portion it was very poorly made. I had to measure out what was missing and print that out. So now the right thigh is two pieces, the left thigh is 3 pieces. Pictures below to show what I mean.
Also had to do quite a bit of cutting and removal to get these to fit somewhat comfortably. Each thigh took more than 4 days to print overall, so I would rather work with what I have than try to start from the beginning.

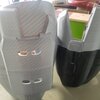
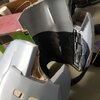
20201117_192054.jpg20201117_192103.jpg20201118_153040.jpg20201118_165411.jpg
Photos showing the 3 piece left leg, side by side of the two showing how much material I had to cut off to make these fit my thicc turkey legs.

Anyways, that's it for now. More later
 
Some work in progress of my Assault Rifle. I had the idea originally to have a DMR, Grenade Launcher, and Handgun. I wanted to have a kit that both represented what I like from the game, as well as matches my overall armor loadout(with the grenades and such). But after doing some test fittings of my armor so far, I really don't want to have 3 weapons all at once. So I'm trying to combine two things into one. I'm trying to make an MA37 assault rifle, with an underslung grenade launcher. I am by no means a pro 3D modeler, but I think it looks pretty neat so far. Any thoughts? Completely open to C&C.

CustomMA5GLKG1.png

CustomMA5GLKG2.pngCustomMA5GLKG3.png

Also I am using the 3D model that I found from here on the 405th. I somehow lost who posted it, I'll have to look around and get back to you.
 
Last edited:
I can tell you what 3D printer model I have, but I cannot guarantee it is perfect for you. Take time looking over all 3D printer options and see what works for you.

I got myself a Creality CR-10s, it has worked fairly well out of the box, but after more than a year of use I have had to replace or upgrade parts all over the kit.
 
Status
Not open for further replies.
Back
Top