1st Build WandererTJ's Mjolnir Mk. V (Custom) - S-128 - [Hybrid Build] [Pic Heavy]

Status
Not open for further replies.
CQC Shoulder - Built & Detailed

Okay all, just got myself a weekend pass for RTX 2015, I'm super excited because I've never been to a convention before.
Unfortunately, that means that I might sacrifice some of the time I've put putting towards supplying updates for the thread, as I will be frantically devoting all my time to finishing my suit.
I've already determined that it will be unlikely that I'll have a helmet for RTX, and that's okay with me.

But without Further ado....


Update Time! :)

CQC Shoulder - Built & Detailed
Before I even start, I mentioned earlier that I had some bad news to share. Well, the bad news is that this ended up being about 4 inches too small.
I was referencing measurements from extracted game models, and only based the scale of the shoulder attachment to the scale of the bicep in comparison to the height of the biceps I had actually made, rather than the overall size of the person, which is why it ended up so short.

But, while it is super small and I do plan on re-doing it, the CQC shoulder did come out quite beautifully. :)
I will likely be selling this piece if someone out there is interested. I wish I could give it away, but money is really tight right now.

Build Photos:
Completed CQC Shoulder:
I followed the Pepakura for some of the file, but not much. All of the details were added from me simply referencing the images that I have.
The center piece was probably the hardest part, and I did it completed from scratch made templates I put together. I don't have a picture of them here, but they exist.
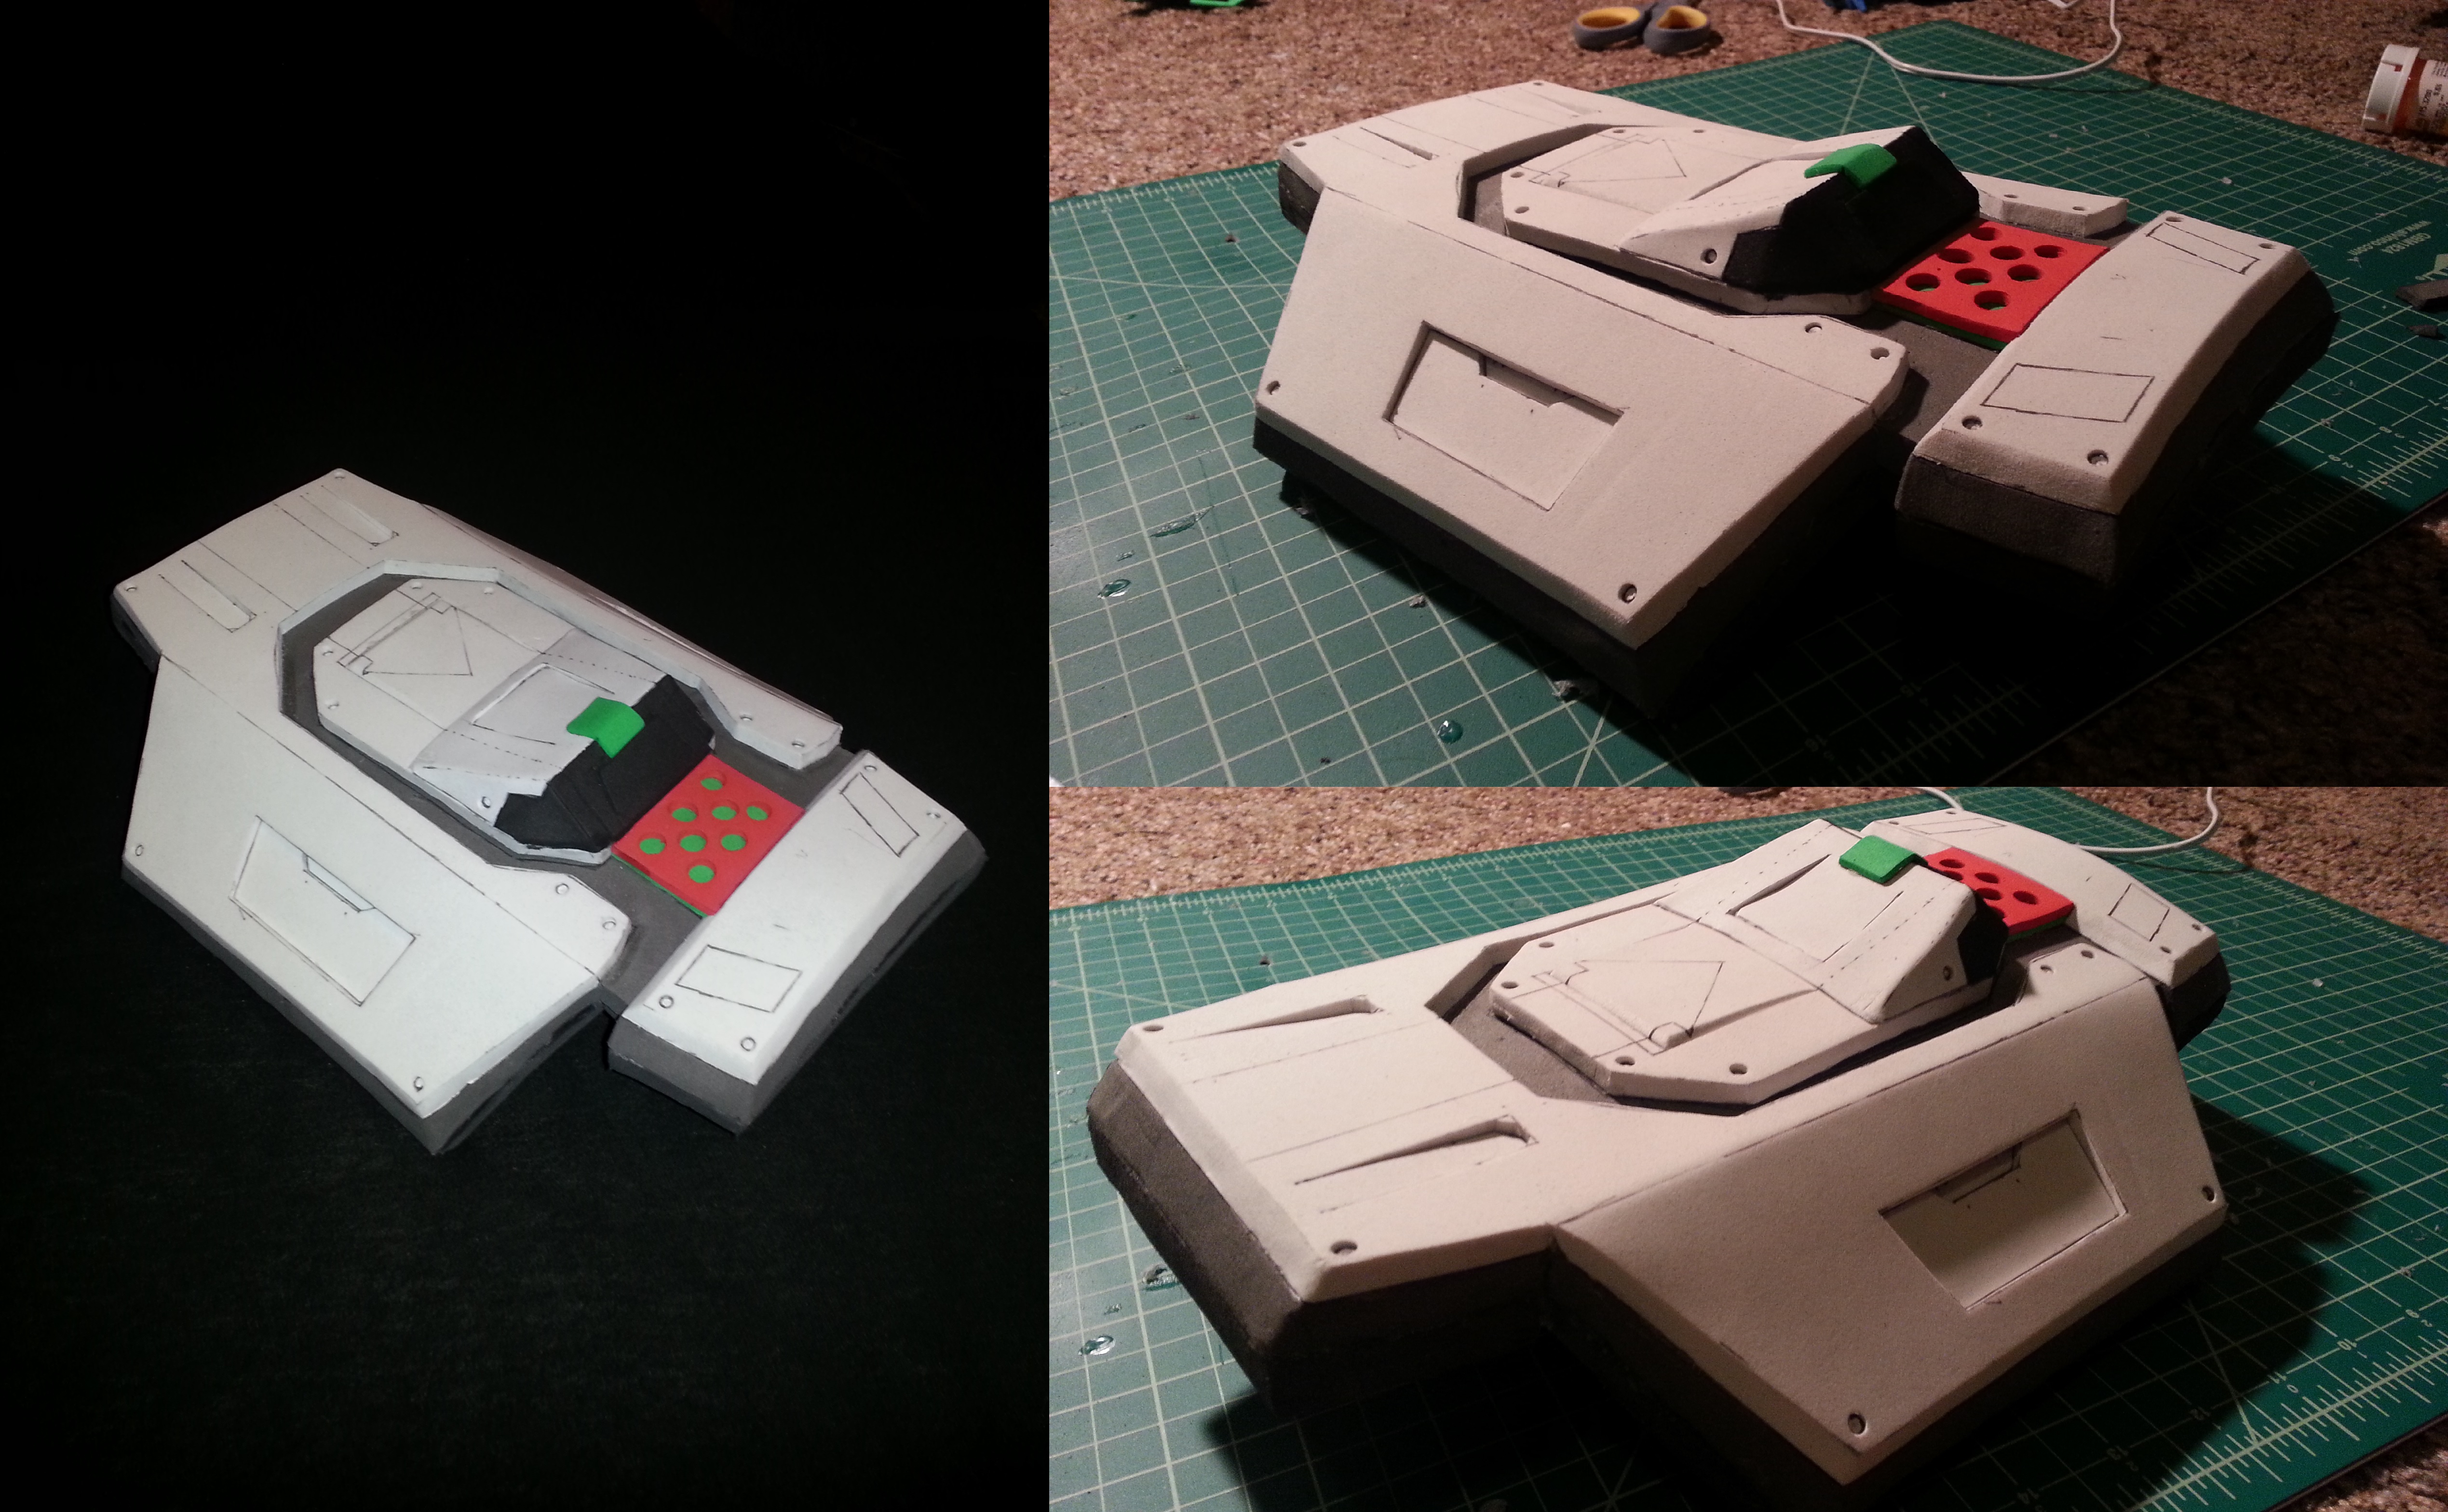
attachment.php


Grey = 1/2'' Puzzle Mat EVA Foam (Roughly 10-12mm)
White = 5mm Craft Foam
Black = 5mm Craft Foam
Red = 3mm Craft Foam
Green = 2mm Craft Foam​


Special Feature:
So I had an idea a long long time ago, that it would be really nice to have easy access contact information and build information available somewhere on your costume.
Business Cards work fine, but I wanted something more, and as such, I've created a door/secret compartment that opens on the front of the CQC Shoulder.
It still needs a magnet and an elastic strap to hold it in place, but I figured it would be best to hold off on that and wait until everything was painted, that way it would be easier for me to hit all the details when I paint it.

The information that I've been planning on including in this hidden compartment includes (but is not limited to):
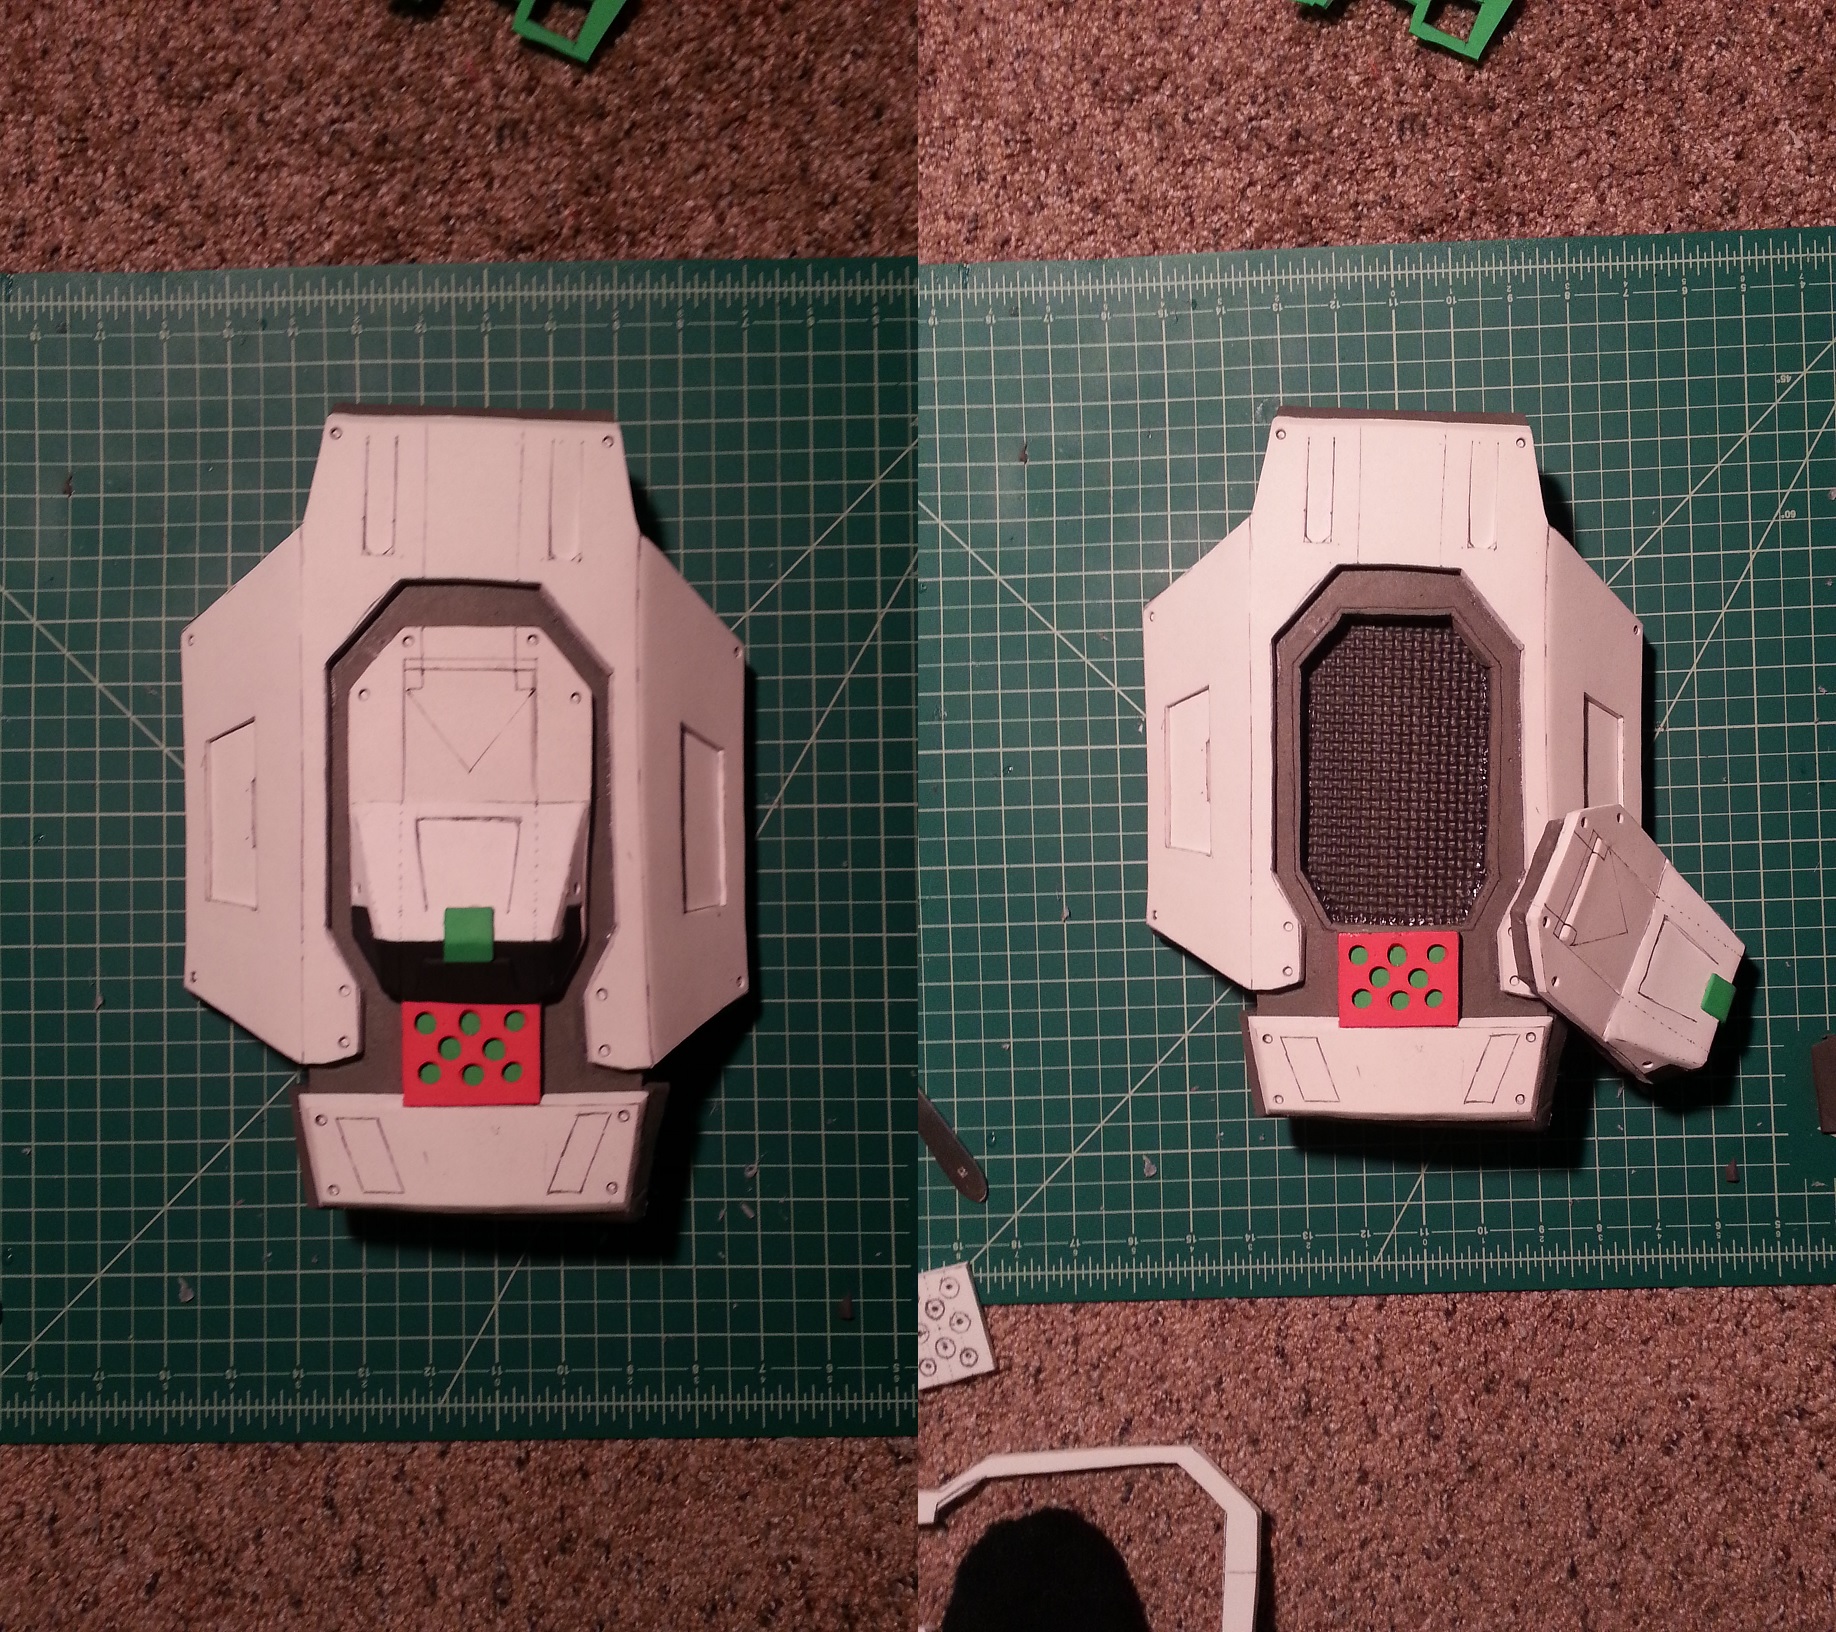
• The 405th Logo
• Link to this Build Thread, shortened Link (Tinyurl) to this Build Thread, and a QR Code that links to this Build Thread
• Instagram Name, so that when people take pics of me at cons, they know my name so they can tag me in their photos​
attachment.php


Progress Photos:
attachment.php


(For full sized photos, be sure to check the thumbnails at the bottom of the post)


Model Used:

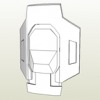
thumb-307.png

http://www.405th.com/file-archive.php?do=download&downloadid=307
Model by: Ruze789
Unfold by: Iganderson​


Reference Images Used:
reach_5153528_Full - 1.jpg reach_5153528_Full - Labeled.jpg 12 (WandererTJ).jpg 19 (WandererTJ).jpg reach_5153533_Full.jpg
Credits: WandererTJ (5)

tex_shoulder_cqc.jpg
Credits: Bungie​
 

Attachments

  • CQC Shoulder - Update 3.jpg
    CQC Shoulder - Update 3.jpg
    2.6 MB · Views: 1,340
  • CQC Shoulder - Update 2.jpg
    CQC Shoulder - Update 2.jpg
    1.1 MB · Views: 1,285
  • CQC Shoulder - Update 1.jpg
    CQC Shoulder - Update 1.jpg
    2.4 MB · Views: 1,294
  • thumb-307.png
    thumb-307.png
    8.8 KB · Views: 349
Wow! That looks really nice. Where on the craft foam packaging does it say the thickness? Or did you get it online? Anyway, very clean work. Also, fridge magnets like the one I used for my current build's left shoulder work pretty well for snap-in/snap-out if you didn't have a specific magnet in mind yet.. Yeah, about 1" by 1/8" fridge magnets. Anyway, looking forward to the paint and the final product! Can't wait!
 
Wow! That looks really nice. Where on the craft foam packaging does it say the thickness? Or did you get it online? Anyway, very clean work. Also, fridge magnets like the one I used for my current build's left shoulder work pretty well for snap-in/snap-out if you didn't have a specific magnet in mind yet.. Yeah, about 1" by 1/8" fridge magnets. Anyway, looking forward to the paint and the final product! Can't wait!

For craft foam, there is a sticker/piece of paper attached to them up in one corner that indicates their dimensions
I'm looking at a 5mm sheet and it reads:
12'' x 18''
(5mm)

As for Puzzle Mat foam, there is a sheet of paper inside the plastic wrap of each package, and one of mine reads:
4 Piece Anti-Fatique Foam Mat Set
· Impact Absorbsinf textured nonslip surface
· Resilient neoprene rubber is waterproof, easy to clean
· 1/2" thick
Each square: 25'' x 25''

Also, I prefer in-store over buying online so that I can check the quality of what I'm buying before I buy it.
Puzzle Mat foam = Harbor Freight. Craft Foam = Hobby Lobby
Hopefully that answers your question.

As for magnets, I was thinking of going with neodymium/rare earth magnets. Not sure if I've seen decently strong fridge magnets... well not for a long time, I usually just see the flat magnets on fridges these days.


I wonder if the 405th is ready to see its first ever dimensionally game accurate Commando shoulder...
 
The flat ones are good if they can lock into a slot of some kind as well. Can you post a picture of the kind of magnets you're using? Also, I would love to see how the shoulder is done in foam! Considering doing that as a shoulder for my upcoming custom spartan build, refpix would be nice..
 
Update Time! :)

Commando Shoulder - Built & Detailed
Well, I hope everyone is ready for the 405th's first dimensionally accurate Commando Shoulder that was derived from the actual game model and textures, because here it is!!!
To start off this build, I had printed out the pepakura file for the Commando Shoulder that we have here, but after comparing it to the Game Model and the reference pics I have, I wasn't very happy with it. Not that the modeller didn't do a great job, I'm just super critical of the details that I'm putting into my build.
So what did I do? Well, if you haven't seen my post up above, I decided to model it myself in SolidWorks.

In order to do so, I took the .obj of the game model, exported it from Blender to a .obj yet again, but with various checkmarks toggled so that I could bring it into Rhinoceros3D.
Once I could open it in Rhino, I proceeded to use the command "_MeshtoNurbs", which takes the dots in space used to form polygonal models and converts them to splines for Solid Modeling software to interpret. I then exported the file out as a .IGES (.STEP also works and should be used since .IGES isn't supported any more) which is a neutral Solid Modeling file format.
Once at that stage, I was able to open it up in SolidWorks, and then I used the measuring tools within SolidWorks to dimensionally analyze the horribly rough and low poly and low detail model.
Once I had all the relevant dimensions, I then proceeded to create my own model.
As I went, and added in details, I referenced the texture image I have as well as the reference images that I have taken from the game.

Once it was all said and done, I templated it all out so that I could start making it out of foam.

Build Photos:
Progress Pics:
attachment.php

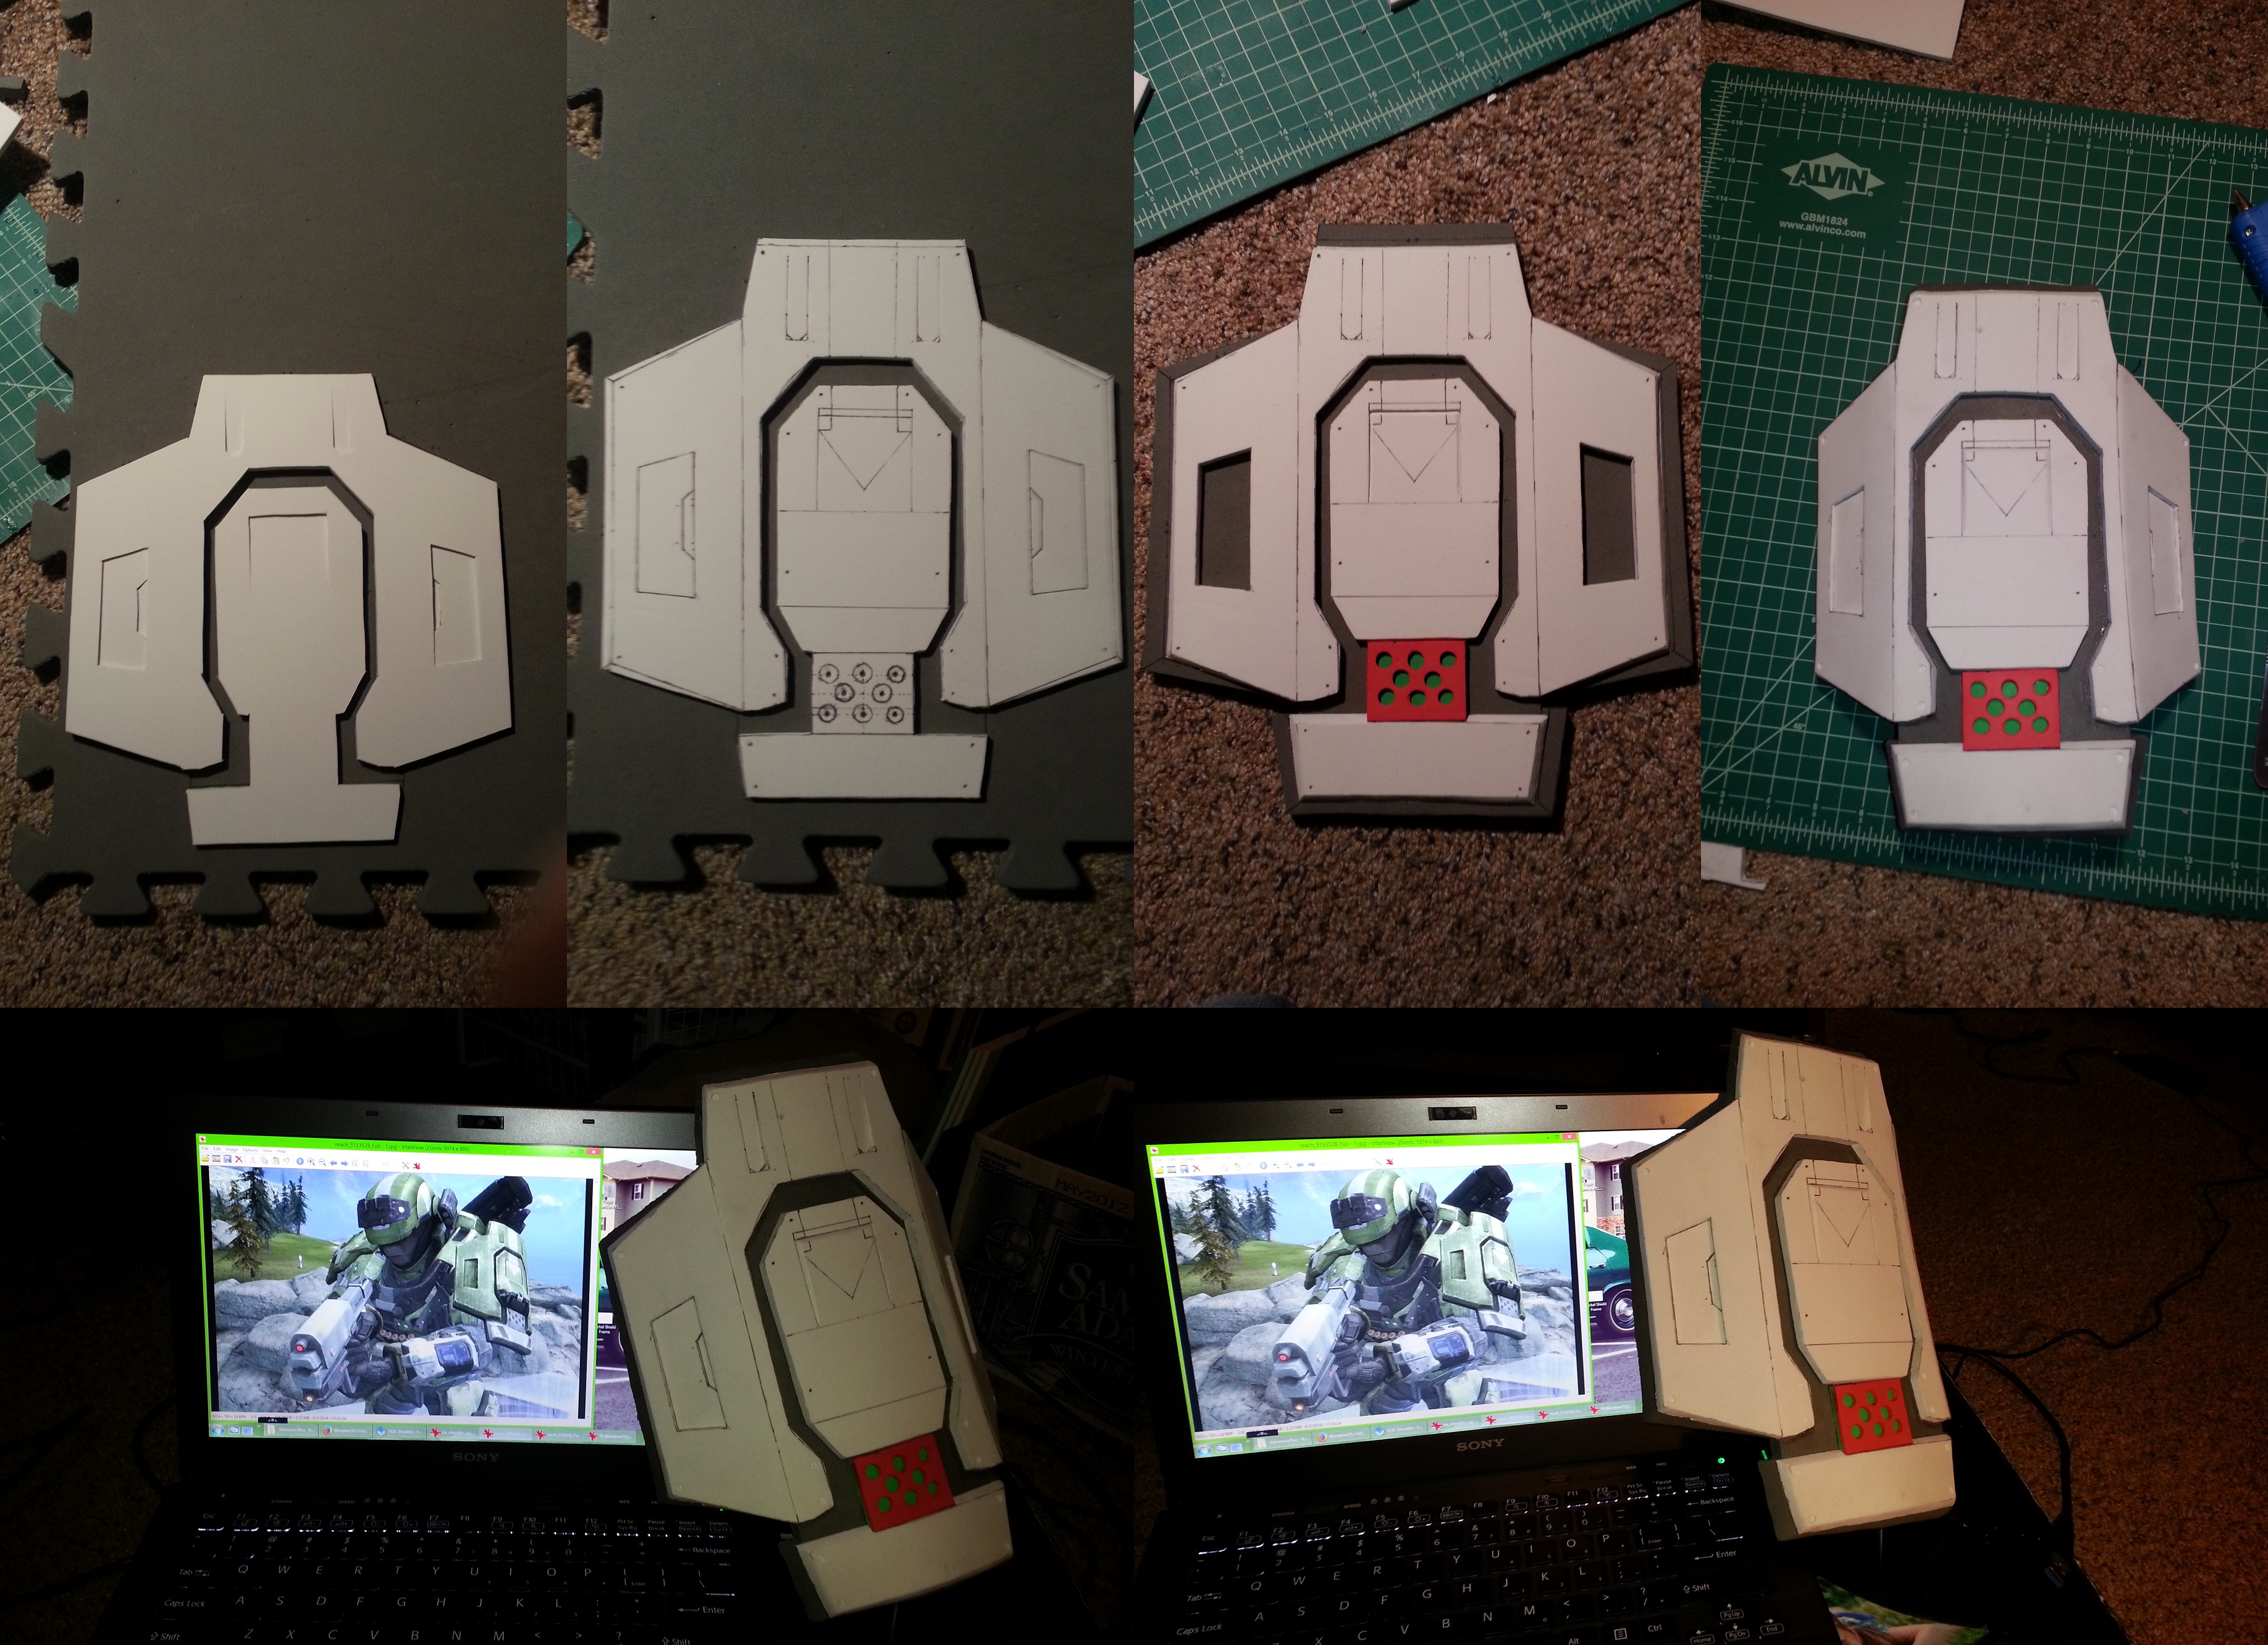
Frame #1: Upper Shield Backing and the Templates I started out with
Frame #2: Upper Shield w/5mm foam (white) added and the 3mm (red) added. The middle piece and the recessed pieces have dimensions, the outer pieces were just traced using the existing pieces and then had the excess foam removed.
Frame #3: Added in rivet hole details or whatever they are using my Dremel.
Frame #4: Comparing size of the shield to my mannequin. I thought it looked great!
Frame #5: Got most of the other pieces cut out
Frame #6: Started to Assemble the lower base.

attachment.php

Frame #1: Lower Base with bottom and upper back piece.
Not Shown: I ended up filling the upper deck area with 2 x 1/2" pieces topped with a 5mm piece.
Frame #2, #3, &#4: Shows how I Dremeled down the body created above.
Frame #5: Update on Assembly and progress of all the pieces

attachment.php

Frame #1: Back-view (Full)
Frame #2: Dempled where the bolts of the mounting piece would be.
Frame #3: View of the upper mounding piece - 1/2" x 2 (same as the lower mounting piece)
Frame #4: Mounted up to the Bicep
Frame #5: Top view of it mounted up to the Bicep
Frame #6: IT'S DETACHABLE!!! View of the bolts, the holes and washers in the inside of the Biceps, and the 3 nuts used to hold it all on.

attachment.php

Selfie!
At this point, it actually wasn't fully mounted, I was holding it on using tape.​

attachment.php

Here is a size comparison of the Commando Shoulder to the CQC Shoulder as well as the bicep.
I mentioned earlier that the CQC Shoulder sadly ended up turning out really small, but there wasn't exactly a reference of how small.
Well, the photo above shows you how small it is.
The CQC Shoulder should be quite a bit larger than the Commando Shoulder. Like at least 1.25x as tall...

Completed Commando Shoulder:
attachment.php

In case anyone is wondering, I'm using my TI-83-SE to keep the Bicep from falling over.

Templates (Final):
attachment.php


(For full sized photos, be sure to check the thumbnails at the bottom of the post)

Details:
attachment.php


Model Used:
small.png

https://grabcad.com/library/halo-reach-commando-shoulder-1
Model by: WandererTJ
Scratch Design Templates by: WandererTJ​


Reference Images Used:
4 (WandererTJ).jpg 5 (WandererTJ).jpg 24 (WandererTJ).jpg 37 (WandererTJ).jpg
Commando-CarterShoulder1.jpg Commando-CarterShoulder2.jpg Commando-CarterShoulder3.jpg Commando-CarterShoulder4.jpg Commando-CarterShoulder5.jpg
Credits: WandererTJ (9)

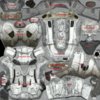
tex_shoulder_commando.jpg
Credits: Bungie​
 

Attachments

  • Commando Shoulder - Update 1.jpg
    Commando Shoulder - Update 1.jpg
    2.9 MB · Views: 1,173
  • Commando Shoulder - Update 2.jpg
    Commando Shoulder - Update 2.jpg
    2.3 MB · Views: 1,105
  • Commando Shoulder - Update 3.jpg
    Commando Shoulder - Update 3.jpg
    4.4 MB · Views: 1,147
  • Commando Shoulder - Update 4.jpg
    Commando Shoulder - Update 4.jpg
    641.7 KB · Views: 1,183
  • Commando Shoulder - Update 5.jpg
    Commando Shoulder - Update 5.jpg
    1.8 MB · Views: 1,150
  • Commando Shoulder - Update 6.jpg
    Commando Shoulder - Update 6.jpg
    3.8 MB · Views: 1,133
  • Commando Shoulder - Update 7.jpg
    Commando Shoulder - Update 7.jpg
    2.4 MB · Views: 1,125
  • Commando Shoulder - Update 8.jpg
    Commando Shoulder - Update 8.jpg
    1.8 MB · Views: 1,120
  • small.png
    small.png
    49.3 KB · Views: 322
Wow, the detail is quite thorough in comparison to the reference picture. Keep going. :thumbsup
 
Wow, the detail is quite thorough in comparison to the reference picture. Keep going. :thumbsup

Thanks for noticing that!
I've mostly been posting them to show what I used as references, but I've also been hoping others have been trying to see what the differences are between my models and how they look in-game.
The fact that some of the angles/views turned out just like the screenshots I took for the Commando Shoulder is pretty amusing to me, I didn't even plan on that.

Once I get everything painted, I'll definitely have to take some new photos and do some side-by-sides to show off my work.


I also realized that I had missed a few responses before I posted the Commando Update.


Your shoulder attachments are looking great! Looking forward to seeing them painted up!

Haha, I'm definitely looking forward to it too! I'm especially excited to make it to the black wash which will make all the details pop even more!

Having a bit of a dilemma at the moment though. Not sure whether or not I should continue ahead and try to get some PVA and some Smooth-Cast 65D to give everything a nice surface before painting or if I should just go the Plasti-Dip route.
A bit short on cash atm, a little worried on time as well.
A Gallon of glue and an order of smoothcast would set me back $100, that doesn't even include all of the paint or sandpaper.


The flat ones are good if they can lock into a slot of some kind as well. Can you post a picture of the kind of magnets you're using? Also, I would love to see how the shoulder is done in foam! Considering doing that as a shoulder for my upcoming custom spartan build, refpix would be nice..

I don't have any magnets on me at the moment and I haven't decided which ones I plan to order. It's something I need to research and I've been heavily pre-occupied by working on my build.

this is stunning some of the most detailed foam work I've seen. epicly epic cant wait to see it finished

Thanks! ^.^
Be sure to watch for updates!


Chernobyl, I should be starting on my boots tomorrow, and after looking through all the Halo Reach textures that I have, I can't seem to find anything for the boots.
Maybe they got split into a bunch of separated sections, but either way, I'm just not seeing them. I think I've only seen the bottom of the boots.
Any chance you could help me out?
 
Last edited by a moderator:
Chernobyl, I should be starting on my boots tomorrow, and after looking through all the Halo Reach textures that I have, I can't seem to find anything for the boots.
Maybe they got split into a bunch of separated sections, but either way, I'm just not seeing them. I think I've only seen the bottom of the boots.
Any chance you could help me out?

The 'grey' portions of the boot reside in the under-armour texture. The coloured parts reside on the main armour texture (torso, thighs, shins, biceps).
 
Not so much as an update, but I wanted to share with you all a little tip I use.

Tutorial: Seamless Edges
Be sure to check the photos for details of each step!​
Tools Used:
Pen
Handheld Razor Blade
Tape
Calculator
Trigonometry
Ruler
Rotary Tool (Dremel)​


Step 1:
20150711_161039.jpg

Step 2:
20150711_161211.jpg 20150711_161238.jpg

Step 3:
20150711_161324.jpg

Step 4:
20150711_161356.jpg

Step 5:
20150711_161831.jpg 20150711_161911.jpg
NOTE: What the calculator shows is: 0.5 = 1/2'' Thick foam, divided by the vertical (90) minus the desired angle.

Step 6:
20150711_162703.jpg 20150711_172153.jpg 20150711_172211.jpg

Step 7:
20150711_172231.jpg 20150711_172232.jpg 20150711_172323.jpg

Happy building everyone!​

"I can't wait to go do some protracting!"
-Caboose​
 
That "little tip" is very useful! I usually just end up guessing what kind of angles I need for bends. Creating bends like yours is now down to a science :).
 
That "little tip" is very useful! I usually just end up guessing what kind of angles I need for bends. Creating bends like yours is now down to a science :).

Yeah! :)
In order to determine what angle I want (assuming I'm using a Pepakura file), I often either hold my protractor up to the screen and gauge an estimate, or I measure the pieces that usually don't get printed when it comes to foam builds. Those edge pieces can easily help you find out what angle you need.

I definitely prefer doing the above in place of trying to cut out a "V" just using the Razor Blade and hoping I don't accidentally cut all the way through.
 
Almost died of laughter!
I mean, not really, didn't need to go to the hospital, but that was super funny!

Haha, i have my moments ;)

Back on track now, is it the front of a chest piece, as viewed from the inside?
 
FlyinPhil, I wish!
Totally looks like it though doesn't it?
I even held it up in the mirror with it on my chest amd was like "awesome".

It's totally the shin guard!

Yeah, I'm behind on my updates, I know, and my Instagram followers totally get spoiled seeing things first.

Thought it's be a fun deceptive photo before I worked on an official detailed post.
 
Last edited by a moderator:
Okay, so I've been doing what I can to make sure my build is as detailed as possible, and in order to do so, I've been doing my best to try and reference the in-game textures for the details on my armor.
I've been trying to divide up the textures so that I have one for each individual piece of armor, and I thought I'd share what I have so far in the hopes to help other builders.

So far, I've got the Bicep, the Shin & Knees, the Thigh, and the Boots split into each of their individual images for referencing purposes.
Halo Reach Bicep Textures & Details.png Halo Reach Boot Textures & Details - WandererTJ.png Halo Reach Shin & Knee Textures - WandererTJ.png Halo Reach Thigh Texture & Detail - WandererTJ.png

Original Images (with notes):
tex_knee_fj_para - Labeled 2.jpg tex_knee_default.jpg spartan_rubber_suit_diffuse 2 - Labeled.jpg

I am struggling at locating the pieces of the forearm, and trying to figure out what the differences in some of the pieces are. I feel like I see 3 different female handplates, but nothing for the male handplates.
The 2nd image seems to mostly be pieces of the glove as well as the robotic arm, I wish I could identify things in it a bit better.

The actual original textures can be found on the 405th File Archive, courtesy of Chernobyl.
 
I am struggling at locating the pieces of the forearm. I feel like I see 3 different female handplates, but nothing for the male handplates.

Forearm textures are located on their own unique texture map. If I haven't uploaded this file to the Archive, let me know and I'll be sure to update accordingly. However, for your own benefit, here's the file you'll want.
 

Attachments

  • spartan_arms_diffuse.jpg
    spartan_arms_diffuse.jpg
    496.5 KB · Views: 400
Status
Not open for further replies.
Back
Top