Carter Build

Status
Not open for further replies.
haha well i'm flattered to know that people think about my build because I am a complete and utter noob and this and have only taken what I've seen of of some other builds as a guide to what is "supposed" to be done. I have some updates that you have been so patiently waiting for! its only a picture of my chest piece hardened and fiberglassed but it is an update! here you go! i'll probably try to bondo it sometime this week and then onto painting!!! =D

here's the pics! (sorry pics are a little distorted because i took them with a wide angle lens on...)
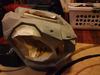
Inside
GOPR0334.jpg


Front
GOPR0336.jpg


Back
GOPR0339.jpg
 

Attachments

  • GOPR0334.jpg
    GOPR0334.jpg
    14 KB · Views: 167
  • GOPR0339.jpg
    GOPR0339.jpg
    14 KB · Views: 158
  • GOPR0336.jpg
    GOPR0336.jpg
    14 KB · Views: 154
This is looking awesome! :) Best of luck as you continue!

Why thank you Krakatau! I've been MIA for a couple months but i'm back on my game and looking to finish before halloween this year! I think i can pretty much complete all the hardening and painting..the only thing i would have trouble with would be the strapping part...i really have no idea on how to go about that guess i'll have to go check those noob forums!
 
How did you exactly scale that helmet? Im a noob at scaling D=


To be honest it took me a couple tries to get it right. The measurements on pepakura are pretty much synched in the sense that they will all adjust to keep the overall shape if you change any of the three values. You just have to basically measure your head from top to bottom as accurately as possible and then measure the width of your head as well. Put in one of those values under the proper category and then check to see that it would fit. I really don't think there is a special formula to get everything to fit exactly because everyone is proportioned differently. You just have to find the measurements for you and then save them for future reference. It took me 3 times to make a helmet that fit so for me it was a very tedious trial and error process =/.
 
alright guys so the chest piece is hardened and ready for bondo! I took a cutting tool attachment on my rotary tool and basically cut it into two so that I can easily clip it together and get into the chest piece in the first place. It applied the first layer of bondo and need to sand now. I'll get some pics up as soon as possible. I got work tonight so i dont know if i'll be able to finish the sanding today =/. Pics coming soon!
 
Alright guys sorry for the double post but.........I have UPDATES!!!! thanks for being so patient! i've been busy with work. Gotta make that cash so i can fund this thing though right? anyways..enough with my small talk and onto the pictures!

alright so here is the back of the chest piece (already applied bondo and another coat of primer...ready for painting!)
2011-08-10014542.jpg

top of the back piece
2011-08-10014553.jpg


I used the same method for battle damage i did with my helmet. it doesn't look like much now but hopefully it'll be epic when it's all painted!
2011-08-10014636.jpg

2011-08-10014627.jpg

2011-08-10014615.jpg

2011-08-10014606.jpg


and now for the front (it's only been primed so i'm gonna apply some bondo to this after i finish posting let it cure overnight and then work on it tomorrow.
2011-08-10014743.jpg


and here's some pics of the two pieces seperated (so you can see where i made the cut) and them put together. I'm planning on buying some clips and then glueing them in with something. I heard epoxy glue works really good. Any other suggestions?
2011-08-10014801.jpg

2011-08-10014942.jpg
 

Attachments

  • 2011-08-10014801.jpg
    2011-08-10014801.jpg
    14 KB · Views: 155
  • 2011-08-10014743.jpg
    2011-08-10014743.jpg
    14 KB · Views: 162
  • 2011-08-10014606.jpg
    2011-08-10014606.jpg
    14 KB · Views: 148
  • 2011-08-10014615.jpg
    2011-08-10014615.jpg
    14 KB · Views: 150
  • 2011-08-10014627.jpg
    2011-08-10014627.jpg
    14 KB · Views: 154
  • 2011-08-10014636.jpg
    2011-08-10014636.jpg
    14 KB · Views: 152
  • 2011-08-10014553.jpg
    2011-08-10014553.jpg
    14 KB · Views: 145
  • 2011-08-10014542.jpg
    2011-08-10014542.jpg
    14 KB · Views: 145
  • 2011-08-10014942.jpg
    2011-08-10014942.jpg
    93.1 KB · Views: 142
Looking good my man! Glad to see you hitting it again! Also, try using the JB quick weld stuff (I used the stuff that Vshore used to mount his visor), that holds real nice, you can find it at Home Depot! Lol, good luck on the rest of the build.
 
Nice work man!

hey thanks! glad you like the build so far. Stay tuned for more i'm aiming to finish this before halloween 2011!

Looking good my man! Glad to see you hitting it again! Also, try using the JB quick weld stuff (I used the stuff that Vshore used to mount his visor), that holds real nice, you can find it at Home Depot! Lol, good luck on the rest of the build.

hey its been a while blackula! thanks for the info on the JB quick weld! i'll be heading over to home depot today to pick some up. I was thinking about using the quick sculpt you used to fill the gap between the visor and then helmet...right now i have just foam stuffed in there but i'm sure it would look a lot better with a more professional looking finish. Just some minor touch ups that I'll probably add on after everything is painted strapped and ready to be taken out for a test run =D.
 
hey guys sorry for another double post...but i have more updates!!! so i just realized that in the process of painting i forgot to bondo in the ridges on the back of the chest piece so i will be doing that today...i will also be hardening a bunch of other pieces after i go down to the store to get some fiberglass cloth. Despite all these setbacks i was able to finish my helmet attachment and just have to wait to find something to use to attach it to my helmet and install the lights i bought for it. Here's the pics! enjoy!

2011-08-11085626_Honolulu_Hawaii_US.jpg

2011-08-11085641_Honolulu_Hawaii_US.jpg

2011-08-11085700_Honolulu_Hawaii_US.jpg

here is a close-up so you can see the "battle damage"
2011-08-11085648_Honolulu_Hawaii_US.jpg


Here's what it looks like on the commando helmet
2011-08-11090247_Honolulu_Hawaii_US.jpg

front view, i dont know what it is but it just looks bulky...it may just be the camera angle or that i'm focusing only on the helmet and the attachment because thats what the focus is...we'll see when i have the whole suit on.
2011-08-11090312_Honolulu_Hawaii_US.jpg

back view
2011-08-11090347_Honolulu_Hawaii_US.jpg


Hope you guys like it! tell me what you think!

oh and another thing...i was wondering if anybody has any pressure suits they used for past suits and where they got them from. I am in need to something to wear under my armor and was looking at some pressure suits online. I have no idea what to buy though so some reference pics of what you are using would help out a ton! Also I was wondering what kind of pants you guys have used because i don't own any spandex-like form fitting apparel with the exception of underarmour long sleeve shirts. Feel free to leave any suggestions all suggestions will be taken into account. Thanks guys!
 

Attachments

  • 2011-08-11085641_Honolulu_Hawaii_US.jpg
    2011-08-11085641_Honolulu_Hawaii_US.jpg
    14 KB · Views: 156
  • 2011-08-11085700_Honolulu_Hawaii_US.jpg
    2011-08-11085700_Honolulu_Hawaii_US.jpg
    14 KB · Views: 155
  • 2011-08-11085648_Honolulu_Hawaii_US.jpg
    2011-08-11085648_Honolulu_Hawaii_US.jpg
    14 KB · Views: 150
  • 2011-08-11090247_Honolulu_Hawaii_US.jpg
    2011-08-11090247_Honolulu_Hawaii_US.jpg
    14 KB · Views: 161
  • 2011-08-11090312_Honolulu_Hawaii_US.jpg
    2011-08-11090312_Honolulu_Hawaii_US.jpg
    14 KB · Views: 144
  • 2011-08-11085626_Honolulu_Hawaii_US.jpg
    2011-08-11085626_Honolulu_Hawaii_US.jpg
    14 KB · Views: 141
  • 2011-08-11090347_Honolulu_Hawaii_US.jpg
    2011-08-11090347_Honolulu_Hawaii_US.jpg
    14 KB · Views: 139
hey guys sorry i haven't been updating...my dog chewed through our internet line so we were without internet for a while =(. I was able to get a lot of work done though! sorry i dont have pics of the whole process just what i have done so far. I'll upload them tomorrow. stay tuned!
 
excellent job on your armor so far man. Here is a link to the under armor I have bought and will be using. I haven't gotten the pants yet but hope this helps.:)
 
Ok so here is what i have done so far...got everything pretty much hardened and primed. going into the bondo stage now. I also added some new battle damage to the helmet to make it look more "armor-like". Here is what i have so far enjoy!

2011-08-19023016_Honolulu_Hawaii_US.jpg


2011-08-19023031_Honolulu_Hawaii_US.jpg


2011-08-19023041_Honolulu_Hawaii_US.jpg


Before...
2011-02-08010716.jpg

After...
2011-08-19022605.jpg
 

Attachments

  • 2011-02-08010716.jpg
    2011-02-08010716.jpg
    14 KB · Views: 138
  • 2011-08-19023016_Honolulu_Hawaii_US.jpg
    2011-08-19023016_Honolulu_Hawaii_US.jpg
    14 KB · Views: 149
  • 2011-08-19022605.jpg
    2011-08-19022605.jpg
    14 KB · Views: 142
  • 2011-08-19023041_Honolulu_Hawaii_US.jpg
    2011-08-19023041_Honolulu_Hawaii_US.jpg
    14 KB · Views: 132
  • 2011-08-19023031_Honolulu_Hawaii_US.jpg
    2011-08-19023031_Honolulu_Hawaii_US.jpg
    14 KB · Views: 155
Man,Carters helmet is so badass.I like the way this is looking.Hey this is Ruzez helm right?Whats up with the blue and red folds?Can it be edited?
 
WOW this looks great man, keep up the fantastic work and the weathering on the helmet looks great =D gooduck with the rest man and i will totally be keeping an eye on this thread =D
 
Status
Not open for further replies.
Back
Top