Aztlan's Halo 4 Rogue + Binary Rifle + M6H + Exo-suit WIP, PIC HEAVY!

Status
Not open for further replies.
what the WHAT?!?! how on earth are you doing that with the foam? i'm guessing some sort of heat forming process... and devil magic... don't suppose you have a video handy? especially that chest piece! would i be correct in thinking that a good deal of it has to do with the grooves cut out of the back side? amazing work! looking forward to seeing more!!
 
Thanks again guys!

As promised, here is a quick tutorial of how I work my EVA. I did my best not to miss any part, but if I did, or you have further questions, feel free to ask.

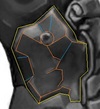
First, the two (four if you count both sides) parts I worked on. I highlighted the peaks in orange and the valleys in blue.

part4_zpsdd95af0c.jpg

Next, I draw the parts onto cardstock. If this is my first piece, then I perform many measurements to obtain the design. However, these are built off of the plate above, so I used that piece's cardstock template as my base. I then freehand the rest of the part, using my body and common sense as reference. I then draw in where the peaks and valleys will be.

SAM_0955_zpsc938b43c.jpg

I then transfer the cardstock templates onto EVA foam

SAM_0960_zps54171b59.jpg

Next, I cut ONE piece at a time, and draw in the valley or peak that was created by that cut-out. I only do one at a time to make sure that the baselines are always the same. If not, I run a high chance of the pieces being off by as much as 1/4". This equals a lot when doing the forming.

SAM_0961_zps017bb154.jpg

This part shows after my cuts on the backside. As you can see in the photo, I decided to add in two valleys in the top piece to help with that curve that is needed. Also, I find it easier to put down my scalpel and use a single edge box-cutter style blade to make these cuts. A bit harder on the hands, but I get a better feel for the angle and depth with these.

SAM_0962_zpsd7872f4d.jpg

Here is where I do a test forming without heat to make sure that all of the angles are correct. If not, I will usually end up cutting a bit deeper or wider to compensate.

SAM_0963_zps70f5770a.jpg

Another thing I will do is make sure everything still lines up to my original piece. I know how much they will "shrink" now because of the new angles created in the forming process.

SAM_0964_zpsb11fcc5d.jpg

Then, with my heat gun on LOW, I take time to make sure that both sides are very warm. I want them to be easily bendable, but not so much as to melt the EVA. Here is each of the pieces after the initial forming process is done.

SAM_0965_zpsa55933f4.jpg

Next, I take my glue gun and fill the recesses where the peaks are. This gives me an even sharper and more consistent peak. To make sure it holds it's place, I immediately run it under cold water to solidify the glue.

SAM_0967_zps1a170664.jpg

Final fitting... yep, I think these will pass :)

SAM_0966_zps2d5cdace.jpg

Hope this helps :)
 

Attachments

  • part4_zpsdd95af0c.jpg
    part4_zpsdd95af0c.jpg
    9.6 KB · Views: 198
  • SAM_0955_zpsc938b43c.jpg
    SAM_0955_zpsc938b43c.jpg
    130.4 KB · Views: 222
  • SAM_0960_zps54171b59.jpg
    SAM_0960_zps54171b59.jpg
    154.5 KB · Views: 186
  • SAM_0961_zps017bb154.jpg
    SAM_0961_zps017bb154.jpg
    160.5 KB · Views: 196
  • SAM_0962_zpsd7872f4d.jpg
    SAM_0962_zpsd7872f4d.jpg
    181.8 KB · Views: 198
  • SAM_0966_zps2d5cdace.jpg
    SAM_0966_zps2d5cdace.jpg
    152.5 KB · Views: 203
  • SAM_0967_zps1a170664.jpg
    SAM_0967_zps1a170664.jpg
    149.6 KB · Views: 200
  • SAM_0963_zps70f5770a.jpg
    SAM_0963_zps70f5770a.jpg
    159.4 KB · Views: 201
  • SAM_0964_zpsb11fcc5d.jpg
    SAM_0964_zpsb11fcc5d.jpg
    143.6 KB · Views: 207
  • SAM_0965_zpsa55933f4.jpg
    SAM_0965_zpsa55933f4.jpg
    143 KB · Views: 203
I have to say your really pushing the envelope with your foam work. Keep it up, and hope to see more tutorials. Simply amazing!
 
Words can't describe how beautiful this is man…. Keep up the amazing work! Super clean pepping, and that is one sick Binary. Also, amazing under suit so far. Looking forward to seeing this finished. Then maybe if we cross roads someday, it'll at least be a fair fight :)
 
Damn. You definately got some serious foamskills man. I've been watching your thread for a while now and have to say, thats one of the best foam builds, I've seen in this forums at all times. I'm really looking forward to further progress. :D
 
Thanks again! I have been smiling a lot today, and most of it was from all of your words of encouragement! As it passes 3am here, I am going to hang my hat up for the night, but not before I give y'all another dose of what I did today, where I am at, and the MAJOR hurdle I have to take on tomorrow!

Also, a side note of something I have noticed about this Exo-armor. So far it matches the connection points with the Rogue set I have pepped. I plan to exploit that all the way!

I hope you all don't mind the vast number of photos, but I feel that some of you want to know how I do this step-by-step. With that, let the photos begin... again :)

Rough cut of that triangle looking thing in the middle of the back.

SAM_0968_zps280757eb.jpg

Underside cuts. This thing was a total pain.

SAM_0969_zps04ffcd39.jpg

Finished piece. The half circles are made from 3/4" dowel that is painted with acrylic.

SAM_0970_zps666b2ee7.jpg

Oblique rough cut

SAM_0971_zps79c87b5a.jpg

Oblique underside cuts

SAM_0972_zps145ed405.jpg

Finished Oblique

SAM_0973_zps9b2ec093.jpg

Completed pieces of the back staged (I did this with the shirt I will be using to mount to with a pillow and it gave the pieces the correct form)

SAM_0974_zps1db41ebc.jpg

And now for tomorrow's challenge! This will be, by far, the most complicated piece I have attempted. Especially where that circle is, because it needs to be at a compounded 45 degree angle... argh!!!!

Yellow = outside cut
Orange = Peak
Blue = Valley

part5_zps5f1cf5f6.jpg

On paper. Almost a full sheet per side! (also, this is before I changed the oval to a circle... stupid brain not translating 3-d to 2-d!)

SAM_0975_zpsbcbab1a2.jpg

And this is where it stands. Can you even imagine what this beast is going to look like?!

SAM_0976_zps293daeb0.jpg

'Till tomorrow! Thanks again!!!!
 

Attachments

  • SAM_0968_zps280757eb.jpg
    SAM_0968_zps280757eb.jpg
    144.3 KB · Views: 182
  • SAM_0969_zps04ffcd39.jpg
    SAM_0969_zps04ffcd39.jpg
    149.2 KB · Views: 187
  • SAM_0970_zps666b2ee7.jpg
    SAM_0970_zps666b2ee7.jpg
    151.4 KB · Views: 196
  • SAM_0971_zps79c87b5a.jpg
    SAM_0971_zps79c87b5a.jpg
    139.6 KB · Views: 177
  • SAM_0972_zps145ed405.jpg
    SAM_0972_zps145ed405.jpg
    164.9 KB · Views: 203
  • SAM_0973_zps9b2ec093.jpg
    SAM_0973_zps9b2ec093.jpg
    148.5 KB · Views: 225
  • SAM_0974_zps1db41ebc.jpg
    SAM_0974_zps1db41ebc.jpg
    153.3 KB · Views: 184
  • part5_zps5f1cf5f6.jpg
    part5_zps5f1cf5f6.jpg
    25.2 KB · Views: 183
  • SAM_0976_zps293daeb0.jpg
    SAM_0976_zps293daeb0.jpg
    203.4 KB · Views: 221
  • SAM_0975_zpsbcbab1a2.jpg
    SAM_0975_zpsbcbab1a2.jpg
    135.1 KB · Views: 187
Back is finished. Before I get to that, here were the last parts.

That wonderful kidney plate!

SAM_0977_zpsbf6c4f75.jpg

Design for the spine:

SAM_0979_zps72ccfbb2.jpg

Finished spine (missing the lowest piece in this pic, but it is in the final one)

SAM_0981_zps58500511.jpg

Comparison Photo:

part6_zpse7b93f83.jpg

My rough fitting of the finished pieces:

SAM_0983_zpscff98a1b.jpg

This was all held together by aluminum tape, LOL! But, it gave me great reference of where I need to tweak a few pieces, add more contour for the sides around the ribcage, and other minor alterations. This pic is also missing one small piece up top, and I plan to add 1/4" diameter rubber hose up either side of the spine. But that will be when I go to mount all this onto the shirt. Now it is time to go back to the front!

Thanks for looking!!!!
 

Attachments

  • SAM_0977_zpsbf6c4f75.jpg
    SAM_0977_zpsbf6c4f75.jpg
    146.3 KB · Views: 190
  • SAM_0979_zps72ccfbb2.jpg
    SAM_0979_zps72ccfbb2.jpg
    123 KB · Views: 190
  • part6_zpse7b93f83.jpg
    part6_zpse7b93f83.jpg
    30.2 KB · Views: 169
  • SAM_0981_zps58500511.jpg
    SAM_0981_zps58500511.jpg
    147.1 KB · Views: 180
  • SAM_0983_zpscff98a1b.jpg
    SAM_0983_zpscff98a1b.jpg
    166.6 KB · Views: 188
This is honestly the greatest build I have seen. The fact that the undersuit is completely scratch-built is just...INCREDIBLE! If this doesn't go elite, i'm sure quite a few people will be pretty disappointed. Keep up the amazing work! :)
 
Hey guys. You are all awesome for those comments! Ferret, by all means bud! I posted these things I create for many reasons, and one of them is to possibly inspire someone to take something I have done even further!

Well... I have been at it for 15 hours now... I am pooped! So, the back is done, and now the front is, for the most part, done too! Now all I have left to complete the upper torso is the neck and the sides. Then it will be onto the arms I think.

With that, progress pics of the front :)

First off, I apologize for not documenting all the pieces... I can always tell when I get tired because I forget to snap shots!

Little pieces below breast plate.

SAM_0986_zps905af437.jpg

Raw plate (not sure what part of the body this would be considered... stomach maybe?)

SAM_0988_zpsb456cca3.jpg

Backside cuts

SAM_0989_zpsebdf4a40.jpg

Finished piece

SAM_0991_zps77bd3f9d.jpg

Working the upper COD piece

SAM_0992_zps3072e0e6.jpg

And a major skip to all the finished pieces for the front (I told you I skipped a bunch!!)

SAM_0993_zps944ca6b4.jpg

'till tomorrow!
 

Attachments

  • SAM_0991_zps77bd3f9d.jpg
    SAM_0991_zps77bd3f9d.jpg
    136.7 KB · Views: 179
  • SAM_0989_zpsebdf4a40.jpg
    SAM_0989_zpsebdf4a40.jpg
    172.7 KB · Views: 177
  • SAM_0988_zpsb456cca3.jpg
    SAM_0988_zpsb456cca3.jpg
    141.3 KB · Views: 172
  • SAM_0986_zps905af437.jpg
    SAM_0986_zps905af437.jpg
    139.6 KB · Views: 175
  • SAM_0993_zps944ca6b4.jpg
    SAM_0993_zps944ca6b4.jpg
    172.3 KB · Views: 151
  • SAM_0992_zps3072e0e6.jpg
    SAM_0992_zps3072e0e6.jpg
    142.8 KB · Views: 149
Well, I'm speechless. That is by far the coolest thing I've ever seen anyone do with foam. Mind if I try that on my build? (If not, i'm glad I saw this before I got too far in...) Friggin great work, man!
 
This...this build...it is amazing.

Your foam work looks absolutely amazing. It doesn't even look like foam, it looks like it's metal plates that have been formed in to pure awesomeness. Cannot wait to see more updates on everything you're doing.

And now because of seeing your work, and it motivating me, it's time for me to get back to working on my pep stuff.
 
Thank you again to all for the awesome comments!

Reminder: EVERYTHING I build and post here is open to be copied, duplicated, or enhanced. If I use someone else's pattern, I will give them credit (and I ask that you do the same). I appreciate those that have asked me if they can duplicate my work, but I just wanted to come right out and say that it is not a requirement :)

So, for today's update. Shopping! YAY!

It was not easy to find them, but a bit of perseverance paid off. Scratch the compression clothing off the checklist!

SAM_0994_zpsf2db8659.jpg

And don't forget the little parts that are so necessary for this build. Thread, .8mm stretch cord, Woven 1" elastic band (black), and quilter's marking pencils. I also grabbed a couple of heavy duty mesh laundry bags for the painting stage, but a bit of testing will have to be done before I feel comfortable using them on my finished pieces.

SAM_0995_zps10d22f4c.jpg

Also, I was thinking I may try a new technique. For the arms and legs, I am considering using EVA to form the muscle patterns that the Exo-suit has, then gluing/sewing them to a first layer of clothing, then putting the compression pieces over the top. I am not sure if I can do this with the sizes I currently have though. I may have to use these ones as the first layer, and then the next size up as the second... the only problem I can see arising from this is HEAT. If I just had the patience to also fabricate a recirculating, radiator/fan cooled closed loop cooling system that followed the vein patterns! I know I could do it, but do I have the patience and the desire to spend that much more? :)
 

Attachments

  • SAM_0995_zps10d22f4c.jpg
    SAM_0995_zps10d22f4c.jpg
    197.6 KB · Views: 149
  • SAM_0994_zpsf2db8659.jpg
    SAM_0994_zpsf2db8659.jpg
    168 KB · Views: 146
Status
Not open for further replies.
Back
Top