INTRO: REFERENCE THREADS, FILES AND OVERALL DETAILS
MY GOAL WITH THIS THREAD IS: To document my journey as explicitly and thorough as possible, with as many photos as possible and a cost/time breakdown spreadsheet.
(please note that I am Australian, and will be pricing everything in AUD) (basically suck it up if you're not Aussie)
COMPLETED BUILD
Saved for future use

QUICK LINKS
THREADS
Dagger06 's thread will be the main build reference thread, as they've done such a detailed report of their journey and provided pictures along the way.

 www.405th.com
SpartanSweed 's thread will be the secondary build reference thread, as he did the 3D printed method, and has awesome deployment photos.

 www.405th.com

 www.405th.com
And lastly Lieutenant Jaku 's thread is useful for the plethora in-game reference images, even though the project itself seems to have died off

 www.405th.com
Shadowshail's Build

 www.405th.com
ReclaimerODST's Build

 www.405th.com
Slayer241489 's Build

 www.405th.com

 www.405th.com
OTSDerpy 's Build

 www.405th.com
SnakeandNape 's Build (Drop-dead gorgeous helmet)

 www.405th.com
FILES
Titlewaves files have been recommended to me by Sweed, and they look like they're perfect.
If Titlewaves files are too expensive for an entry-level build, there is a free helmet file in the armory.

 www.405th.com
Apart from the 3D model from Strider and Titlewaves printable files, the only other body files that I could locate are the Classic Halo 2 ODST .pdo files, located below in the armory.

 www.405th.com
This way someone on a budget could potentially print out a helmet, and pep/foam-work the armour.
mardJaderp 's pepakura unfolds (incomplete)

 www.405th.com
RELATED PROPS
I plan to use my NERF MA40 repaint as my prop; even though it's not accurate to what the ODST's use in Halo 2, but it will suit the vibe of the cosplay. Potential weapons to create are either the Sniper or BR, however those will be far in the future.
And as of the 5th of March, I will be acquiring and painting a classic, 1:1 scale Plasma Rifle.
DEADLINE
My deadline for this project is to be finished before April 2025, as I'll head up to the Gold Coast for Supanova and meet some of the 405th!
I find it good to have a deadline, it'll really push me to complete this build and not let it sit around. HOWEVER, if I do not complete it by that deadline, I will not be rushing and simply move the date to the next con.
Once the build is completed, I will pour effort into making this tread as easy to read as possible, as I am very prone to walls of text.
MY GOAL WITH THIS THREAD IS: To document my journey as explicitly and thorough as possible, with as many photos as possible and a cost/time breakdown spreadsheet.
(please note that I am Australian, and will be pricing everything in AUD) (basically suck it up if you're not Aussie)
MY GOALS WITH THIS COSPLAY ARE:- To make a Tier 3 accurate suit.
- To use 3D printing methods for the hard armour.
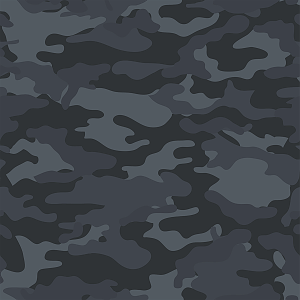
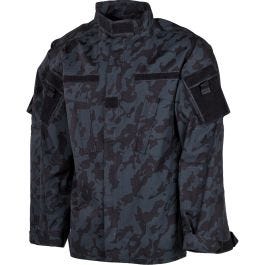
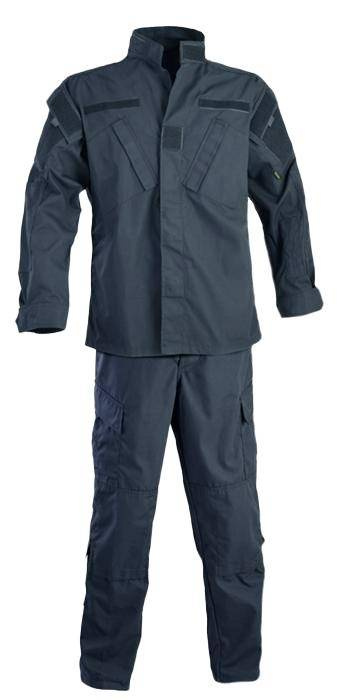
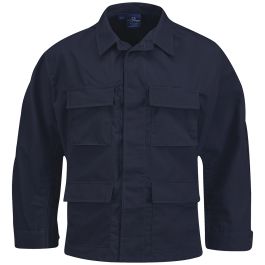
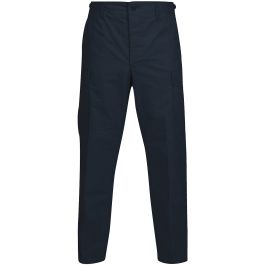
- To create a proper, in-universe accurate BDU. Relevant patches, camo pattern, leather ribbing etc.
- To include lights inside the helmet to provide an exterior see-through effect, so people can see my ugly mug when I want.
- To create a microphone-to-speaker system and vice-versa, for easy communication.
- To include a working flashlight attached to the helmet.
COMPLETED BUILD
Saved for future use
QUICK LINKS
- PART ONE: REFERENCES, ARMOUR SCALING AND PREPARATION
- PART TWO: UNDERSUIT
- PART THREE: SHINGUARDS
- PART FOUR: CHEST PIECE
- PART FIVE: SHOULDER PIECES
- PART SIX: HELMET
- PART SEVEN: STRAPPING AND SECURING
- PART EIGHT: PAINTING, WEATHERING AND DECALS
- PART NINE: POUCHES & MISCELLANEOUS DETAILS
- CLOSING THOUGHTS AND TIME/COST BREAKDOWN
THREADS
Dagger06 's thread will be the main build reference thread, as they've done such a detailed report of their journey and provided pictures along the way.

Halo 2 Anniversary ODST - A return to form
Photo by PostConBlues So after a long absence, I've decided to return to the world of Halo costuming. A combination of meeting some local Halo cosplayers as well as Halo: Outpost Discovery reignited my interest. I debated between doing Vale or the Halo 2 ODST, but after various commitments...
SpartanSweed 's thread will be the secondary build reference thread, as he did the 3D printed method, and has awesome deployment photos.

H2A ODST build
It’s new suit time! In an effort to have a suit that is both easier to transport and easy to wear, I’ve decided to build the incredible looking ODST from Halo 2’s anniversary. Armor files are in the works but first on the to do list was the helmet! The files are Turbos and they’re absolutely...
Rookie425 's thread is EXTREMELY useful for the separation of components for references, so stoked I uncovered this. I shall be taking some closer reference shots, as I've got years of experience in SFM.
In-Engine Armor References [Source Film Maker]
Whew. Sorry that took so long, but I've been all over the place as far as my availability over the past months between commissions, personal projects, and a final decision to start writing "that novel" if only I could remember what "that novel" was supposed to be about. Anyways, for this round...
And lastly Lieutenant Jaku 's thread is useful for the plethora in-game reference images, even though the project itself seems to have died off

H2A ODST Planning/Build
So as the title says I'm planning to make an H2A ODST, so step 1 gathering reference, you'll notice most of these photos are of the back because that's what seemed to be missing online. I'm planning to do foam but seeing as I don't own a printer it may be a while before I actually start...
List Of Other Build Threads;Shadowshail's Build

Shadowshail's H2A ODST Build Thread
Hello all! I have started yet another project! Halo 2 Anniversary ODST!! Im not sure to what detail i will have in this as life is pretty busy and i might be a little lazy in describing things, so ask away if you have any questions about anything. My 3d print files are by Titlewave on Etsy...

Another H2A ODST Cosplay – First Build
Hello all! This is my first post for my first ever attempt at a cosplay. I’ll be working to put together a very game-accurate Halo 2 Anniversary ODST with a small Sunray twist in the paintjob. Shoutout to CYNE 739 for encouraging me to start my own thread here and being a great wingman for this...

Halo 2/Halo 3 ODST hybrid; foam build
Hey guys, I made some halo 3 odst shoulder and chest out of foam from the armory and slapped them onto my previous halo 2 odst cosplay as a last minute halo 3 odst cosplay for halloween and twin cities con this week. I plan to work put more work into it as the year goes by so it looks more...

Halo 2 Anniversary ODST build foam; 2nd cosplay with foam
Hey y'all, I've seen very little cosplays of the Halo 2 Anniversary ODST. I really like the design of these guys and it looked like something that would have been simple to do and more comfortable for moving around in at a convention for 7+ hours. Got the helmet going along with all the pieces...

ODST MK III; “Halo 2 Anniversary”
So I’m going to try something that has been started by many MANY cosplayers, but never really...fell through. If you don’t know what that is, then let me tell you that it’s the “H2A ODST” from the “MCC.” (Master Chief Collection) So far I did a pretty decent job on starting a template...

Halo 2 Anniversary ODST
Have always been a big fan of how the ODST looked in halo 2 and have finally decided to start working on 3d printing a set of the armor. I found the 3d files on thingiverse.com if anyone else is interested. Right now I have the helmet printed off and will be working on the chest next.
List Of Other H2A Cosplayers (without build threads)- FuriousFido
- @dat_boi_builds on Instagram
FILES
Titlewaves files have been recommended to me by Sweed, and they look like they're perfect.
The file package also includes images of strapping guides, which is a very nice bonus.If Titlewaves files are too expensive for an entry-level build, there is a free helmet file in the armory.

Halo 2 Anniversary - UNSC ODST
This is a comprehensive zip file including numerous files from multiple artists. Contents of zip-file: halo-2-anniversary-unsc-odst-helmet.pdo Modeler: Satchmo III PRINTABLE FILES halo-2-anniversary-unsc-odst-helmet.stl Modeler: Satchmo III

Halo 2 - UNSC ODST
This is a comprehensive zip file including numerous files from multiple artists. Contents of zip-file: halo-2-unsc-odst-chest.pdo Modeler: Ruze789 halo-2-unsc-odst-helmet.pdo Modeler: Ruze789 halo-2-unsc-odst-shin.pdo Modeler: Ruze789...
mardJaderp 's pepakura unfolds (incomplete)

Pepakura - H2A ODST Cosplay
I've known about 405th for awhile, but it wasn't until now I decided to scroll through the threads. Recently I've gotten into the ODSTs more than the Spartans, but I more specifically gotten into the Halo 2 (Anniversary) ODSTs. For some reason, I find them a bit more appealing than the Halo 3...
RELATED PROPS
I plan to use my NERF MA40 repaint as my prop; even though it's not accurate to what the ODST's use in Halo 2, but it will suit the vibe of the cosplay. Potential weapons to create are either the Sniper or BR, however those will be far in the future.
And as of the 5th of March, I will be acquiring and painting a classic, 1:1 scale Plasma Rifle.
DEADLINE
My deadline for this project is to be finished before April 2025, as I'll head up to the Gold Coast for Supanova and meet some of the 405th!
I find it good to have a deadline, it'll really push me to complete this build and not let it sit around. HOWEVER, if I do not complete it by that deadline, I will not be rushing and simply move the date to the next con.
Once the build is completed, I will pour effort into making this tread as easy to read as possible, as I am very prone to walls of text.
Last edited:

