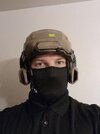
Duke's CEA Army BDU - Jungle Marine

Status
Not open for further replies.
in my experience I have felt that its the aerosol in the paint that causes the embrittlement. I have yet to find a rattle can that doesn't end up cracking on the foam. Not sure if there are spay cans out there that aim to be "flexible" but may be worth a google.
 
in my experience I have felt that its the aerosol in the paint that causes the embrittlement. I have yet to find a rattle can that doesn't end up cracking on the foam. Not sure if there are spay cans out there that aim to be "flexible" but may be worth a google.
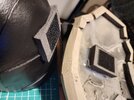
I appreciate that, but I think you're referring to the creased or crinkled look painted foam gets over time from frequent bending. I'm talking about a crackling effect like this:

20230401_115934.jpg

Which is usually caused by a chemical reaction between the two paints. Either incompatible or the first layer did not cure fully.

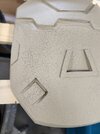
Thankfully, I found a Krylon ultra flat camo and it worked perfectly. Covered up the cracks and all (right shoulder)
20230401_120759.jpg
 
I appreciate that, but I think you're referring to the creased or crinkled look painted foam gets over time from frequent bending. I'm talking about a crackling effect like this:

View attachment 329654

Which is usually caused by a chemical reaction between the two paints. Either incompatible or the first layer did not cure fully.

Thankfully, I found a Krylon ultra flat camo and it worked perfectly. Covered up the cracks and all (right shoulder)
View attachment 329655
Ah, that kind of cracking. I misunderstood. I'm glad you found a suitable work around!
 
And so began my weekend in a cold shop with paint and a dog that clearly thinks I brought her here to murder her.

20230401_115917.jpg


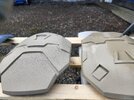
I found a different brand of Kahki Camo by Krylon and it worked perfectly! No cracking and I even liked the slight color difference.

The paint is still wet, so ignore the shinyness, but you can see there is a little more brown in this Krylon compared to the Rustoleum on the left.

20230401_120759.jpg


I managed to Khaki everything and I even got to start my secondary gun metal!

Here shows my taping technique, using trash bags and regular masking tape for the large areas. I also got to use a new technique of Acrylic Mask (teal on the front of the helmet.) I can see why people like it.
20230402_152128.jpg


So pretty! The round ear part will get painted black.

20230402_153644.jpg
 
That looks great!! do you plan on weathering it dirty? Just curious since I know I will be most likely
 
That looks great!! do you plan on weathering it dirty? Just curious since I know I will be most likely

Yeah, I do plan on light black wash plus brown wash. But, I do not plan to do chipping or much scratching. The tan marine armor always has a super dirty look, but I believe it is actually like a type of camo. It looks like a coyote brown sponged patterned on top.

Your boys a marine!
20230403_130648.jpg


Also left a surprise decoration at work courtesy of Thom A293

20230403_160558.jpg
 
I spent a good two hours today debating on what I wanted to do for the paint job.

My original plan was a sort of random sponge pattern with coyote brown to make a sort of camo.

But, after trying it I couldn't tell if I liked it. After much discussion with some trusted costume colleagues, I've settled on keeping it drag tan and once all together than I may consider going back to specific spots/panels to add the camo pattern.

For prosperity, I thought I'd show you all my test process:

1. Did a small section of a piece furthest from sight.
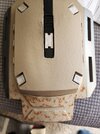
20230404_161209.jpg

2. I didn't like how "clean" it looked so I did a quick black wash.
20230404_163233.jpg

3. I needed to see it fully done up.
20230404_164534.jpg

4. I liked it, but needed to see it in contrast to my BDU/flightsuit
20230404_165655.jpg20230404_165658.jpg


I then taped off the piece and repainted the tan.

In the end, I think the plain tan is cool looking enough. But, it won't be hard to add the camo to small spots if I want.
 
I've been making lots of progress, but I haven't been taking pictures and telling all you about it and I feel bad!

Most of it has been hand sewing straps and velcro, gluing and cutting to help for rigging the armor. But, I'm doing all in dim light while watching TV so it hasn't been great for pictures.

I'll catalog what I've done and post this weekend.

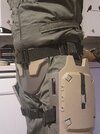
Here's one example though. I ripped the holster and ammo pouches off my thigh straps and resewed them to hold my thigh armor and cod piece up! I can wear something!

20230404_210053.jpg
 
Alright, the weekend is here!

First, big update.... I finally saw a Doctor! I swallowed my pride and went to the free clinic. I for sure have diabetes and was put on oral medication. It has only been one week and my pain has already been reduced to less than half of what it was! I'm feeling very optimistic.

Now, before I show you my progress, I'd like to show you my techniques for increasing strength on straps and velcro when working with foam. For this I am using Gorilla Glue High Temp Hot Glue (this stuff is great), Industrial strength Velcro, Nylon Webbing and EVA40 foam.

1. Extra grip on Velcro. My issue is that the glue holding the velcro to the piece usually gives way before the actual velcro does. To combat this I do a similar technique to anytime I'm gluing something... I rough up the surface to add texture for the glue to grab.
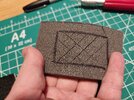
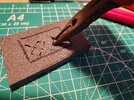
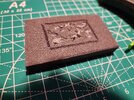
Craft knife slice a crisscross pattern shallow into foam. Using pliers, twist to create gaps. Fill in hot glue to the gaps.
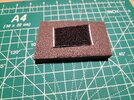
20230406_190946.jpg20230406_191041.jpg20230406_191120.jpg20230406_191412.jpg20230406_191518.jpg


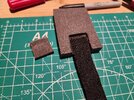
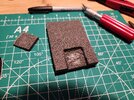
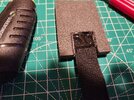
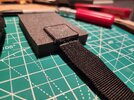
2. Extra strength to straps. You can for sure just glue nylon webbing to foam, but there is a high likelihood that it will snap off at the wrong time. Reduce this chance by burying the strap in the foam.

Cut out a recess into the foam the same size as the webbing squared and not too deep (less than half the thickness of the foam. Put a little hot glue down in the recess and attached the strap. Then put cover the strap in hot glue and press down the foam piece you cut out. You've got to keep even pressure down while it dries and also not burn yourself.
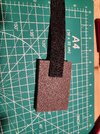
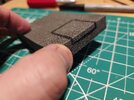
20230406_190605.jpg20230406_190634.jpg20230406_190742.jpg20230406_191207.jpg20230406_191236.jpg20230406_191331.jpg

PS: I had ArcSol try to rip this strap out of this test piece and 30 some odd tries and we were both unable to. Gorilla glue is good, plus glue on both sides of the strap is fantastic.

Little bit of extra time in construction to avoid extra repairs in the feild.


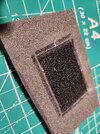
On the bicep (shoulder mount) I added a strap so I can snap it to my BDU and also cut out a square, built up a foam block and added velcro so I can attached my shoulder pieces.
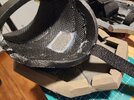
20230406_203036.jpg

20230406_203102.jpg


I did the strengthening strap technique to add a channel for the thigh straps to go through to help keep them from flopping around.
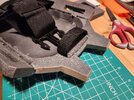
20230406_203014.jpg

I also did up some of the decorative straps and added a couple loops of thread onto the 3d printed buckles to help keep them in place.
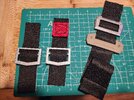
20230406_203457.jpg

***Fingers cross for good weather to keep painting this weekend!
 
That's an excellent tutorial. I may have to try it on my vest depending on how far I want to go with it.
 
Thanks he4thbar and I now know I have 24 posts in this thread seeing as how you've gone through liked all of them. :)

Great suggestion TurboCharizard, if I come across a more flexible material I like I will certainly do that.

Dire while I love the edit, I'm not exactly sure what the suggestion is. There is already a tab inserted into the rangefinder arm. But, since it is smaller, just like your drawing shows, it is a weak point and didn't take more force to break. Which also made it hard to get the tab out.


I've had a different idea to increase the strength of the plastic. Internal supports!

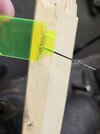
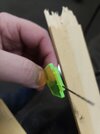
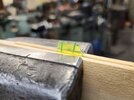
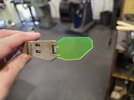
Using the smallest drill I could find (#60 wire gauge) I drilled two holes in the tab. Then I cut the drill bit off inside the holes. Sure you can see little lines, but I'll take that over breaking. Still probably not going to hold up to a con floor, but we've got to try stuff to see right?


20230429_130311.jpg
20230429_130429.jpg
20230429_131415.jpg
20230429_131501.jpg
 
Last edited:
Status
Not open for further replies.
Back
Top