Duke's Halo 4 Venator Helmet Pep *COMPLETE* (with Step-by-Step)

Status
Not open for further replies.
Re: Duke's Halo 4 Venator Pep Build *WIP (1st suit Step-by-Step) +photos!

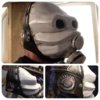
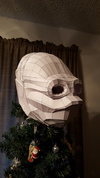
And voila!


20151231_173032_zpsc0dlauel.jpg


This turned out to be a pretty tricky helmet. It is so angular that symmetry is crucial. All the little mistakes I made get noticed really easy when you look at it at the wrong angle. One that I really hope I can correct with bondo is the lopsided muffin top of the helmet when looking at it dead on. It is leaning to the left just slightly.

20151231_173115_zpsyruydk5a.jpg

20151231_173145_zps39yge5o1.jpg
I forgot to close the hole at the top, not intentional and it is closed now.

20151231_173209_zpsg3ji1zn7.jpg

Happy New Year everyone!!!
 

Attachments

  • 20151231_173032_zpsc0dlauel.jpg
    20151231_173032_zpsc0dlauel.jpg
    198.1 KB · Views: 346
  • 20151231_173209_zpsg3ji1zn7.jpg
    20151231_173209_zpsg3ji1zn7.jpg
    187.7 KB · Views: 322
  • 20151231_173145_zps39yge5o1.jpg
    20151231_173145_zps39yge5o1.jpg
    202.6 KB · Views: 292
  • 20151231_173115_zpsyruydk5a.jpg
    20151231_173115_zpsyruydk5a.jpg
    251 KB · Views: 311
Re: Duke's Halo 4 Venator Pep Build *WIP (1st suit Step-by-Step) +photos!

Man, I picked such a good day to start resining... There's not much moisture in the air, it's pretty warm oh wait... it's snowing! :/
20160103_120053_zpswpszfizj.jpg

I picked up these items at a local fiberglass store (Kent, WA) called Fiberlay. Set me back $100 for all of it after tax, but the owner assured me it is going to be better than bondo brand. He also had edged fiberglass cloth strips in different widths, which will keep the mess down a bit once I get to that point.
20160103_121210_zpsgeytiq2h.jpg

Combined with the materials I have left over from before...
20160103_121421_zps5lcqkm8p.jpg
Acetone for cleaning the paintbrushes after resining (use just enough to submerge the bristles). Gold Bond baby powder for powdering the outside after resining to make it less tacky. Lots of disposable gloves, like others have said, be sure to leave a couple pairs of gloves out so that you can change gloves quickly without making a mess.

Another trick I will pass along to quickly measure and use fiberglass resin: Buy a pack of clear plastic party cups. Put two cups together. Fill one cup up with either 1 or 2 oz of water. Mark on the outer cup where the water line is. Then cut the outer cup at the line. Now you can put any of the other cups inside this one and have an instant measurement of either 1 or 2 oz without getting it dirty. Pour the resin up to the line and then take the measuring cup off and set it aside to be used on the next batch.
20160103_123116_zps45qngpyt.jpg

Here is my first coat of resin:
20160103_130108_zps8hvfkbuo.jpg
My next move will be to coat the inside, then coat the outside once more and then move on to fiberglassing.


Tips on hardening pepakura with polyester resin (aka fiberglass resin):
1. Wear a respirator!
2. Look over your whole piece to fix any last minute issues and make sure your piece has proper supports on the inside. Cereal Kill3r has a great technique he uses in his videos involving Popsicle sticks and hot glue.
3. Work in small batches (only 1oz or 2oz at a time.)
4. Once the appropriate amount of catalyst is added you will typically have between 10-20 minutes to work with it.
5. Your first coat should be applied to the outside of the piece and in a very thin coat. The idea is to make is to make it look wet. Be sure to wick up an drips or pools of resin.
6. Once dried, your second coat should be applied to the inside of the piece and the idea is to
make it look saturated, and keep an eye out for holes where the resin may drip out onto the front.
7. It should now be a decent integrity and any further coats will be at your own discretion.

On this one I did not have a great plan for supports before I started. I wish I had spent more time figuring that out so that I might not have to fix as much with the bondo. I didn't even notice till I was almost done witht the first coat the two tabs around the opening had been torn loose from me trying the helmet on several times. But, I do keep the hot glue handy through the whole process so it was a quick fix.


20160103_120053_zpswpszfizj.jpg


20160103_121210_zpsgeytiq2h.jpg


20160103_121421_zps5lcqkm8p.jpg


20160103_123116_zps45qngpyt.jpg


20160103_130108_zps8hvfkbuo.jpg
 
Last edited by a moderator:
Re: Duke's Halo 4 Venator Pep Build *WIP (1st suit Step-by-Step) +photos!

Really detailed thread thats great to follow.Will be watching your progress.
 
Re: Duke's Halo 4 Venator Pep Build *WIP (1st suit Step-by-Step) +photos!

Glad to hear Shumway ! I will try to not disappoint.

I've determined that it is not really cost effective for me to heat my half frozen garage up for just one helmet so I've decided to make two more! First, I'll finish the correctly-sized Mark VI from Halo 3 I've been working on (3rd attempt). You can see from the picture that I am almost done. Then I am going to work on my belated Christmas present to my younger brothers which they have picked out as being a Half-life 2 Metrocop helmet.
20160103_202136_zpshudzczre.jpg
half_life_2_metro_cop_helmet_by_matson23-d7wai8w.jpg
*Metrocop helmet is not my own, just a reference.

So for now this project will be on hold and hopefully by the time I'm ready it will be a little warmer too!
 

Attachments

  • 20160103_202136_zpshudzczre.jpg
    20160103_202136_zpshudzczre.jpg
    260.7 KB · Views: 295
Re: Duke's Halo 4 Venator Pep Build *WIP (1st suit Step-by-Step) +photos!

I just figured out a new Pepakura construction tip! Maybe it is not a concern for everyone, but with my hobbit fingers (combined with biting my nails) it is really hard to work with small things like some of the pep pieces after they are cut out. So previously I've been scoring the pieces while they are still on the page... While working on this metrocop helmet I started thinking... Why not fold them while they are still on the page?? I've tried it and it has been soooo nice.

Sounds weird, I know. But, what I'm doing is cuting the edges of any "valley" fold tab. Then I fold the tab up before cutting it out. I went through and did this to every page incredibly fast (granted it makes storing the pages a little trickier). Now when I am cutting out the pieces half of the work is done already. Here's a shot of all the pages after folding up the valley tabs.

20160107_161348_zpsuvv14uvj.jpg


Here's another photo to show this trick and how difficult some of these folds can normally be. In this photo it took me less than 10 minutes to cut and fold all that is pictured.
20160107_171931_zps8faidmrk.jpg


You do have to be a little more careful around the pages when cutting out the pieces, but you can always just cut out a big bubble around the piece you're working on to make it easier to work with.
 

Attachments

  • 20160107_171931_zps8faidmrk.jpg
    20160107_171931_zps8faidmrk.jpg
    201.2 KB · Views: 295
  • 20160107_161348_zpsuvv14uvj.jpg
    20160107_161348_zpsuvv14uvj.jpg
    199.7 KB · Views: 298
Re: Duke's Halo 4 Venator Pep Build *WIP (1st suit Step-by-Step) +photos!

I just figured out a new Pepakura construction tip! Maybe it is not a concern for everyone, but with my hobbit fingers (combined with biting my nails) it is really hard to work with small things like some of the pep pieces after they are cut out. So previously I've been scoring the pieces while they are still on the page... While working on this metrocop helmet I started thinking... Why not fold them while they are still on the page?? I've tried it and it has been soooo nice. Sounds weird, I know. But, what I'm doing is cuting the edges of any "valley" fold tab. Then I fold the tab up before cutting it out. I went through and did this to every page incredibly fast (granted it makes storing the pages a little trickier). Now when I am cutting out the pieces half of the work is done already. Here's a shot of all the pages after folding up the valley tabs.

http://i1379.photobucket.com/albums/ah127/Chris_Pense/20160107_161348_zpsuvv14uvj.jpg

Here's another photo to show this trick and how difficult some of these folds can normally be. In this photo it took me less than 10 minutes to cut and fold all that is pictured.
http://i1379.photobucket.com/albums/ah127/Chris_Pense/20160107_171931_zps8faidmrk.jpg


You do have to be a little more careful around the pages when cutting out the pieces, but you can always just cut a big bubble around the piece you're working on to make it easier to work with.

This whole idea is such a great idea for I have the same problem so for me I just stopped using them but I might try using them.
 
Re: Duke's Halo 4 Venator Pep Build *WIP (1st suit Step-by-Step) +photos!

Heh, that's awesome, I'm glad you liked my idea and I hope it does get you to try doing pepakura again!!
 
Re: Duke's Halo 4 Venator Pep Build *WIP (1st suit Step-by-Step) +photos!

Thanks to my new pep technique, I have finished the metrocop helmet in my own record time.

20160109_161104_zpshyz2r1pb.jpg

What I haven't had time for, apparently, is to take my Christmas tree down. lol.

I was going to try and rig up a cardboard box system in my garage to help speed the drying of the resined helmets along. Instead, I will be driving out to my parents house in a little bit to use their barn that has a splendid little furnace. (Please note that fiberglass resin fumes are flammable and I will be heating the barn prior to working). I'll post more pics soon and be back on track with the Venator suit.
 

Attachments

  • 20160109_161104_zpshyz2r1pb.jpg
    20160109_161104_zpshyz2r1pb.jpg
    642.9 KB · Views: 287
Re: Duke's Halo 4 Venator Pep Build *WIP (1st suit Step-by-Step) +photos!

Photo Update:

As per daviduffy 's instructions, I am now enjoying a beer after completing the fiberglass portion of the helmet. Really is nasty stuff. You can see in the photo that I have completely covered the inside with fiberglass (minus the portions I will be cutting out for the visor, not sure if other people do that or not, I just don't like creating more work for myself).

20160110_113420_zps0413pjer.jpg

Here the fiberglass has been completely coated in resin, took about 8 oz.
20160110_122844_zpsi6tuxqkq.jpg


Steps for Fiberglassing:
1. Cut out a variety of pieces. I like to have a good stack of about 2" x 4" rectangular pieces along with a large rectangle piece to cover the majority of the top of the head part. Be sure to have a bunch of little squares and rectangles to fill in any gaps at the end. Lastly, cut more than you need! Once you start it is a pain to deal with the fiberglass again.
2. Set out extra sets of gloves in case your gloves get sticky you can quickly switch them out.
3. Use spray adhesive on a portion of the inside that you want to put some pieces on. I recommend starting with the hardest to reach or most intricate spot, like the eyes of this Venator or brim of the MC helmet. Work in small areas at a time, spraying just enough adhesive each time to make it tacky. Don't forget to switch gloves if the fiber strands start sticking to you too much.
4. Mix up a good batch of resin. I've found with a regular sized helmet about 6 oz is good. Before you start, make sure you can quickly make more resin if you need it and be sure to have the brush handy.
5. Pour the large batch you just made inside the helmet in a drizzling fashion. Make rings around and around, don't let it pool in just one spot, try to get it everywhere!
6. Set it aside for a minute, the fiberglass needs to soak up a little. Now, mix up a medium batch of resin, for a helmet I'm good with another 2-3oz.
7. Using the paintbrush and new resin, start dabbing the unsoaked spots of fiberglass. You'll find that using traditional paint strokes tends to move the fiberglass around and you don't want that. Using a dabbing technique, or more like stabbing, you can push the resin around and force the fiberglass to stay against the cardstock.
8. Leave about 2" around the neck opening for last, this will keep your arms from getting covered in resin.
9. Once it has all been soaked, keep moving it around with your hand to help it from pooling up in one spot too much. While you are doing this continue to use the paintbrush to dab, this time looking for any air pockets underneath the fiberglass. Structurally speaking, air pockets are not as strong as a solid wall of fiberglass.
10. Once you've cleaned up, grab your favorite drink because it is time to relax and reward yourself for a job well done!


20160110_113420_zps0413pjer.jpg


20160110_122844_zpsi6tuxqkq.jpg
 
Last edited by a moderator:
Re: Duke's Halo 4 Venator Pep Build *WIP (1st suit Step-by-Step) +photos!

Your scoring/cutting tips are making my life so much easier! I was wondering are using a low or high temp glue gun?
 
Re: Duke's Halo 4 Venator Pep Build *WIP (1st suit Step-by-Step) +photos!

Glad to help! I use a low temp mini glue gun. First one I bought was the cheapest I could find online $4 and it got way too hot, repeatedly burning me. I left it on it's side for too long and Pop! with a little puff of smoke. Freaked me out. I spent a little more on the second one, $8 and it has been serving me well.
 
Re: Duke's Halo 4 Venator Pep Build *WIP (1st suit Step-by-Step) +photos!

Wow! Absolutely fantastic work. Your instructions and guide to this build are extremely clear and well structured - this should probably be a sticky thread! As a noob to this hobby I'm learning loads from your build. Keep up the good work!
 
Re: Duke's Halo 4 Venator Pep Build *WIP (1st suit Step-by-Step) +photos!

Nice idea with the spray adhesive! I might do a test run with that on one of my smaller pieces just to see how it goes. I assume you are applying a coat of resin on the outside and the inside of the pep before moving into the fiberglass phase. So, by applying adhesive on top of resin on the inside of the piece, you're creating a "sandwich" of a couple of different materials. My question is: have you noticed any structural compromise or difficulty in the bondo phase from using adhesive between two layers of resin?
 
Re: Duke's Halo 4 Venator Pep Build *WIP (1st suit Step-by-Step) +photos!

Silvabullet - Thanks! To be fair, I'm still a noob too. We all learn a little more each time we do something. So don't forget that making mistakes is just part of learning. Also, there are tons of great tutorials on the site and you may learn something from each of them. Good luck with your start!


daviduffy - It's not my tip actually, I gave credit to Ral Partha in my last build. He (or she) sounded like he's been doing it for a long time. I haven't seen any structural problems with it between resins. I also just spray enough to make it tacky. The order I did this helmet was, resin outside, resin inside, spray adhesive inside, fiberglass and resin inside, resin outside (for good measure). The bondo will be on the outside, so apart from all the pressure during sanding it shouldn't matter. During the Pipboy, I used a lot of pressure during sanding and had no problems with integrity apart from the few spots I couldn't get fiberglass into.


And here they are!
20160110_113355_zps6ufvoskc.jpg
I'll be smoothing out the edges of the Venator helmet this week.
 

Attachments

  • 20160110_113355_zps6ufvoskc.jpg
    20160110_113355_zps6ufvoskc.jpg
    322 KB · Views: 281
Re: Duke's Halo 4 Venator Pep Build *WIP (1st suit Step-by-Step) +photos!

I went to an army surplus store (well 4 to be exact) for the first time today and I picked up these awesome helmet pads!
20160113_170028_001_zpsdbkcdotc.jpg

I figured for $7 it is worth not having to mess around with sewing my own or using really thin bicycle helmet pads. Plus, since I bought three sets the guy let me get a few extra things for free like those spacer pieces around the top of the picture. Which, I'm guessing, are to push out the pads a little if your head is a little small. Since everything is already made of velcro material it will make padding a cinch.

Now to start shaping this beast..
 

Attachments

  • 20160113_170028_001_zpsdbkcdotc.jpg
    20160113_170028_001_zpsdbkcdotc.jpg
    307.8 KB · Views: 259
Re: Duke's Halo 4 Venator Pep Build *WIP (1st suit Step-by-Step) +photos!

Photo Update:

For the pools and drips of resin consider using a knife instead of sanding. Sanding can take a while and if it is just a small hardened droplet, a thin knife (I use a utility knife or razor blade) can make quick work of it. Here's what I'm talking about with the dremel to sand or grind down spots.
20160113_175843_zpsm9xepsbx.jpg

Now, I've been a little worried about the bondo phase for this Venator helmet. It is an unusual mix of angles and curves. So, my fear is that I will smooth out an angle by adding bondo to the wrong spot. So while brainstorming this evening I came up with a plan.. I grabbed a large permanent marker and marked the lines that I do no want to smooth out, after looking at the reference photos that I have. These newly marked folds will be kept at their current angles, while the unmarked folds will be given body filler (bondo) to make them smooth and/or curved. It was also really a neat way to start to visualize what the helmet will look like in the end.
20160113_174802_zpskcvew8ko.jpg
I think this will help me a lot in the next phase. It will be almost like a coloring book, don't go outside of the line! lol. I'm also thinking I'll do another color marker for things like where I need to make cuts, or where I need to build up the body filler up to fix mistakes, etc.


Last thing I'll do tonight is give the inside of the helmet a good coat of spray primer. Hopefully, this will help cut down on the resin smell and give me an extra little barrier from the fiberglass. *update- It did.

20160113_175843_zpsm9xepsbx.jpg


20160113_174802_zpskcvew8ko.jpg
 
Last edited by a moderator:
Re: Duke's Halo 4 Venator Pep Build *WIP (1st suit Step-by-Step) +photos!

Looking very nice indeed! Great idea with marking specific lines that need to stay defined. Just another idea for the liner, search motorcycle helmet liner on ebay. That is where I found the one in my sons helmet. It was cheep too, 15.00.
 
Re: Duke's Halo 4 Venator Pep Build *WIP (1st suit Step-by-Step) +photos!

Looking very nice indeed!... Just another idea for the liner, search motorcycle helmet liner on ebay.

Thanks. You're right, much better results searching liner instead of padding, still though a little on the pricy side for my budget. Thanks for the suggestion though.
 
Re: Duke's Halo 4 Venator Pep Build *WIP (1st suit Step-by-Step) +photos!

It looks great! :D

I personally work with rondo - yes, I do it on the outside too. I experimented with mixing, I tried more bondo and more resin and it works great. If you apply more bondo, it'll be less liquid... I just find working with rondo much easier than with bondo.
 
Re: Duke's Halo 4 Venator Pep Build *WIP (1st suit Step-by-Step) +photos!

It looks great! :D

I personally work with rondo - yes, I do it on the outside too.

Why, thank you! Still much to go. I haven't used rondo before, but I have a feeling I will like it too. Not sure how I feel about using it on the outside though. Seems like bondo being any runnier would make it more difficult to work with. No harm in experimenting though. I actually enjoyed working with bondo my first time. I applied it with my fingers.. made me feel like a kid again. lol. It's the sanding later that is the real pain. Just like with everything else, it will get easier with each time I do it and each thing I learn.
 
Status
Not open for further replies.
Back
Top