You are using an out of date browser. It may not display this or other websites correctly.
You should upgrade or use an alternative browser.
You should upgrade or use an alternative browser.
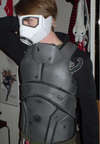
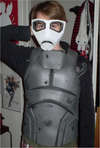
Fallout New Vegas, NCR Veteran Ranger Armor
- Thread starter Kommissar
- Start date
- Status
- Not open for further replies.
i'll cut some stencils and spray paint them, shouldn't be too hard.
as for weathering, i'm going to be experimenting with a few different paints, plastidip is a good thing from what i understand, but i'll be trying a variety of acrylics, enamels, airbrush and inks to see what works best.
as for weathering, i'm going to be experimenting with a few different paints, plastidip is a good thing from what i understand, but i'll be trying a variety of acrylics, enamels, airbrush and inks to see what works best.
TheFlyingChris
New Member
This is gonna be epic. I may just make the helmet as a side project.
nothing amazing, quite boring infact.
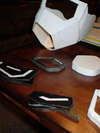
i've built (but not secured) the nose
as well as working on the eye frames.
things would be quicker if it weren't so cold, otherwise i'd be using my bandsaw to do the cutting, and cut several hours off each nights work.


i've built (but not secured) the nose
as well as working on the eye frames.
things would be quicker if it weren't so cold, otherwise i'd be using my bandsaw to do the cutting, and cut several hours off each nights work.
Attachments
i'll cut some stencils and spray paint them, shouldn't be too hard.
as for weathering, i'm going to be experimenting with a few different paints, plastidip is a good thing from what i understand, but i'll be trying a variety of acrylics, enamels, airbrush and inks to see what works best.
You could go on the foam armoring topic and check out what I did for the weathering. Any questions feel free to ask. Plasti-dip is not used for weathering though, it is only used for coating the foam to seal it up of any cracks or lines that you dont want to show. I am aware that hog mog works just as good too.
You could go on the foam armoring topic and check out what I did for the weathering. Any questions feel free to ask. Plasti-dip is not used for weathering though, it is only used for coating the foam to seal it up of any cracks or lines that you dont want to show. I am aware that hog mog works just as good too.
actually i've been under the impression that plastidip makes a great primer for paint to go ontop of..
Both. You use the liquid plasti-dip as a filler/sealer/primer. Since it's the liquid, it's very viscous, allowing it to seal and fill cracks and holes, as well as prime for other paints. Just keep in mind the foam likes to absorb, so more than one coat might be needed...actually i've been under the impression that plastidip makes a great primer for paint to go ontop of..
actually i've been under the impression that plastidip makes a great primer for paint to go ontop of..
Yah, but I was under the impression that you meant you wanted to do battle damage with the plasti-dip, not spraypaint over it, lol! =P You still need to prime over the plasti-dip before you paint though. 1 coat primer, 2 coats paint and 1 coat clear, or vise-vera, 2 coats primer, 1 coat paint and 1 coat clear.
nahh, i always prime everything i do,
unless your trying for a very specific "absorbed" look, it's best to prime this stuff, i was just unsure of what to prime it with exactly, until recently.
took part of the mask apart tonight and flared out the edges around the muzzle area,
trying to replicate the flared edges of this picture.
http://www.existentialgamer.com/blog/wp-content/uploads/2010/10/fallout-new-vegas.jpg
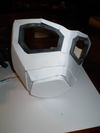
than attached the front and lens frames.


now i need a couple of pipes for the gas mask canisters.
unless your trying for a very specific "absorbed" look, it's best to prime this stuff, i was just unsure of what to prime it with exactly, until recently.
took part of the mask apart tonight and flared out the edges around the muzzle area,
trying to replicate the flared edges of this picture.
http://www.existentialgamer.com/blog/wp-content/uploads/2010/10/fallout-new-vegas.jpg
than attached the front and lens frames.
now i need a couple of pipes for the gas mask canisters.
Attachments
L
Late to the meeting
Guest
haven't looked at this in a while and now that I have it is compelling me to move away from pep's and may start on some foamies of my own.
jwstroud84
New Member
hey man didnt know you were over here at the 405th
Okay folks, big update,
i've been working hard getting the amp on the front of the mask looking right, which isnt easy when its from scratch.
couldn't find a pipe the right diameter to use for it, so i had to improvise.. now i have to do something similar for the gas canister! not going to be fun.


sometime round this period i noticed i was doing it wrong, and had to tear the pieces apart and redo them, so the gap between the sections were even all the way along, rather than kind of arcing outwards.

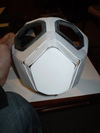
i felt the mask was too wide, so i cut a slit in the side

and attached it closer.

I also began work with my favorite type of weathering, BATTLE DAMAGE!
so i took my trusty soldering iron to the foam.


i've been working hard getting the amp on the front of the mask looking right, which isnt easy when its from scratch.
couldn't find a pipe the right diameter to use for it, so i had to improvise.. now i have to do something similar for the gas canister! not going to be fun.
sometime round this period i noticed i was doing it wrong, and had to tear the pieces apart and redo them, so the gap between the sections were even all the way along, rather than kind of arcing outwards.
i felt the mask was too wide, so i cut a slit in the side
and attached it closer.
I also began work with my favorite type of weathering, BATTLE DAMAGE!
so i took my trusty soldering iron to the foam.
Attachments
-
 PA060603.jpg59.3 KB · Views: 314
 -
 PA060602.jpg99.7 KB · Views: 310
 -
 PA060601.jpg52.3 KB · Views: 312
 -
 PA070609.jpg74.4 KB · Views: 308
 -
 PA070608.jpg68.9 KB · Views: 426
 -
 PA070607.jpg82.1 KB · Views: 316
 -
 PA070606.jpg99.3 KB · Views: 317
 -
 PA050600.jpg40.1 KB · Views: 292
 -
 PA050599.jpg41 KB · Views: 307
 -
 PA060605.jpg46.4 KB · Views: 290
 -
 PA060604.jpg87.1 KB · Views: 314
 -
 PA070610.jpg73.7 KB · Views: 312
 -
 PA070614.jpg31.4 KB · Views: 522
 -
 PA070611.jpg70.9 KB · Views: 344
 -
 PA070613.jpg36.7 KB · Views: 374
Bountyknight
Member
looks nice dude very nice
- Status
- Not open for further replies.
Similar threads
- Replies
- 2
- Views
- 682
- Replies
- 3
- Views
- 1,086
- Replies
- 3
- Views
- 709
- Replies
- 5
- Views
- 2,314


