Goblin Slayer, MK I

Status
Not open for further replies.
Okay, it's been a while, but a lot of stuff just came out of nowhere the last couple of weeks that kinda got me distracted. Now that you're up to speed, let's see the progress:

I finished both gauntlets and added some battledamage on both. Gonna add some 2mm Eva to get more detail and make it look nicer, rather than have it look plane.
IMG_20200604_201232124.jpg IMG_20200604_201226495.jpg IMG_20200604_201256492.jpg IMG_20200604_201410088.jpg IMG_20200604_201402975.jpg received_756381948435283.jpeg

Started working on the back. Probably gonna add 2mm on that and the chest piece too.
IMG_20200605_223911719.jpg

Gonna wait on the connecting strap until I get the under cloth all squared away. I managed to get away with it for the gauntlets because they're a bit more easy to adjust. Gotta learn how to sew real quick.
 
Last edited:
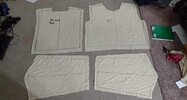
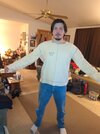
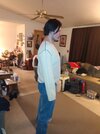
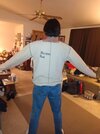
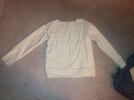
So this is what I managed to produce for my "Prototype #1."
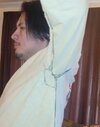
So it next prototype needs to have the hole, for the head, be a bit bigger; heard some snapping of threads. Need to figure out how to make the collar. Not to mention I need to make it a bit taller so it can be seen from under the armor. But all in all..not a...bad first attempt, but could be better. Just need to focus on the head, collar and make it taller.
24.jpg 25.jpg 26.jpg Goblin_Slayer.jpg
 
I think I might need to make a custom shirt that is lightweight, breathable, but also baggy to give off that look.
Goblin_Slayer_Character_%28Manga%29.png

I've felt this freelift shirt at Dick's Sporting Goods and it had all my requirements: lightweight, breathable, comfy. The reason I didn't get it is because they had this design on the arms that would show it. Thinking about seeing if Walmart might have a shirt if I already don't. I remember having one like that long ago.
 
Sorry I haven't posted anything about any updates on the suite yet. Been watching videos on how to get this one measurement done. It's a male bodice pattern and what I've been trying to figure out is why the shoulder piece is about the same size as the chest, rather than having it be less so like every other bodice pattern.
Shirt.png shirt 02.png

Am I doing it wrong? Or am I measuring incorrectly? I'm measuring it based off of this.
body.png body.jpg
 
Sorry I haven't posted anything about any updates on the suite yet. Been watching videos on how to get this one measurement done. It's a male bodice pattern and what I've been trying to figure out is why the shoulder piece is about the same size as the chest, rather than having it be less so like every other bodice pattern.
View attachment 294890 View attachment 294891

Am I doing it wrong? Or am I measuring incorrectly? I'm measuring it based off of this.
View attachment 294892 View attachment 294893

I've made at least one bodice pattern and so far, from what I can tell, most shirt seams go around the armpit.
 
Okay, so I made the "#01 Prototype" and that didn't work out so good.

Firstly on "#01" the chest was a bit too tight. Good for when I stood straight and when I breathed, but was tight when I lurched my arms forward in "#03."

Second on "#02" the Shoulder pieces are too long. Hanging right over, if not further, than the shoulders themselves. Need to shorten them.
08.jpg 09.jpg

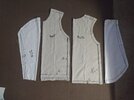
Third, the draft needs to be redone. Here it is cut out and cut onto fabric.
11.jpg 10.jpg

And here's the fabric when they're held together with pins. Yeah, looks like a giant square, huh?
07.jpg

Luckily I fixed these problems in my newest "#02 Prototype."
01.png 02.jpg 03.jpg 05.jpg

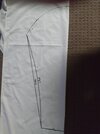
Here's a bit of a detailed diagram of what I did to improve this prototype.

This is for the "Neck" and "Shoulder Slope."

Edit:
I forgot to mention!!! When you measure your neck ("X")

- "X" / 2 = "Y"
*If doing half bodice, continue to next
step*

- "Y" / 2 = Target Measurement.
01 writting.png 02.jpg

And this is for the "Armhole" and "Chest." Also, if you're wondering why I measured the armhole from around the shoulder area, but labeled it on the diagram to the "Top" of the highest point, my only answer is just to "See where this goes, that's what they said in the video."
02 writting.png 03.jpg

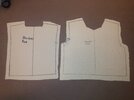
And here are the fabric pieces cut out. I think that's a little better than before. Though I DO think this is a bit too big for my chest. I might shrink the sides down about .5cm on each, since that would mean I took about 1cm on a whole.
04.jpg 06.jpg 06.png

But yeah, that's my progress so far. I think I'm making some improvement and am hoping these diagrams work for ya.^^
 
Last edited:
So I tested out a theory and wanted to try it out. And so far, I FEEL like I gotta share it:

If any of you wanted to make some belts on your cosplay, but have "little-to-no" experience with leather working or funds, than this is a cheap solution. With some 5mm foam, wool knitting yarn, and a thick needle, you can make something that looks like a belt. And if your skilled enough, maybe something else that is supposed to be made of leather. To make the holes, I just use a fork with 3 points. Gonna use this on my Goblin Slayer armor after more testing. They never teach you things like this in the books, and very little are shown on YouTube.
View attachment 287842
nice job on the belt i like the idea. great job
 
Sorry I haven't updated in a while, life has been popping in and I had to shift priorities a couple times to get them out of the way. Might be like this for maybe a couple more months. Will update this thread once everything is settled enough to work on the suite once more.
 
Got some work done on the shirt and cut out the pieces from the big paper boards unto some bed fabric.
received_197185188662780.jpeg

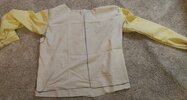
After that, did some "Loose Stitching" and made another piece with sleeves this time. Worked out pretty well.
IMG_20201213_225530607_BURST000_COVER_TOP.jpg IMG_20201213_225537244.jpg IMG_20201213_225542217.jpg IMG_20201213_225547136.jpg

The bottom of the front arm-hole seemed to be a bit too large. The bottom of the sleeves came up to the space that was added for the seam-allowence.
IMG_20201214_105914122.jpg

Sewed it to the line on the other side, but that only tightened the chest a bit more. So I marked where the sleeve met and took it apart. Gonna make a "Front Block #4" out of the adjustments and marking of "Front Block #3."
IMG_20201214_122051196.jpg
 
Tested out the new pattern and....It's fine....I guess. Still not sure how to fix the Armpit holes, but that's not what I'm focused on.

GB 04.jpg GB 01.jpg GB 03.jpg

I'm more focused on the tightness on the lats right here. Could be because the fabric is just real stiff and not flexible at all. But with this done, I'm gonna dismantle it and see what the pattern loos like form onto new fabric.
GB 02.jpg
 
Okay, so block #3 pattern was going great until not; shortened the shoulder pieces to have the edges hanging off my shoulders like a coat, then accidentally lowered the armpit again, shoulder pieces were...alright, so I'm not gonna change those. Spent the whole time thinking "Wait! I can fix this!!" Gonna have to start from scratch again and redo the measurements. Either that, or do another technique that had me just copying the desired shirt onto the fabric. See how that goes. But right now, I just need to take a break for a bit.
received_1346840162323122~2.jpeg IMG_20201226_193746318.jpg IMG_20201226_193811666.jpg
 
Had more time to do some research and came across something on YouTube that helped out quite a bit:


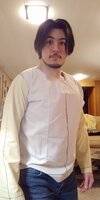
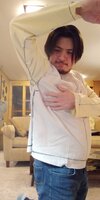
And with this, I've managed to make an 8th prototype.
0001.jpg 002.jpg 03.jpg 004.jpg

It's a little tight around the arms, so I'll have to make it a bit bigger. It's not much, but it's a step in the right direction.
 
Last edited:
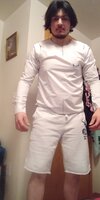
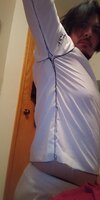
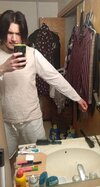
Just made the next prototype. Arms are now....FIXED! They're loose, they're comfy, THEY FIT! Old line had a curve, that's why it became tighter on the arm. I just straightened the two points. Added 1/8" on the sides to be more roomy, some odd reason the added 1" did not match up on the added 1" on the front. Will experiment with that more. Chest is a bit tight, but that's just the fabric.
GS 05.jpg GS 06.jpg GS 07.jpg
 
Last edited:
Just made the next prototype. Arms are now....FIXED! They're loose, they're comfy, THEY FIT! Old line had a curve, that's why it became tighter on the arm. I just straightened the two points. Added 1/8" on the sides to be more roomy, some odd reason the added 1" did not match up on the added 1" on the front. Will experiment with that more. Chest is a bit tight, but that's just the fabric.
View attachment 302466 View attachment 302467 View attachment 302468
Yeah, making your own top for a costume can be absolute hell! When I had to make mine for my last costume, I literately had to reverse engineer the process by making my own pattern in Blender and then had to make adjustments in Inkscape according to the measurements I made...
...on spandex.

You got it easy!
 
Status
Not open for further replies.
Back
Top