Goblin Slayer, MK I

Status
Not open for further replies.
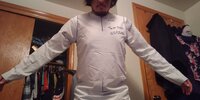
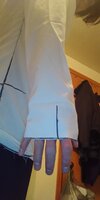
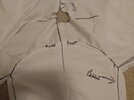
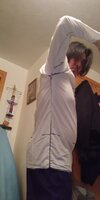
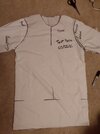
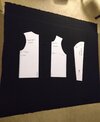
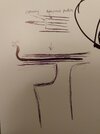
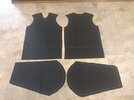
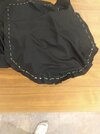
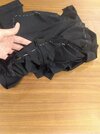
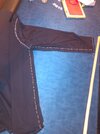
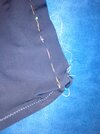
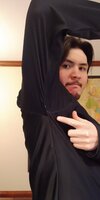
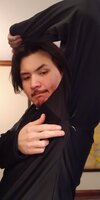
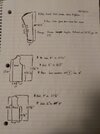
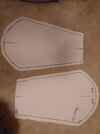
Okay, so made the latest test piece. As you can see, I upgraded the ENTIRE template from my drawn plans. I know they don't look like much, but they were VERY helpful.
IMG_20210222_022828343.jpg IMG_20210222_023020225.jpg IMG_20210222_023002671.jpg IMG_20210222_023109080.jpg

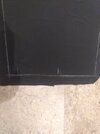
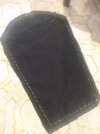
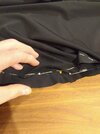
What you don't see is that when I added length on the sides of the torso and armhole by 1/4", I had to add 1" on the circular part on the FRONT side of the "Half-Shoulder" piece. Worked like a charm. Didn't hurt the fact either when I only cut ONE original test piece and added more from the difference to make the second template.
IMG_20210221_142539561.jpg IMG_20210221_154631259.jpg IMG_20210222_023039970.jpg IMG_20210222_022752443.jpg

Still some tightening on the lats, but THAT'S OKAY!! This material isn't known for stretching. If it was a cotton-type material, it would feel much more comfortable. Not to mention, the flattened size of my plane shirt matches up with this test piece. So, all is good. Gonna test this with some breathable, flexible, fabric. I'm thinking cotton, since it's the most common stretchy fabric to my general knowledge.
 
Last edited:
Just got some fabric from Joann's and the material I'm using is something by the name of "Cosplay by Yaya Han. YH 4-way Matte Solid Black." It's 75% Nylon and 25% Spandex. Only washable by hand in cold water. Just got done washing it and am now just waiting for it to dry, but odds are that the cutting and sewing phase will not happen today. This material requires it to be "Line Dried" and I think that will take all day. Updates will come soon.
 
Just got some fabric from Joann's and the material I'm using is something by the name of "Cosplay by Yaya Han. YH 4-way Matte Solid Black." It's 75% Nylon and 25% Spandex. Only washable by hand in cold water. Just got done washing it and am now just waiting for it to dry, but odds are that the cutting and sewing phase will not happen today. This material requires it to be "Line Dried" and I think that will take all day. Updates will come soon.
you gonna wear this get up to the bristol ren fair by chance?
 
Okay, after washing I hung it to dry, but that wasn't fast enough, so I used my Grandfather's fireplace to speed up the process. don't worry, I set the fabric a safe distance where the fabric would get warm, but not enough to catch fire.
GS 12.jpg

Managed to get 2yrds worth of this fabric. Which is lucky for me because this was ALL they had for this material.
GS 13.jpg

Well.....time to do this with a water soluble pencil. This is nerve racking.
 
Okay, so the water soluble pencil did not work. It managed to mark the fabric, yes, but very lightly. Almost non-noticeable. Going to go back and get a marker instead, hopefully that should help.
 
Last edited:
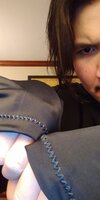
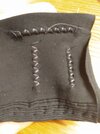
So I did some practice runs before I went fully in. Did several tests on some small scraps and found that the "Straight Stitch" does not work for materials of a more stretchy nature. Instead, I used this "Zig-Zag" pattern that went over the area several times. This option still retained the materials stretchiness while simultaneously having the stiches hold the fabric together.
GS 14.jpg

Bottom left is the best option.

Thread tension: "1"

Stitch length: "2.5"

Stitch Width: "5.0"

I also went to Joan's and got some Chalk Wheel Kit for about... $14.99.
GS 15.jpg

Will cut the cloth out of the patterns and sewn together this weekend.
 
Last edited:
Had more time to do some research and came across something on YouTube that helped out quite a bit:


And with this, I've managed to make an 8th prototype.
View attachment 302462 View attachment 302463 View attachment 302464 View attachment 302465

It's a little tight around the arms, so I'll have to make it a bit bigger. It's not much, but it's a step in the right direction.
Reading through your thread and this video was pretty interesting, thanks for sharing, your build is looking great!
 
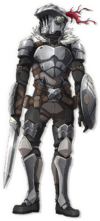
I just had an idea to get Goblin Slayer's chaps. First of all, look at them. They're clearly chaps.
Goblin_Slayer_Full_Body.png

Secondly, I should've used the "duct-tape dummy" method and simply DREW the chaps on to my size, but I'll move onto that after this fails.

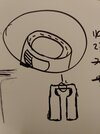
Thirdly, this is how I'll do it. After giving the width about 1/4" extra space, I simply make a smaller rectangle and sew it onto the inside, but leaving the ends open for shoe laces.
IMG_20210304_210341062.jpg

Think of this as a chap version of some sweatpants after I adjust the comfort of the outer chaps, mark, and place the inner pouch accordingly.
IMG_20210304_211435076.jpg
 
I just had an idea to get Goblin Slayer's chaps. First of all, look at them. They're clearly chaps.
View attachment 303665

Secondly, I should've used the "duct-tape dummy" method and simply DREW the chaps on to my size, but I'll move onto that after this fails.

Thirdly, this is how I'll do it. After giving the width about 1/4" extra space, I simply make a smaller rectangle and sew it onto the inside, but leaving the ends open for shoe laces.
View attachment 303666

Think of this as a chap version of some sweatpants after I adjust the comfort of the outer chaps, mark, and place the inner pouch accordingly.
View attachment 303669
Yeah you're right i never noticed that before. It looks likes hes wearing a pair of brown pants then a pair of Black chaps on top. Yikes! thats going to be a hot one. The shirt you made will tie in nicely with the chaps.
Do you have ideas for shoes yet?
 
Yeah you're right i never noticed that before. It looks likes hes wearing a pair of brown pants then a pair of Black chaps on top. Yikes! thats going to be a hot one. The shirt you made will tie in nicely with the chaps.
Do you have ideas for shoes yet?
Maybe some boots or some plain dress shoes with some comfort soles in them. I mean, they'll be covered by the armor. So anything as long as they're not TOO detailed, like sneakers.
 
Okay, MAJOR update upon this shirt.
First off, I got the pieces chalked up and cut out. The chalk turns out to work quite well; doesn't stain on the cloths and tends to disappear quite easily with a few rubs. Though it IS a bit difficult to use when it would move the fabric by dragging it a bit. Doing it in term I like to call "Chicken Scratch" seems to work best to lessen the drag.

GS 16.jpg GS 17.jpg


Before sewing, I had trouble trying to line the chalk sides together. Spent a good 30min just struggling to get the pins in JUST right. I then had an idea; If I "Loose stitched" the chalked lines, I see it where it is on the other side!
GS 19.jpg GS 20.jpg GS 21.jpg GS 30.jpg GS 31.jpg

This worked like a treat! I'm surprised this was told in some of the videos I watched.
GS 27.jpg

The Shoulder was a TRIAL: Thick fabric. No light-table. Chalk was thin.
GS 22.jpg GS 23.jpg

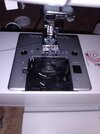
After the whole Saturday of getting this done, I called it a night. Then on Sunday, when I started the machine, some thread messed with the mechanics on the lower pad. Fixed it in an hour.
GS 33.jpg

Then I began sewing the two-halves together. And I had to deal with some sizing errors between the two by shortening one side.
GS 34.jpg GS 35.jpg

It was here that I realized that I made a mistake: I forgot to sew the neckline and doomed ANY CHANCE of sewing it after getting the shoulders finished the day before. I COULD have probably got away with it, but the space between needle and machine was so small, that it would bunch up and stretch when I needed to move it. So I decided to call it good and cut off the extra.
GS 32.jpg

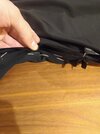
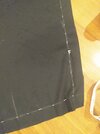
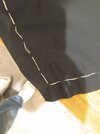
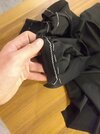
After that, the shirt was done. Some things I would like to improve and understand a bit more is the armholes. As you can see in the pics, there IS about an inch space in between. not sure how this happened or why, but its there. On the edges of the arms and bottom of the shirt, you can see that when I sewed them I accidently sewed one of them stitching-side up on the inside.
GS 36.jpg GS 37.jpg GS 38.jpg GS 40.jpg GS 41.jpg

But I'm happy with this. It's the first shirt I have EVER created and, like I thought before, this material fit perfectly since bedsheets don't have the properties to stretch. Now I'm going to work on the chaps.
 
Last edited:
This what you need to do with the armholes. I had the same issue with my suit. Turn them inside out. Suit and sleeves. Next, you line the sleeves up to the hole of the shirt and sew them up the side of the shirt. Then sew the rest the sleeve.
 
This what you need to do with the armholes. I had the same issue with my suit. Turn them inside out. Suit and sleeves. Next, you line the sleeves up to the hole of the shirt and sew them up the side of the shirt. Then sew the rest the sleeve.
Like, attach the ends first and go from there? Or do you mean that after this, turn the entire shirt inside out, attach the misaligned edges, and resew the new connection on the entire shoulder?
 
Turn the shirt and sleeves inside out first. Then line up the edges of the shirt and the sleeves and sew up the side of the shirt to the end of the sleeves. Then sew the shoulders to the shirt. Here are some youtube videos to get the idea.


Turn the shirt and sleeves inside out first. Then line up the edges of the shirt and the sleeves and sew up the side of the shirt to the end of the sleeves. Then sew the shoulders to the shirt. Here are some youtube videos to get the idea.


First few caused me to have some nervous sweat's, but the second one made it more simple to understand. Still nervous to try this, but it will help. Thank you!^^
 
Last edited:
Status
Not open for further replies.
Back
Top