Halo The TV Series Master Chief full build

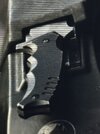
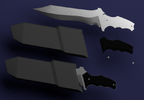
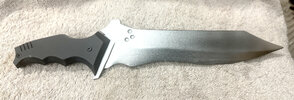
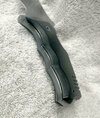
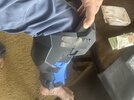
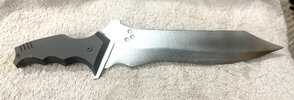
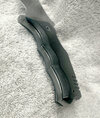
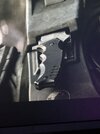
his combat knife is now done. We were only able to find good images for the knife handle from season 2 of the show so we took some creative license creating the blade profile using other profiles from the Halo universe. the 3 depressions are for magnets to hold the knife in a sheath mounted inside the front armor shoulder piece like on the show. I wont know how viable that really is until I get the armor made so we'll have to see about that
 

Attachments

  • IMG_2802.jpeg
    IMG_2802.jpeg
    1.1 MB · Views: 67
  • 0521 halo combat 1.png
    0521 halo combat 1.png
    334.6 KB · Views: 66
  • MC knife2.jpg
    MC knife2.jpg
    5.1 MB · Views: 65
  • MC knife.jpg
    MC knife.jpg
    3.5 MB · Views: 64
  • MC knife1.jpg
    MC knife1.jpg
    3.8 MB · Views: 65
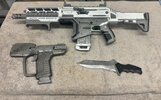
Ok, the Master Chief's suite of weapons is complete ... rifle, pistol & combat knife. for anyone interested in the knife shown in the previous post I have one completed knife & the raw e3D printed kits available in my Etsy shop: https://www.etsy.com/shop/DarkMatterSciFiProps. And if you happen to be a fan of FireFly you'll definitely want to check out my shop ...
Since my undersuit is still be sewed by my brother's wife I'm going to start work on either the helmet or boots since neither of those require a completed undersuit to fit correctly. I have the boots I'm going to be using and I've already printed a test ring of the helmet to ensure its scaled at the right size to fit me. I don't have quite enough filament at the moment to do the helmet since with my new PRUSA XL I can print it as one piece so I'll probably start with the boots.
I've gotten side tracked with 2 other cosplay outfits: a complete Jayne Cobb & a complete Cooper Howard (The Ghoul) while waiting for my undersuit to be done. Both build threads can be found on The RPF forum:
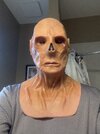
Jayne Cobb is complete except for a leather sheath for his knife and the Ghoul costume is progressing nicely. the real challenge for the Ghoul will be constructing the full silicon mask which I've never done and completing a comprehensive 219 yr old weathering of the costume. I am a little concerned that I will not complete MC in time for MegaCon 2025 (Feb) & I wanted to be sure I had at least one new cosplay outfit. I also need to do a relatively serious upgrade for my Dalek which absolutely must be done in time for MegaCon so I need to leave time to work on that as well.
Luckily since I'm retired and have no life I'm able to be in the shop pretty much every day which is important given how slow I work ...
 

Attachments

  • MC weapons.jpg
    MC weapons.jpg
    1.3 MB · Views: 65
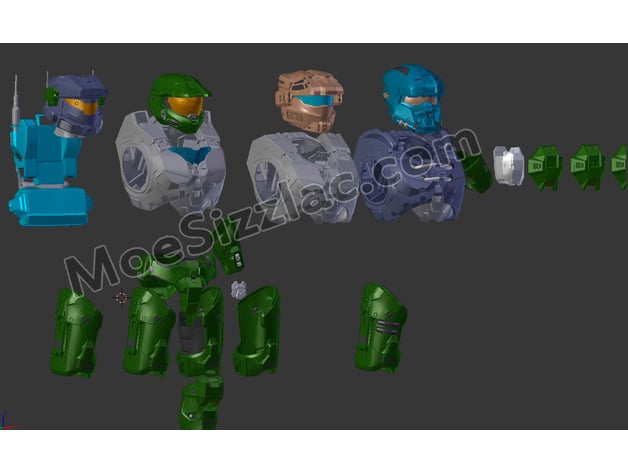
So I've decided to go with the GA base armor - I already have their 3D model for the helmet. I decided to work on the boots first since I don't need the under suit sized for those. I printed out one side but I didn't like the fact that the boots were basically a shell that would fit over whatever you were wearing and I couldn't come up with a good concept to make that work where the boots would stay in place?. I then remembered another member here whose boot files had soles on them so you could mount your sneakers inside them. however I really like the detail in the GA files so I wanted to find a way to still use them.

I ended up being able to add soles to the heel, toe cap & mid section via PRUSA slicer. I'm also going to do what i did for my mando gauntlets and attach some elastic banding to the inside of the toe cap/mid section interface which should not only secure them but allow for slight flexing as I walk ... that's the cunning plan anyway.

I'm currently printing the left forearm piece since that also will not relie on my under suit for correct sizing and as soon as that 13 hr print is done I'll print my modified boot pieces and we'll see how clever I am ... lol.

BTW, I ended up printing my helmet too big at 104% so if anyone is looking for a raw 3D printed helmet at that size (no visor) I'd be happy to sell it to recover the cost of my filament, just PM me.
 
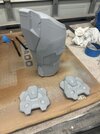
First pieces of the base armor are now complete (left forearm & both hand plates) and ready to paint. In order to ensure a cohesive look I'll be waiting until all pieces are done and paint everything at one time ... only about 40 more pieces to go ... lol. I ended up having to sand down the front lip about 1/16" in order to fit my hand through so it could be one piece. Therefore I'll be printing the right forearm at 101% which should eliminate the problem without any noticeable sizing difference between the bicep & forearm
Given how the boot armor is fabricated I abandoned my initial cunning plan of using boots inside the armor since will be almost impossible to actually put on once the boot armor is assembled. As others have done I'm going with a pair of Sketcher's slip ons. I don't want a repeat for how difficult my Mando boots are to don because I decided to make them exactly how they did on the show - leather fabricated covers over boots, instead of just buying the scratch made ones from an Etsy seller ...
 

Attachments

  • IMG_3106.jpeg
    IMG_3106.jpeg
    2.6 MB · Views: 43
Well, it may be time to pivot ....
at least isn't that what the corporate suits all say after realizing they've made a huge blunder that everyone else saw so they can try and look like they know what they are doing?
Luckily I don't think I've made a major mistake yet ... but I do think I'm going to make a big change. I was always planning to make the boots out of something* like Duracast 57 which is a flexible resin so that I could more easily walk in my boots. Then I got to thinking over the last day or so . Why not make the entire armors from that instead of just rigid PLA? That would have to be more comfortable. Then just today a video dropped from GA where they showcased their new flexible Helldivers armor made from a combination of Durcast 65 (more rigid) and Duracast 57 and it came out looking amazing and was paintable without issue.
Apparently great minds DO think alike ... lol.
While there will be a lot more work and I've never done any mold making or slush casting the end result should be an order of magnitude more comfortable to wear and durable. Nothing changes in the short term as I still need to 3D print all the pieces to make molds from and that will give me some time to practice mold making and slush casting.
The one area I don't have figured out yet in this cunning plan is how to mold and then cast something like the gauntlets which have been printed as a single hollow piece. For a lot of the armor it has natural segmented pieces which I can mold and cast separately and then join with straps and buckles but the single piece hollow forms have me stumped.
I found a YT video where someone had created single piece gauntlets molded out of flexible urethane rubber but he didn't go into how he did it, the video was only about how he learned how to paint flexible urethane rubber so if anyone out there can point me in the right direction I would greatly appreciate it, thx!
 
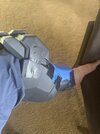
Since the undersuit I'm fabricating will not have anything directly to do with armor at the knee and below I decided to go ahead and print that out to ensure a good fit. It was a little awkward taking pics but when I taped it all together it not only can be put on as a single piece but it fits rather nicely. I'm 6' 190 lbs and this was printed at 100% so so far it appears the armor was created around a 6' person more or less ...
Once I return from Alaska I'll probably be taking a short strategic pause while I go back to finish a couple of upgrades I have to get done on my Dalek prior to MegaCon 2025 and I don't want to wait until the last minute like last year. Also, I have a feeling with my cunning plan pivot to casting the armor with semi rigid resin I willl not be able to get done in time for MegaCon 2025 so if true there is no great rush... we'll see how long the Dalek upgrades take to determine the real schedule
 

Attachments

  • IMG_3114.jpeg
    IMG_3114.jpeg
    2 MB · Views: 44
  • IMG_3110.jpeg
    IMG_3110.jpeg
    2.3 MB · Views: 42
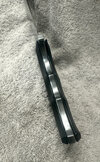
got a couple of PMs about the combat knife I showed back in June. Here's some photos showing the completed knife as well as reference images used when making the 3D model. The 3 holes on the right side of the blade near the handle are for magnets so the knife can stay secure in the shoulder strap section of the armor like in the show. I have one completed knife as well as raw 3D printed kits for sale in my Etsy shop: DarkMatterSciFiProps - Etsy for anyone who may be interested
 

Attachments

  • MC knife2.jpg
    MC knife2.jpg
    5.1 MB · Views: 37
  • MC knife3.jpg
    MC knife3.jpg
    3.5 MB · Views: 39
  • MC knife1.jpg
    MC knife1.jpg
    3.8 MB · Views: 42
  • IMG_2801.jpeg
    IMG_2801.jpeg
    613.5 KB · Views: 36
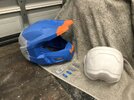
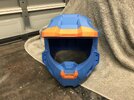
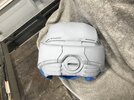
Well my mistake can be someone else's gain. I printed my helmet at the wrong scale so I'm looking to sell it. I also printed the visor buck before realizing what I did so I'll include that as well. The helmet is printed using the GA files in 2 pieces in PLA and the visor buck is printed in PETG. It's printed at 103%, the bottom opening is 9" x 7.25". The front is in 2 colors because I ran out of blue just before it finished but it is one piece.
$65 shipped to you
 

Attachments

  • IMG_0141.jpeg
    IMG_0141.jpeg
    2.9 MB · Views: 26
  • IMG_0142.jpeg
    IMG_0142.jpeg
    2.7 MB · Views: 25
  • IMG_0143.jpeg
    IMG_0143.jpeg
    2.5 MB · Views: 28
Well my mistake can be someone else's gain. I printed my helmet at the wrong scale so I'm looking to sell it. I also printed the visor buck before realizing what I did so I'll include that as well. The helmet is printed using the GA files in 2 pieces in PLA and the visor buck is printed in PETG. It's printed at 103%, the bottom opening is 9" x 7.25". The front is in 2 colors because I ran out of blue just before it finished but it is one piece.
$65 shipped to you
It would be worth posting this in the Marketplace here on the forums or on the discord server

Slush casting is a lot more work! But I am excited to see how your armour comes out, as I haven’t seen many folks do it because of the big time and financial investment.
 
It would be worth posting this in the Marketplace here on the forums or on the discord server

Slush casting is a lot more work! But I am excited to see how your armour comes out, as I haven’t seen many folks do it because of the big time and financial investment.
Thx for the suggestion, I'll get it posted there. As I was thinking about this while printing the first few pieces I stumbled onto a video where someone had cast a gauntlet out of a flexible resin and it turned out quite nice. That got me thinking about this and then when I saw the recent GA video where they are also now casting the helldiver armor they sell out of a semi flexible resin that is paintable that sealed the deal for me. Time and money are really not an issue for me but wearability is. I have a full Mando outfit and even that is tough for me to wear for more than about 3-4 hrs straight, I'm not exactly 25 years old ...lol. Also, because of the upgrades to my Dalek that I have to complete prior to MegaCon this coming February it became obvious I could not get done in time anyway so I decided to take a longer approach. I also fell for the Fallout TV show and decided a had to have a Ghoul costume so I jumped int9 that head first since I can complete that in time for MegaCon as I always like to have one new outfit each year. Except for some weathering the costume is complete except for the full face silicon mask. That learning curve should also help with this armor casting as well. That's the cunning plan anyway ...
 
This thread is more than 3 months old.

Your message may be considered spam for the following reasons:

  1. This thread hasn't been active in some time. A new post in this thread might not contribute constructively to this discussion after so long.
If you wish to reply despite these issues, check the box below before replying.
Be aware that malicious compliance may result in more severe penalties.
Back
Top