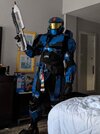
SavageCaliber sorry this took so long to get around to.
Here's a run down of how I have everything currently rigged up. I wouldn't consider this to be optimum and there are a lot of things I hope to improve/remove/change. I'll try to mention things I don't like as I go.
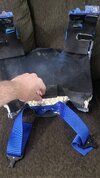
Lower Body:
Starting at the very top, I wear this H-harness, which has been modified to include an additional set of 1" buckles on the front and another set on the back. The back has long straps that have been sewn in a cross (X) pattern for added strength. I have also used quick rivets we possible, because I don't necessarily trust sewing. I don't use the lower set of buckles on the front anymore for armor, I leave them for attaching weapons.
View attachment 358193View attachment 358195
Thighs and Calves:
The first step in the chain of connections below that is the thigh armor. As mentioned in my previous post, there is a 3-point connection at the top of each thigh armor. 2 of the connections go to the h-harness and one runs down to the calf armor. Since this spot is potentially taking a lot of force, I use a 1/4"-20 bolt to tie everything together. This is great for strength, but not great if the nut comes off while you're walking around C2E2 and you can't find it, and it's not great when you're walking in a mile-long parade in Atlanta and have the end of the bolt digging into your hip. Because of those two situations, I have flipped the bolt so that the head is on the inside and I believe they are both locknuts now.
Of note, I have cut out the inner thigh section due to it being a bit too tight (I don't skip leg day) and due to the rubbing. This makes it a bit easier to put on as well, since I can slide it over either my lower calf or at the knees.
View attachment 358196View attachment 358197
The calf strap runs all the way down the outside of my leg to the top of the calf armor, where it buckles in. As mentioned previously, I don't feel that it is the best route to have such a long strap the upper thigh to the calf armor, and I may remove the long strap and make it a shorter connection from lower thigh to upper calf, plus maybe another strap on the inside of the legs to prevent rotation. Ideally I will eventually remake the calf armor to be light enough to just strap directly to my calves without needing to be held up though.
View attachment 358198View attachment 358199
When putting the armor on, I find that it's easiest to buckle the thigh and calf armor together (as shown in the above photo) and then slip both pieces on at the same time. For removing the armor, I usually unclip the calf armor and remove it first, then remove the thigh armor.
Once the armor is over my leg, the thigh armor is clipped to the h-harness. The long straps in the back wrap around to clip to the short piece and the long piece from the thigh armor goes up to the front of the h-harness. The long back straps are helpful/critical for putting it on yourself (as I always do #foreveralone), but the front straps can go from either direction. I have the front and back straps different so that I don't get the lengths mixed up.
View attachment 358200View attachment 358201
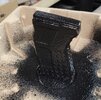
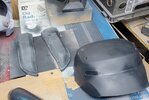
Boots:
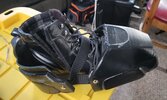
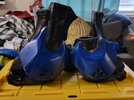
For the boots, I originally tried gluing the pieces onto a set of crocs, but they quickly started falling apart while walking around at C2E2, and I wasn't really a fan. My current solution which I deem "meh, good enough" is that I have the pieces held together with elastic in a way that kind of clamps them to a pair of boots, with a string tied to the back and a strap running under the boot as well. Honestly I would say that the boots are the "weakest" part of my armor, aesthetically, and are where I want/need to improve the most, but I always have a hard time caring about the lower body section of any of my Cosplays.
View attachment 358202View attachment 358203
Belt:
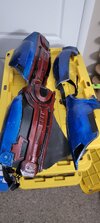
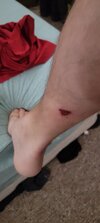
The belt used to tie into the H-harness before I had no way to tighten it, but after trimming away a few inches from each side to create a gap between the cod piece and butt plate, I was able to add a set of tactical belt buckles to each side and use 2" nylon webbing to allow it to be tightened and stay up on it's own. I put the belt on after the thigh and calf armor so that the nylon straps run under it. I'm missing some of the extras for the belt from the GA files, I printed them but didn't have time to finish them and it turned into a "I'll get back to them" task that I never came back to. I also recommend being ready to add padding to the top of the butt plate. I had some pretty uncomfortable rub marks left on my back from the corners when I wore this to DragonCon, so I added a sheet of EVA foam and that dramatically helped with comfort.
View attachment 358204View attachment 358205View attachment 358206
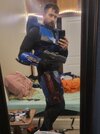
Upper Body:
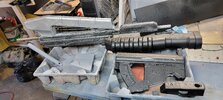
Arms:
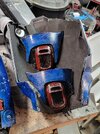
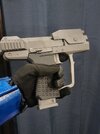
For the forearms, I have a strap up near the elbow that holds the upper part against my arm, and then the thin forearm piece (I think it's the one you mentioned) is "floating" on two strips of elastic, so it can be pushed out a bit while my hand slides through. I have the upper side firmly attached with Chicago screws, but so far have been just redoing the hot glue on the lower piece. I need to get a better connection on that end. I probably also need to adjust my padding a bit for a more snug fit, since the forearms have a tendency to rotate a bit (but not as bad as the calf armor).
On the piece shown, the top strap is just hot glued on, I think the other one has Chicago screws holding it (this one will eventually also use Chicago screws, I just tend to not upgrade things until they break).
View attachment 358208View attachment 358209
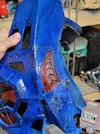
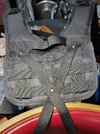
The bicep and tricep plates are held together like an armband with elastic, and the elastic is attached with quick rivets. As mentioned in the previous post, I hate these pieces. I probably need to reprint them shorter or make them out of foam, but they cause a major amount of pinching and mobility limitations. I think originally I had these buckled to the pauldrons, but the elastic is "good enough" at keeping them up on the arms, though they do still slip down a bit. Like I said though, I usually leave these off unless it's for a photo shoot. In the future, I might also experiment with using snaps for these. You'll also notice that I'm missing one of the pieces, I found that it only added to the pinching and the scale wasn't right, so I just got rid of it entirely.
View attachment 358210View attachment 358211
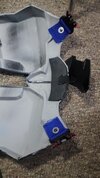
Chest/Back:
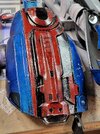
Everything for the torso ties into the back armor. The chest plate has a set of 1" buckles at the top that clips it to the shoulder straps and a set of 2" buckles for the kidney straps. The GA files have a printed piece for the kidney straps, but I found that having the entire assembly be rigid was uncomfortable, so I cut the kidney straps out and replaced them with the nylon straps to allow for the torso to be tightened against my body.
I attached the kidney straps to the very back of the back plate instead of the sides so that when I tighten it, there aren't forces pulling the armor into a tighter curve, just pulling the back plate forward.
An important note about these images: the shoulder straps need work. One of the upper chest buckles separated while it was being worn last time (was one of the remaining hot glue connections) so it will soon be fixed using a Chicago screw. One of the shoulder straps is also cracked, so I'm probably going to add some metal staples to reinforce it. The padding is always being modified.
View attachment 358212View attachment 358213View attachment 358214
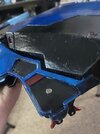
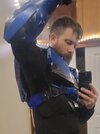
Shoulders (Pauldrons):
Both pauldrons clip to the shoulder straps. The large pauldron uses a 1" buckle at the center and then a smaller clip towards the back (to keep it from moving around as much), while the smaller pauldron just has the smaller clip (I will eventually replace this with a 1" buckle, or more likely just another of the larger pauldrons). Each pauldron has an elastic strap with a clip that goes around the arm to hold it against the arm.
I have a rather long bolt that runs through the shoulder straps since they are too thick for Chicago screws (or at least the ones I have). That bolt holds the straps for the chest armor clips and the 1" pauldron clips (I have one on each side because I accidentally added one to the smaller pauldron side).
The shoulders are an area I can probably improve on. I would like to tie the pauldrons in to the H-harness instead of the back armor, but that would be difficult to do when putting on the armor myself. Right now I clip the chest plate and the pauldrons to the back armor (leaving the kidney straps undone) and put the entire torso on at once, kind of like a set of football pads. Then I clip the kidney straps in. When removing the armor, I will reach under the chest plate and unclip the chest to make it easier to remove.
View attachment 358215View attachment 358217
View attachment 358216View attachment 358218
Hope this helps. Let me know if you have any other questions about the GA Mark IV.