You are using an out of date browser. It may not display this or other websites correctly.
You should upgrade or use an alternative browser.
You should upgrade or use an alternative browser.
Mark VI high-def foam armor WIP
- Thread starter Gamemaster
- Start date
- Status
- Not open for further replies.
Gamemaster
Member
hey man this is amazing bro great idear to use foam i just wanna ask did you use the low def pepakura files or did you change them abit the pieces you cut out look different to the files so im just askin what did you do to it
thanks
ron
I considered the high-def files first, but when I saw the sheer number of tiny parts I nearly puked on my keyboard. I thought to myself "Yuck, I'm not cutting out all those tiny little parts from foam and trying to peice them together"
So I mainly used low-def files, hence the thread title, but then I looked at the pieces and compared them to the game accurate photos and said "OMG WTF that looks soooo vanilla".
So I also printed the detail parts from HD files, matching the dimensions in the pepa-designer first. For some parts, like the cod and handplates I only used the high-def file. And finally, for the details that the pep files missed I custom made my own shapes to match and burned the detail in, or cut it from 2mm foam and glued it on. At one point I was actually holding paper up to my monitor and tracing out certain shapes from the reference photos. I have a perfectionist problem though, I'm sure there's a 12 step help group for me somewhere.
Gamemaster
Member
what do you use to make all the seams fit so nicely?
Mad Skillz!
Seriously,
I use a hotknife for the cut-outs so I get nice edges, then I use high temp hotglue and press hard, wait 30 seconds and pick any excess glue off with my talon-like finger nails. Caw-caw
It also helps to try and only put seams where there will be details or definition lines to hide them.
Gamemaster
Member
Thank you. I try to make Jorge shin with Eva mats and small hot glue gun and it didn't come out right so I will try again with hot knife an better glue gun and btw your suit is awesome and I hope mine will look almost as good as yours.
For the shins and boots I used a heat gun to shape the rounded parts before I glued them, less stress on the seams.
*UPDATE*
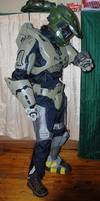
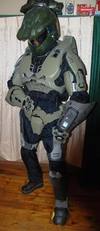
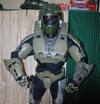
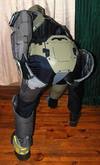
Finished the right thigh, only took about 5 hours and now both pieces are off to the paintshop. Here are some pics so far, and yes, that's the Rubie helmet for now until I finish the foam one.
View from the back
Strike a pose
I think I dropped something
I'm huge! Spartan Intimidator 316 is on duty
Is that HQ calling?
Sure is, looks like a damsel in distress
But Sarge, I'm still missing parts
Oh well, off I go
Attachments
-
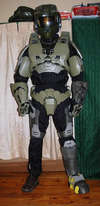 DSC_0007.jpg45.1 KB · Views: 204
 -
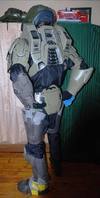 DSC_0020.jpg34.9 KB · Views: 199
 -
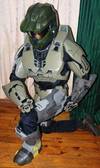 DSC_0041.jpg48.6 KB · Views: 200
 -
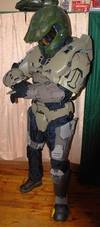 DSC_0038.jpg59.1 KB · Views: 192
 -
 DSC_0029.jpg40.7 KB · Views: 190
 -
 DSC_0035.jpg32.7 KB · Views: 193
 -
 DSC_0009.jpg45.3 KB · Views: 199
 -
 DSC_0045.jpg66.6 KB · Views: 207
 -
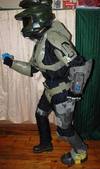 DSC_0053.jpg44.9 KB · Views: 200
Gamemaster
Member
Banged off the right shin tonight, took about 6 hours, here are some pics


Also forgot to post pics of the left boot, as we say in Canaduh... Whats that all aboot?


Almost done, one boot left, clean up the helmet and either redo the left forearm or clean it up too.
Like my Avatar says... That was easy!
Also forgot to post pics of the left boot, as we say in Canaduh... Whats that all aboot?
Almost done, one boot left, clean up the helmet and either redo the left forearm or clean it up too.
Like my Avatar says... That was easy!
Attachments
fullmetalsam
New Member
Wow - I've got to say this is one of the nicer foam build I've seen on here.
It confirms I totally have to try plasti-dip... it seems to be wonderful at hiding seams - in a previous post, you were saying you were going to try different products. Did you ??? and if you did, what were the results ???
If you're in Canada, I find that plasti-dip is not readily available (can't find it in hardware store)... so it's be great to have an alternative that works just the same.
Mensrea Prod
Member
Thats some great work you got going. Keep it up.
Gamemaster
Member
Wow - I've got to say this is one of the nicer foam build I've seen on here.
It confirms I totally have to try plasti-dip... it seems to be wonderful at hiding seams - in a previous post, you were saying you were going to try different products. Did you ??? and if you did, what were the results ???
If you're in Canada, I find that plasti-dip is not readily available (can't find it in hardware store)... so it's be great to have an alternative that works just the same.
Still in the testing phase, I would stick with plasti-dip for now. You can order it online, I have everything you need listed here: www.squidoo.com/how-to-make-halo-armor
And again, thank you all for the kudos, I'm getting quite excited myself to see it finished soon! (and I don't excite easily)
lordzoabar
Active Member
just wondering, but what was the final number of foam pads you needed to use? I'm actually going to Harbor Freight today (we have a recently opened store nearby!) and was wondering how many 4-packs I should get for the suit + add-ons and weapons...
Gamemaster
Member
just wondering, but what was the final number of foam pads you needed to use? I'm actually going to Harbor Freight today (we have a recently opened store nearby!) and was wondering how many 4-packs I should get for the suit + add-ons and weapons...
I've used 12 sheets (3 packs) including mistakes, but not weapons. (I made a thigh to small and a boot to big)
Gamemaster
Member
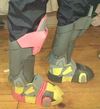
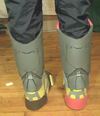
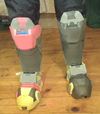
Another update, the right boot is also finished, took about 5 hours. Legs are complete!
Here are the pics

We found these size 10 platforms at the thrift store for $2, perfect for the Intimidator theme

They fit nice and add 2" to height


Lookin good with the shins, I will probably put some kind of a spacer in between, about 2 inches


Here are the pics
We found these size 10 platforms at the thrift store for $2, perfect for the Intimidator theme
They fit nice and add 2" to height
Lookin good with the shins, I will probably put some kind of a spacer in between, about 2 inches
Attachments
Mensrea Prod
Member
Looking good man! But have you try to moon walk in them yet? hahahaha
Charlieiscool12
Member
Woot woot! youre almost there!
Gamemaster
Member
Looking good man! But have you try to moon walk in them yet? hahahaha
Haha, when I was in high school break dancing was the new fad. Unfortunately for me I chose warrior and builder type for this lifetime and had to give up the ability to sing, dance or play the guitar (seriously I suck at those 3 things) Maybe I could moonwalk on a sheet of ice, but other than that I would be comic relief.
OK, on to the WIP!
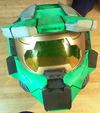
This is it, the moment you've all been waiting for... (drumroll please)
THE FOAM HELM!
Not bad for a first attempt, I think I could hide some of the seams by tweaking my pattern.
Next up I am going to redo the left forearm and hopefully a tutorial video with it.
Attachments
- Status
- Not open for further replies.
Similar threads
- Replies
- 3
- Views
- 194
- Replies
- 6
- Views
- 233


