Rock Lobbster
Sr Member
- Member DIN
- S098
And yet still a long way to go.

And yet still a long way to go.

Yeah, sure. Go for it.What is this madness - two posts in one day?
I got the new chest detail printed out
View attachment 312575
MoeSizzlac - Are you ok if I attach the file here to share with others if they want it?
Oh yeah man this thing beats destroying scissors. It can cut thick layers like butter.Took a stab at doing some work with the fiberglass tonight! I decided to do the butt plate first since it wouldn't be too hard to redo it if I totally screwed it up.
Before:
View attachment 312757
After
View attachment 312758
Also - massive shoutout to Off Earth - I saw his post on Instagram about using a roller cutter to cut the fiberglass cloth
View attachment 312759
This works amazingly and is 100% worth the 9$ for anyone that plans on working with fiberglass
Man, wish I know this when I was glassing my first suit.Also - massive shoutout to Off Earth - I saw his post on Instagram about using a roller cutter to cut the fiberglass cloth
View attachment 312759
This works amazingly and is 100% worth the 9$ for anyone that plans on working with fiberglass
Such a valuable tool.Man, wish I know this when I was glassing my first suit.
Also - massive shoutout to Off Earth - I saw his post on Instagram about using a roller cutter to cut the fiberglass cloth
This works amazingly and is 100% worth the 9$ for anyone that plans on working with fiberglass
That is quite the schedule there... and the color coding. You'll get it done. Curious, what are the "Bonus" scheduled items for?
MrJamin
You never say what kind of filament you used or are ordering.
Let me suggest you not use PLA. Its common for people starting in 3d printing but not a good choice for cosplay & armor. It has a lower transition point meaning its going to get soft and warp at lower temps. You don't want your armor deforming while in the trunk of your car, or in luggage on the tarmac of a flight to a convention, etc.
PETG or ASA both have a higher temp range and more resilance to impact and stress before shattering.
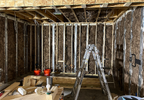
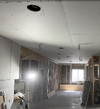
Man that's a lot of cable! Once did a networking job with my dad and we only ran like 150 feet and I thought that was a lot of work. I can't imagine how long it would take to lay all that cable! Your basement looks like it's going to be sweet though!Well I should be a week into my project plan, and I currently have made no progress.
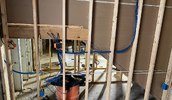
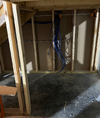
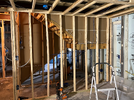
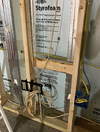
However, it isn't without reason. We are currently in the process of finishing our basement and for about 14-ish hours at night last week I was running low voltage cables all around.
In the end I ran:
- 125 FT of Coaxial
- 25 FT of HDMI
- ~300 Feet of Speaker Wire
- ~500 Feet of CAT 6
Future IT Space + Printer Space Under the Stairs
View attachment 316869View attachment 316867View attachment 316872
Home Theater Space
View attachment 316871View attachment 316870
Main Room Music Speakers
View attachment 316868
I bought a 1000' box when I moved into my house and after doing the basement I have ~60 feel left of that whole box :-DMan that's a lot of cable! Once did a networking job with my dad and we only ran like 150 feet and I thought that was a lot of work. I can't imagine how long it would take to lay all that cable! Your basement looks like it's going to be sweet though!
