MrJamin's 3D Printed MK VI Master Chief

Status
Not open for further replies.
Man that's a lot of cable! Once did a networking job with my dad and we only ran like 150 feet and I thought that was a lot of work. I can't imagine how long it would take to lay all that cable! Your basement looks like it's going to be sweet though!
That’s not a lot. That was my profession for 13 years. I’ve ran miles of Cat and fiber.
 
That’s not a lot. That was my profession for 13 years. I’ve ran miles of Cat and fiber.
Agreed. Doing 'home runs' in my last house was probably 100' per run from the network closet at one corner to every bedroom, a couple in the living room, the kitchen, home office and so on. 1,000 foot box doesn't get the job done.
 
Made some progress this afternoon at work! (put in 12 hours at work yesterday so I left early today)

Everything that I plan on fiberglassing / coating with resin s now done! Time to move on to sanding.
Progress.png


I also decided to try something to see if I could improve the misalignment of my chest (See link for how I screwed it up)

I got it lined up a bit better than before and I plan to keep adjusting to try to make it better still.
Chest.png


Link for how bad the alignment used to be.
 
I am getting back on track with my schedule. I made a ton of progress with sanding today and got some primer down on a number of pieces.

Primer.png


also holy heck - I've never used my orbital sander on 3D printed parts before, but dang did it work well when I was using it today. (started with 80 grit paper)
 
also holy heck - I've never used my orbital sander on 3D printed parts before, but dang did it work well when I was using it today. (started with 80 grit paper)
Printed parted was the reason I bought an orbital and added it to my Roybi crate of tools. After seeing how well UV resin works via airbrush that's going to be my next smoothing station. Outdoors of course. And only at night for obvious reasons. But airbrush with UV light on a foot peddle. Spray... light exposure... {repeat}
 
Well it was a very productive weekend!

I got two coats of primer and sanding done on these pieces (minus the neck detail which has only been sanded)
Primer.jpg


The forearms are 99% ready for final wet sanding before color. The shins need a tiny bit more work (lets say 80% ready)

The left thigh (first one I started working on a while ago) is 75% ready. The right needs a bit more work...
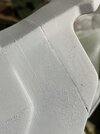
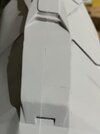
Fill 3.jpgFill 2.jpgFill 1.jpg
I didn't do the greatest job when I glued it together and have much more noticeable seams. I am going to pick up some body filler (thanks TurboCharizard for the suggestion) instead of my usual spot putty and give that a go tonight.

Remaining pieces ready to sand:
- Biceps

I also need to figure out the scaling and get the three boot pieces printed out. Those won't have any seams so it *should* be pretty quick to get them ready once they are printed

I think I am also going to reprint the hand plates since I feel like my current ones are too small.


Final update - Since I have the chest currently clamped together I decided to grab my helmet and take a fun pic:
Fun.jpg


P.S. - Man it feels good to get back into this project and make some tangible updates. T-Minus 102 Days until C2E2
 
Progress on sanding + filling continues.

The Bondo body filler worked well to help cover up the ugly seams on the right thigh piece.
Sanding Progress 2.jpg


Most of these pieces are getting close to final primer + wet sanding. Also, I finally got some initial sanding done on the biceps

Sanding Progress.jpg


T-Minus 95 Days until C2E2
 
Even more sanding + primer has gone down on these pieces. I feel like I am very close to being done with this phase and will soon be able to move on to my favorite steps (Color + Weathering)

IMG_3200.jpg


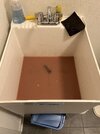
I also made a hacked painting stand out of some a cardboard box, some cardboard edge guards, and some duct tape. It is cheap and effective!
IMG_3207.jpg


T-Minus 93 Days until C2E2
 
This is looking awesome! Seeing the shot of your helmet and chest plate together is great! I cant wait to see it all done
 
Made some real progress today! (and dang it feels good)

The following pieces are now 100% ready for a quick wet sand and then basecoat
IMG_3512.jpg


That leaves these pieces with a little bit of work yet:
IMG_3511.jpg


This is such a small number of pieces and is getting me really excited. I really hope to have these all wrapped up and move on to color by end of week!
 
Back with another tantalizing update. I've officially finished all of the filler primer for all of the remaining pieces!

I got most of them wet sanded tonight and ready for color to start going down.
IMG_3524.jpg


As PlanetAlexander said - I made forbidden soup!
IMG_3523.jpg

The only other pieces not pictured here are the boot pieces which got a coat of resin on the inside to help strengthen them. I hope to get those wet sanded tomorrow night and even start laying down some of the black basecoat.
 
Status
Not open for further replies.
Back
Top