Noble Spartan(mod's/add-on's begin)

Status
Not open for further replies.
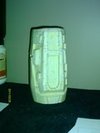
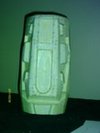
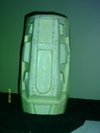
Time for this weeks Update. Finished with the 2 Forearms Hardened with Smooth Cast 321 and ready for Rondo. starting Pep on thighs today. Heres the pic's of Forearm.

th_IMAG0254.jpgth_IMAG0245.jpgth_IMAG0244.jpgth_IMAG0246.jpgth_IMAG0255.jpg
Should have one thigh pep'd by days end.

By the way I'm still looking for really good HD Reach Cod if anyone has a link, I'd love some help with this one please.
 

Attachments

  • th_IMAG0254.jpg
    th_IMAG0254.jpg
    5 KB · Views: 420
  • th_IMAG0245.jpg
    th_IMAG0245.jpg
    4.5 KB · Views: 305
  • th_IMAG0255.jpg
    th_IMAG0255.jpg
    4.9 KB · Views: 296
  • th_IMAG0244.jpg
    th_IMAG0244.jpg
    3.7 KB · Views: 284
  • th_IMAG0246.jpg
    th_IMAG0246.jpg
    3.7 KB · Views: 295
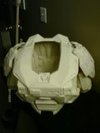
Just a quick question: how did you get your chestpiece on? Did you cut it? If so where? I'm in the process of making my own and since the head hole is too small to pull over my head (which it's meant to be) I need to figure out where to make the chop in order to get it on and off.
 
I cut the collar out completely by scoring around the outside line of it, and plain on making it out in foam. Then I made 2 cuts on the lower belt about 6 inch's apart this piece I will use velcrove to lock in place in order to get into and/or out of my chest piece. Hope this helps if not let me know and I can work out some Pic's
 
So, to clarify, you replace the collar with foam, which bends? And you cut at the bottom on the sides so the top will hinge in order to get it on and off?
 
Collar: If in hard format cut on outside edge and remove to be replaced later by foam.

If in soft format you can cut it to leave the back edge and front nubs, witch will give you room to put you're head thru.

Lower belt: just below the arms mark a center line with a pencil, now figure out how much space you need to get you're arm in and/or out for me this is 6 inches. So I now mark 3 inches on ether side of my center line giving me my 6 inches. now cut this part out and keep in safe place. This piece you need to add a backing to it extending it by Aprox. 2 inches on both ends. Now add velcrove to pieces and insert back into the gape.

Note: I did NOT hinge the top of my armor. I spaced the lower belt with a gap big enough to fit arms thru.

Note: I did try flanging the collar piece but it was way to tight and was cutting off the blood flow to my brain, (this is not a good thing). So being in hard format already will replace in foam witch will be easier to cut and glue in.

Hope this helps everyone
 
So you've made it so you can actually shove your head through the head hole then? I take it you have to cut the bits out of the sides because putting your arms over your head to pull it down like a pullover doesn't let your shoulders through? Mine's nearly rondo'd so I'll be able to take all the support struts out and try it for myself soon. Quite excited.
 
Yes, with out the collar there was enough room for my head easily. and plenty of room for shoulder to fit in the lower. it will also allow me to hook the shoulders on to the upper armor just like military styled armor.
 
This weeks update: finished the grind and alteration of the end caps on forearms and started lower end of Biceps. I also pep'd the Right thigh.

Also I need a break Down on what my line should look like to do the smaller pic's here so I can clean this up a bit. If someone could pls. take the time to give me a "how to".

Next week I'll Pep the left thigh and the following week I'll hit it with the smooth cast 321. I'll post then. Till then everyone stay safe.
 
If your using photobucket, just use the 'IMG Thumb' url by clicking on the url (it will change to say 'copied') then just hit the 'insert image' button here and paste the url.

the code below has been altered so you can see what it looks like, replacing the 'GAP' in brackets with 'URL' makes it work.
[GAP=http://s1129.photobucket.com/albums/m510/active84u/?action=view&current=shooterup.jpg][GAP]http://i1129.photobucket.com/albums/m510/active84u/th_shooterup.jpg[/IMG][/GAP]
 
this looks so good.Im on awww on how your pepakura work turn out so well.Im so going to be watching this thread from now on.
 
Looking good on your Pep work there Thorn, I'm loikin those thighs, I like sheathing they have for the inner thigh.
 
Forearms, Chest, Shoulders, and Biceps

th_IMAG0246.jpgth_IMAG0254-1.jpgth_IMAG0255.jpgth_IMAG0245.jpgth_IMAG0225.jpgth_IMAG0230.jpgth_IMAG0226.jpgth_IMAG0228.jpg

OK. I got this down now. I had to go into settings on Photobucket and have it list Thumbnails, then copy and past THAT.
 

Attachments

  • th_IMAG0254-1.jpg
    th_IMAG0254-1.jpg
    5 KB · Views: 314
  • th_IMAG0246.jpg
    th_IMAG0246.jpg
    3.7 KB · Views: 296
  • th_IMAG0226.jpg
    th_IMAG0226.jpg
    4.2 KB · Views: 290
  • th_IMAG0230.jpg
    th_IMAG0230.jpg
    4.9 KB · Views: 304
  • th_IMAG0225.jpg
    th_IMAG0225.jpg
    3.9 KB · Views: 367
  • th_IMAG0255.jpg
    th_IMAG0255.jpg
    4.9 KB · Views: 282
  • th_IMAG0245.jpg
    th_IMAG0245.jpg
    4.5 KB · Views: 295
  • th_IMAG0228.jpg
    th_IMAG0228.jpg
    4.4 KB · Views: 290
Time for the weekly update. Cored the lower ends on Biceps sanded and shaped both biceps and shoulders and then primed them.

th_IMAG0273.jpgth_IMAG0259-1.jpgth_IMAG0268.jpgth_IMAG0265.jpgth_IMAG0276.jpg

Next week I should have thighs completed with pep and first coat smooth cast 321.
 

Attachments

  • th_IMAG0273.jpg
    th_IMAG0273.jpg
    4.1 KB · Views: 302
  • th_IMAG0268.jpg
    th_IMAG0268.jpg
    5 KB · Views: 300
  • th_IMAG0259-1.jpg
    th_IMAG0259-1.jpg
    6 KB · Views: 281
  • th_IMAG0265.jpg
    th_IMAG0265.jpg
    5.6 KB · Views: 289
  • th_IMAG0276.jpg
    th_IMAG0276.jpg
    5 KB · Views: 305
Sizing check.

Thought I'd throw this in just to see if my proportions are right. What do you think? input needed pls.

th_IMAG0278.jpgth_IMAG0279.jpg
 

Attachments

  • th_IMAG0279.jpg
    th_IMAG0279.jpg
    5.1 KB · Views: 295
  • th_IMAG0278.jpg
    th_IMAG0278.jpg
    5.2 KB · Views: 285
Making some nice progress sir. Proportions look pretty good from the pictures. Keep it up buddy, you're trucking along a good clip.

-Matt
 
Status
Not open for further replies.
Back
Top