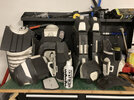
ODST Foam/Fabric/Filament Build

CMYKey

Member
I started an ODST build back in 2020 but never brought it to the finish line. I’ve expanded my arsenal of tools and skills since then, and I'm now ready to revisit the build—starting from scratch.

The release of the official Rookie cosplay guide has motivated me to work toward something far more accurate this time around. I was blown away the work done by WhenInMaine and although my 3D printer will play a large role in bringing this build to life, it will not be the primary material used—I've instead decided to take my first shot at unfolding and create some foam templates from his 3D files.

The plan is to use foam for the majority of the build and use my 3D printer for the helmet, weapons, and smaller details/greebles with some fabric for the undersuit and other parts as required. I’ve broken everything down into a list below.

Foam
Fabric
  • Undersuit (Torso)
  • Undersuit (Pants)
  • Shoulder Straps
  • Field Pack Straps
  • Shin Straps
  • Ab Plates (Base)
  • Belt (Base)
  • Codpiece
  • Thigh Pouches
  • Shin Pouches
Filament
  • Helmet
  • M7S SMG
  • M6C SOCOM
  • Belly Plate/Wallet
  • Combat Knife
  • Belt (Details)
  • Ab Plates (Details)
  • Shin Details
  • Forearm Details
  • Chest Clips
Other/TBD
  • Gloves
  • Visor
  • Grenade Canisters
Seems more daunting than it is, right? Oh – and I’m planning to have something wearable in time for Calgary Expo 2023 (April 27)
 
Last edited:
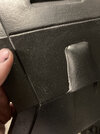
Over the past couple months I've been doing some retopology in Blender (similar to what is seen here) to simplify the 3D files before unfolding them in Armorsmith. With that (mostly) out of the way, I’ve started foamsmithing.

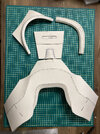
Back plate – haven’t decided how I’m going to rig this up yet.

223E1489-A1B0-475E-9BFA-B26DAA53EDFD.jpg

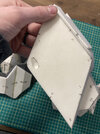
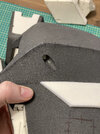
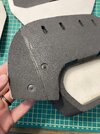
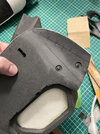
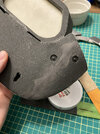
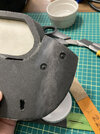
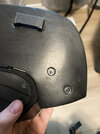
Shoulders – these ones aren’t based off the FromTheBrink files. The ones on the armoury were accurate enough for my liking, so I decided to save some time unfolding. I used a Dremel to get the right look for the pilot holes. I plan to stick some real screws in there after painting.

2CE1C961-3A2D-47FC-8BA7-A75AD9ACCAE7.jpgBB011733-BEAC-4306-BA03-542B6DC9A792.jpg

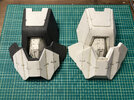
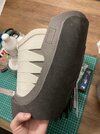
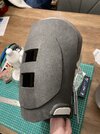
Chest core – Dremeled out the pilot holes here as well. I’m going to try and make the chest panels magnetic so I can attach my combat knife to them.

69AF5B2E-BF83-4559-9248-5E98ECDDF020.jpgFAD5D7BC-6B23-4F30-ABAE-A7A2CD048654.jpg

I don’t have pictures, but I printed the SMG a little while back as well. However, I suffered a mishap while printing the combat knife and my printer hasn’t been behaving properly since then and I haven’t had a full day to troubleshoot yet. So that’s next on my list.
 
Last edited:
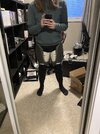
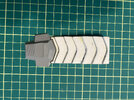
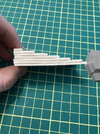
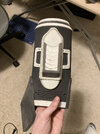
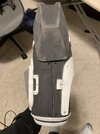
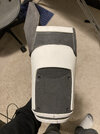
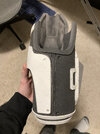
We've got some thighs. There was some trial and error with the thigh inserts. I found the patterns included in the armour files to be a little wonky, but that may have been a me issue.

I think they ended up a tiiiny bit too big - probably could've been scaled down another 1-2% - but not enough to be worth re-doing at this point. Hoping they won't impede my mobility too much once the shins are on.

BDBBCF80-CAB2-4BEE-BFC7-367B14972799.jpeg 1961FC63-2DC8-4042-8521-F83410C77CFF.jpeg A3AD0BA0-8756-4421-A6EE-4E3CCB49D740.jpeg

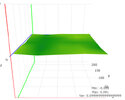
As for the printer... no progress there. I've essentially taken the whole thing apart and put it back together, yet I'm still experiencing the exact same issue. With my bed as perfectly level as it can get (confirmed by the bed mesh visualizer in Octoprint) the left side of my bed is always too far away from the nozzle after probing with ABL. All signs point to this being a misaligned x-gantry, but after following some tutorials, taking the whole thing apart, measuring, etc. I saw no improvement.

It was printing perfectly up until that one print a little while back where there was a tangle in my filament that I didn't notice, and when I came back to the printer, the filament had snapped and stopped the print. I'm worried something got bent or misaligned due to the struggle.
 
As for the printer... no progress there. I've essentially taken the whole thing apart and put it back together, yet I'm still experiencing the exact same issue. With my bed as perfectly level as it can get (confirmed by the bed mesh visualizer in Octoprint) the left side of my bed is always too far away from the nozzle after probing with ABL. All signs point to this being a misaligned x-gantry, but after following some tutorials, taking the whole thing apart, measuring, etc. I saw no improvement.
Could it maybe be a warped bed? Great work so far!
 
Could it maybe be a warped bed? Great work so far!
Thanks!

Well, the bed has always been slightly warped, which is why I have the BLTouch to compensate for it. This has only been an issue since the filament tangle incident. My bed mesh visualizer looks pretty much the same as it always has, so my bed hasn't suddenly become more warped. Which is why I think something got knocked out of alignment, but nothing I've done in that regard has been able to fix it yet. According to the bed visualizer, it's about as level as it can get. So maybe there's an issue with the BLTouch itself? I'm kinda stumped.

Untitled-3.jpg

I guess the next step might just be removing the BLTouch and seeing if the issue persists.
 
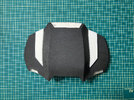
I've been avoiding the shins, so I got the lumbar and hip plates done instead. Used my Dremel to make a countersink for the screws. I was originally planning to 3D print the strap clips and inserts for the lumbar plate, but there's really not much of a point in doing so, it's not like they're super detailed or anything... will revisit.

IMG_5973.jpg IMG_5974.jpg
 
Woaahhhh you have been unfolding my files? Thats absolutely amazing! Such cool work, and top notch foam work as well! Cant wait to see how the build turns out!
 
Woaahhhh you have been unfolding my files? Thats absolutely amazing! Such cool work, and top notch foam work as well! Cant wait to see how the build turns out!
Sure have! Excellent work by the way. Well done striking a balance between accuracy and practicality.

Despite the lack of updates, I am still working on this. I didn't make it in time for Calgary Expo, but I am working hard to have it ready for Edmonton Expo and just haven't had the time to post anything. I should have a big update in the coming weeks.
 
Alright, so I have been working on this on and off with setbacks killing my motivation (in between missing deadlines). But I'm back on the ODST train and feel generally confident in finishing phase 1 of the build in time for this coming Calgary Expo. In the grind to make previous deadlines, I didn't do a super great job of documenting my progress, but I do have several updates that I'll share over the next few posts to keep the thread organized.

Here's a look at the forearms, which were a mix of foam and 3D printed parts for the smaller details.

IMG_6046.jpg IMG_6047.jpg IMG_6094.jpg IMG_6095.jpg IMG_6096.jpg IMG_6097.jpg

I used Prop Monkey Studio's Gap Filla to hide my seams, which I acquired from Red Moon Cosplay. I never had much luck with Kwik Seal and decided to try something new and was really impressed with Gap Filla. It goes on like a paste which can feathered out and sanded and (when done correctly) makes the seams completely invisible and dries felxible. For each piece I'd sand my seams, apply the Gap Filla, then smooth and sand, as seen below on the lumbar armour. The last photo is after priming.

IMG_6110.jpg IMG_6111.jpg IMG_6112.jpg IMG_7611.jpg
 
Last edited:
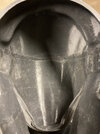
So, a pretty substantial gap in documentation here, but all of the armour pieces have been completed, primed, and base coat (partially) applied.

For sealing/priming, I used Hexflex and applied it with a brush. For the most part, it worked out pretty well and for a fraction of the cost of Plastidip. Brush strokes didn't start appearing until about the 3rd coat, which is basically the minimum amount of coats needed. I did try to use an airbrush to apply the Hexflex, but due to it being transparent, it was pretty difficult to see how it was being applied. I would definitely use a pigmented Hexflex with an airbrush next time, but unfortunately, they only had transparent at the time. With Hexflex being water soluble, I was able to apply a tiny bit of water and smooth it out a bit with high grit sandpaper, but it created a lot more work and the end result still wasn't perfect.

IMG_6240.jpg IMG_6738.jpg IMG_6739.jpg

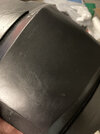
I started on a base coat using black Createx Colors which was working great until I snapped the tip on my cheap Amazon airbrush. I decided it was time to upgrade and treated myself to an Iwata Revolution which... has also been giving me trouble. It has a significantly better spraying experience, but has not been providing a good finish with the Createx paints. No matter what I do (spraying closer, spraying further, increasing/decreasing psi, adding reducer, adding retarder) I always get a rough, speckled texture. Below you can see a comparison between the smooth finish achieved with the cheap airbrush and the rough finish achieved with the Iwata.

IMG_6796.jpg IMG_6794.jpg

So I'm a little stumped here and sadly, none of the advice from Createx support seemed to help. I'm open to suggestions from any airbrush experts out there.
 
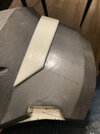
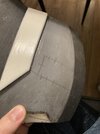
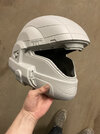
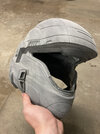
In the meantime, I made some good progress on the helmet. The helmet was printed with Matter3D Performance PETG filament in multiple parts using a file purchased some time ago from NerdForgeDesigns on Etsy (which no longer appears to be available). I glued the pieces together and used the filament soldering method to reinforce the seams from the inside. It's since been sanded and primed.

IMG_6798.jpg IMG_6799.jpg IMG_6803.jpg

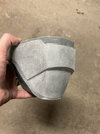
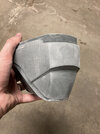
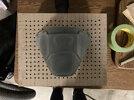
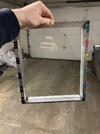
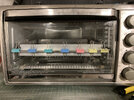
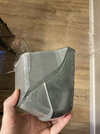
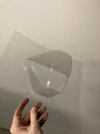
I've also vacuum formed a few visors. I printed the buck hollow and backfilled it with expanding foam according to some advice I found on the 405th Discord and it worked great! I sanded the hell out of the buck, nabbed a toaster oven from the thrift store, ordered a ton of PETG from a local plastic distributer, assembled my vacuum former and went to work. Though imperfect, I was still surprised at how well it went.

IMG_6800.jpg IMG_6801.jpg IMG_7411.jpg IMG_7407.jpg IMG_7410.jpg IMG_7416.jpg IMG_7408.jpg

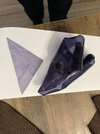
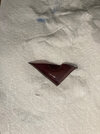
I made my first attempt at dying the visor to... strange results. Aside from the rookie mistake of dying the whole visor on the first shot instead of testing it first, it turned out completely purple instead of the blue-grey colour it was supposed to be. Rit customer support has been great in my experience, and gave me a few tips that I will try on my next attempt.

IMG_7566.jpg
 
Very nice foam work!

I've never heard of gap filla. I've always just used kwik seal. It can be a bit finicky to deal with at first, but I've never really had a big issue with it. Do you apply gap filla in the same way as you would kwik seal? Just sort of spreading it around with you finger? I would try it out but man is gap filla ever expensive!

How did you assemble your vacuum forming frame? It doesn't look welded. Your pull looks great!

If you figure out how to get the ritDyeMore to work please share how you do it! You know after all that we don't get iDye in Canada
Thanks!

Gap Filla is thicker than Kwik Seal and more like a paste. But it's applied pretty much the exact same way. It's almost like Bondo spot putty. You can build it up and sand it away. It dries hard, yet it's flexible. Really interesting stuff.

The frame is made from aluminum angles that I cut using a miter box and a reciprocating saw. The angles were glued together using JB Weld Steel Reinforced Epoxy. Pretty janky - the miter box got chewed up and the frame isn't square at all, but I was working with what I got and it does the job lol.

Rit DyeMore definitely works, as in, it dyes the plastic - but the colours might be a little finnicky. I had the water too hot in my tests, but if you keep the temp between 140-150 F it won't deform.

It turns out the red was coming from the Frost Grey dye for whatever reason. I tested the dyes on their own, and the navy dye looked as expected, but the grey was oddly red. So I'm going to make another attempt using "Smoky Blue" and "Graphite"

IMG_7613-small.jpg IMG_7618-small.jpg
 
Nice foam work. What type of foam/thickness did you use? I'm trying to get started in building foam armor and I want to see what other people have used instead of the typical foam anti-fatigue puzzle mats.
 
This thread is more than 6 months old.

Your message may be considered spam for the following reasons:
  1. This thread hasn't been active in some time. A new post in this thread might not contribute constructively to this discussion after so long.
If you wish to reply despite these issues, check the box below before replying.
Be aware that malicious compliance may result in more severe penalties.
Back
Top