Spartan Fred and Kelly Build

Status
Not open for further replies.
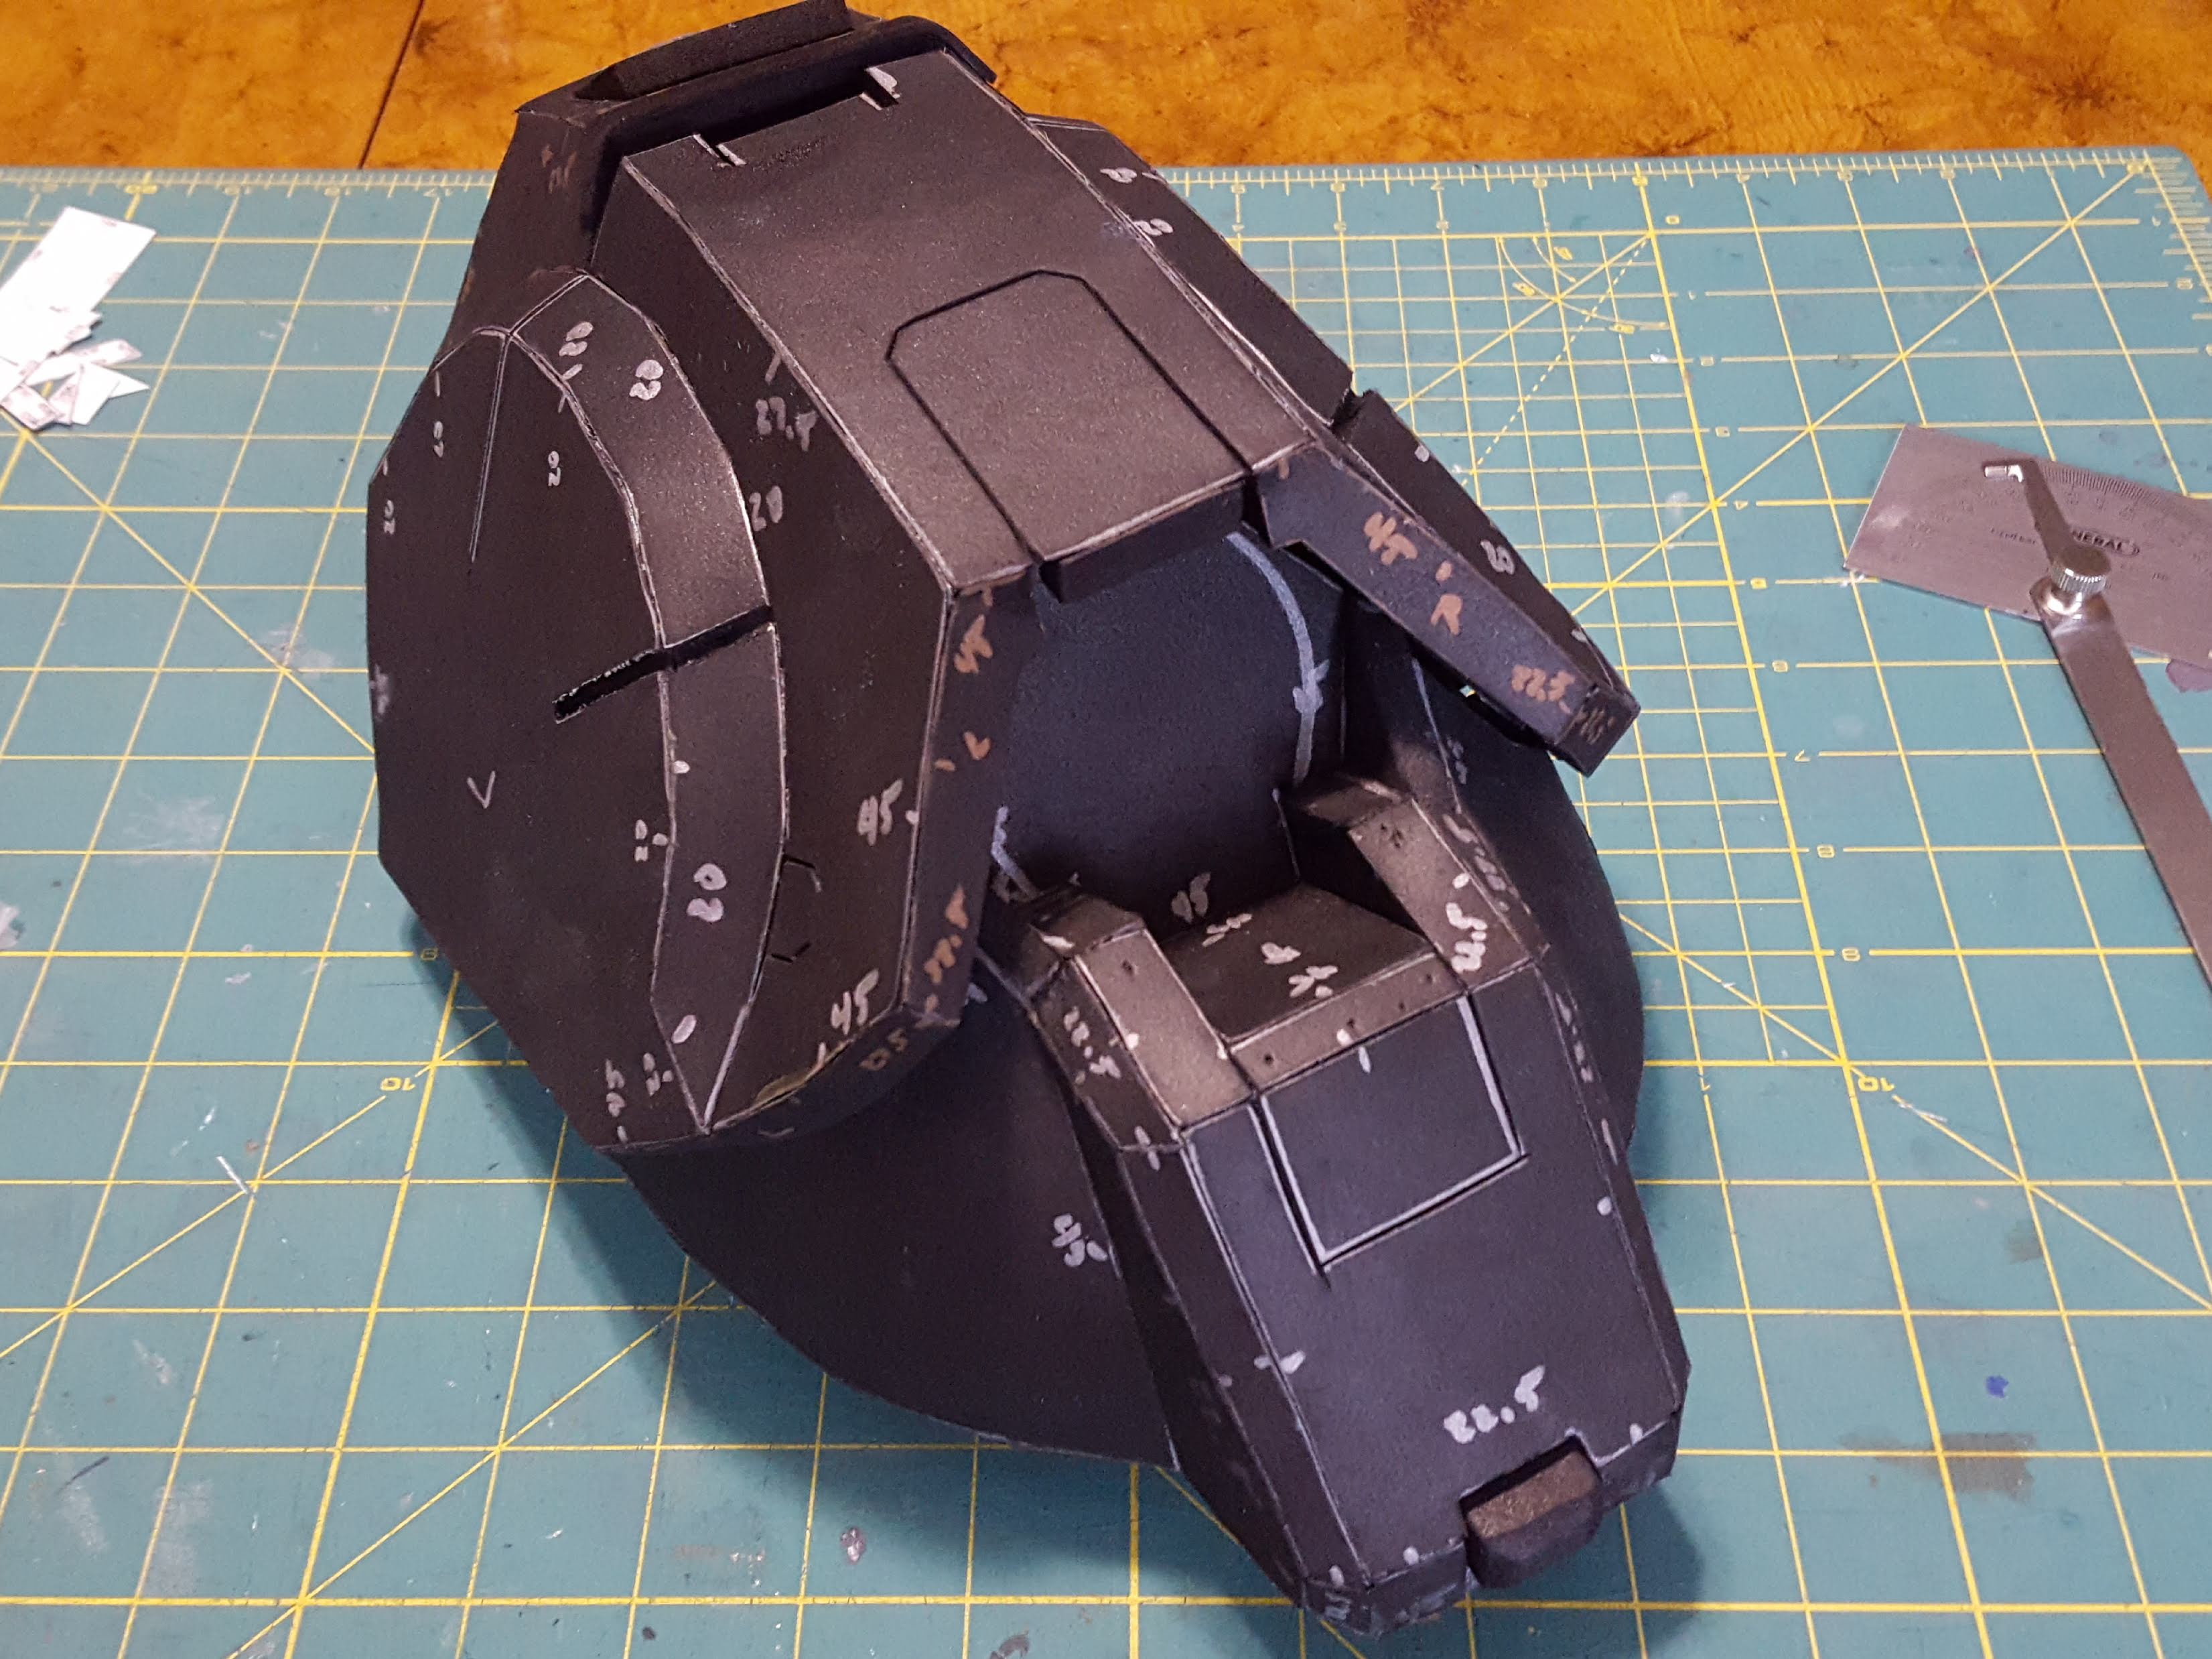
Well, it's been a while since I've done an update or any work on the Kelly build. It's been a very cold winter here in Florida, so avoided working in the garage. Anyways. The first chest plate was too small. I forgot to take into account foam thickness when I scaled it, so I've started over. Here's the progress so far.

20180301_105947.jpg


Having made one already, this chest piece has gone together fairly quickly. I'm slowing down as I'm getting into new areas that I didn't previously make. I'm keeping it in sections for ease of build, and if I mess anything up, I just have to remake that section. As always, let me know what you think.
 
It's been looking amazing! I'm not even experienced in any kind of armor making! I've tried countless times and failed each one, I just can't seem to get shapes right ever, and my edges are never clean consider me jealous!!
 
Finally took time to finish up the strapping for the boot armor of Laura's Kelly build.

20180313_165904.jpg


I thought about adding velcro to further stabilize and hold the armor in place, but it seems to be holding just fine as is. I'll see what happens when she walks around in them.

The upper foot armor will be attached with velcro. I've put 3 strips in place, so that should hold it. I also used industrial velcro to further help with the adherence.

Let me know what you think.
 
The boots are all done. You can see a quick walking demonstration over on SunnyLadybug087

20180314_135525.jpg


After a quick walk around the living room, I realized I'm going to need to add a couple strips of velcro along the toe to keep it in line as she walks.

I hope to post a show and tell video on how they were made soon. Until then, let me know what you think.
 
Well started work on getting the back to Kelly's torso armor together.

20180320_160043.jpg


Heading into unknown territory with this, but most of it seems straight forward for now. I'm likely to change my mind when I get to the thrusters. This is going to be an important part as this will tell me if the whole thing is going to fit or if I need to go back and restart.

We'll seey.
 
Well, with a little help from a friend to figure out some of the small finicky bits, I managed to bring together all the bits for the chest and back.

Here's the final result.

20180402_152754.jpg


I still have a few little details to do. I also need to go around and clean up some edge with a Dremel, and then heat shape it into it's final form. My next step is probably to start work on the power plant. That way the two shoulder piece have fixed center point, and I'd have a solid chuck of the armor done.

Let me know what you think, and if you have any tips where to go from here.
 
Things have been a little slow over here as I've worked on a few side projects and trying to figure out more of the details on Laura's armor.

In the mean time, we finally ordered and got a proper Kelly/Hermes helmet from BMP Props. Even got the visor for it in the correct color too. Right now I'm going through the process of cutting and sanding it. I think it's going to be a much better helmet than the Orbital, and will fit Laura's head a lot better.

31510346_1810402059039706_612085478799179776_o.jpg


Here's it's current state. I need to sand a uniform thickness around the edge where the visor is going to be before I can finish the little detail at the mouth of the helmet.

20180504_141945.jpg


For the armor, I've started on the power plant. This is going to be an important piece as it's what's going to join the "shoulder blade" which then is connected to the front. There are a lot of strange details, angles, and what not that I'm figuring out. Really hoping to get this done soon as I can then basically put the armor together for final fitting and strapping. After that, it's on to the thrusters.

20180509_155638.jpg


Until next time, like to know what you think, and if you got any tips.
 
This is an inspiring build! Your lines are very clean, and attention to detail is impeccable! This reminds me of the heady days of Longshot-X's amazing Mk VI and the RvB set! Haha I look at this and think i want to get back into costuming.

Just a note, for work I am required to wear a lot of equipment, and since a lot of work is outside i can say with some authority that if you carry a lot of weight on your hips or shoulders, the day gets really long really quick. If you're still working on strapping, i would *Super Duper highly* recommend finding a way to split the load between both shoulders *and* hips, and make sure not to over -pad in odd areas. Too much pressure from the padding can make things just as uncomfortable as not having padding where needed.

I an impressed at the project you've got here. Great work!
 
Dude epic!!!! I have to cheak out that program ... because sizing is my enemey!! And great job man!!!!

Thanks. I highly recommend Armorsmith Designer. I've got some basic tutorial videos of using it on my Youtube channel. The only mistake I made with sizing is that I forgot to compensate for the size change the thickness of foam will do. Otherwise, it is my go to tool now.

This is an inspiring build! Your lines are very clean, and attention to detail is impeccable! This reminds me of the heady days of Longshot-X's amazing Mk VI and the RvB set! Haha I look at this and think i want to get back into costuming.

Just a note, for work I am required to wear a lot of equipment, and since a lot of work is outside i can say with some authority that if you carry a lot of weight on your hips or shoulders, the day gets really long really quick. If you're still working on strapping, i would *Super Duper highly* recommend finding a way to split the load between both shoulders *and* hips, and make sure not to over -pad in odd areas. Too much pressure from the padding can make things just as uncomfortable as not having padding where needed.

I an impressed at the project you've got here. Great work!

Thanks a lot. You should totally get back into it. We have not got to strapping, but the various ideas we've tossed around are being considered. Wearing my ODST kit all day, I know how things can get tiresome real quick. Though this armor should not be in the same ball park as mine when it comes to weight, but comfort and having the armor secured are things we are certainly taking into account.
 
So i got the program and I dont know if you figured it out yet or not but to get it to zoom in somewhere else just double click on that body part!
 
So i got the program and I dont know if you figured it out yet or not but to get it to zoom in somewhere else just double click on that body part!

Yep. Got that figured out. I'll be making another video soonish on how to take your measurements for it.
 
Did some work on the shoulder mounts of the armor. Sharing it here to show that mistakes will happen. Now I'm just debating whether to try and fix it or completely redo them.

Let me know what you think.

20180520_165418.jpg
 
Status
Not open for further replies.
Back
Top