- Member DIN
- S015
SO, I have had a few people asking about strapping recently.
After making several suits for my husband @Kusak , I have learned a few things on what has worked for us.
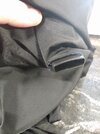
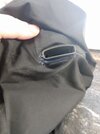
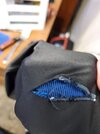
So, when @Lobbster contacted me to help him make his strapping I jumped on it. Our plan is to place the strapping inside his black suiting. Only where the buckles need to be out will there be keyholes, or buttonholes for the strapping to come through his suiting.
So. FIrst step was to have him put on his black undersuit, and his armor on.

This let me figure out where the edges of his armor was going to be, and where I wanted the strapping to show.

I marked the edges with Tailors chalk, and saftey pins.

I marked where I wanted the strapping to end for each section.
Then I had him remove his armor.
The next step was to measure his waist, about the place that he wears his normal belts.
From there I measured from his waist, over his shoulders, and to the opposite side of his back, creating a cross point in the middle of his back.

The next measurements were from the front of his waist down to the top of his thigh pieces, then to the top of his shins.
Repeat that for the back of his legs.
This gave me all the measurements I needed.
Our materials list was,
1 inch web strapping
1 inch elastic
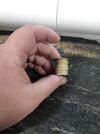
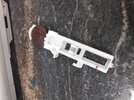
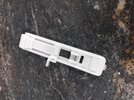
1 inch parachute buckles
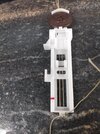
1 inch tri glide, strap adjusters
2mm foam

So. The pattern design is a solid belt, with suspenders, and leg suspension rigs. We also have attachment points coming off of the shoulders.


I added tri glides, and extra webbing to give us a good bit of adjust-ability.
Now, at the shoulders, we added a strap of elastic from the front to the strap to help keep the armor from twisting. It would also give, giving Lobb his movement while pulling the armor piece back into place.
We added a strap across his upper chest to help keep the shoulder straps from sliding outwards.
Next, we did his leg straps.

We had 4 straps total here.
2 front
and 2 back
We made then double layered. The hip to thigh strap which was 1 inch web. The second layer was 1 inch elastic down to the top of the shin.


On each of these we have adjustable tri glides, and buckles.
Once we had the base built we then needed to connect the buckles to the armor pieces.
One of the best ways I have found out to do this was to make a strapping sandwich.
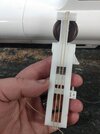
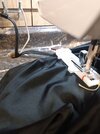
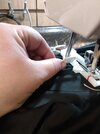
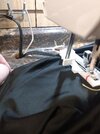
What this means is taking your elastic to the buckle, and then sewing it to a piece of foam.


We then had Lobb rearmor. We did his legs first.
Once he started to put his armor on, I was able to figure out where the buckles needed attached inside the armor.
Use contact cement on the small foam squares, and glue it to the armor.

Let that dry, and then we kept building his armor upwards.
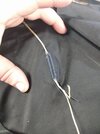
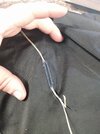
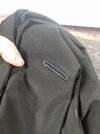
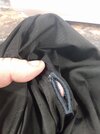
Soon we had the full strapping done. Next will be to make my keyholes, and
 put the strapping inside his undersuit.


P.s. As soon as I get the suit again, I will be making the keyholes. I will update the above post with how those are added, and how it looks with the straps fully hidden.
After making several suits for my husband @Kusak , I have learned a few things on what has worked for us.
So, when @Lobbster contacted me to help him make his strapping I jumped on it. Our plan is to place the strapping inside his black suiting. Only where the buckles need to be out will there be keyholes, or buttonholes for the strapping to come through his suiting.
So. FIrst step was to have him put on his black undersuit, and his armor on.
This let me figure out where the edges of his armor was going to be, and where I wanted the strapping to show.
I marked the edges with Tailors chalk, and saftey pins.
I marked where I wanted the strapping to end for each section.
Then I had him remove his armor.
The next step was to measure his waist, about the place that he wears his normal belts.
From there I measured from his waist, over his shoulders, and to the opposite side of his back, creating a cross point in the middle of his back.
The next measurements were from the front of his waist down to the top of his thigh pieces, then to the top of his shins.
Repeat that for the back of his legs.
This gave me all the measurements I needed.
Our materials list was,
1 inch web strapping
1 inch elastic
1 inch parachute buckles
1 inch tri glide, strap adjusters
2mm foam
So. The pattern design is a solid belt, with suspenders, and leg suspension rigs. We also have attachment points coming off of the shoulders.
I added tri glides, and extra webbing to give us a good bit of adjust-ability.
Now, at the shoulders, we added a strap of elastic from the front to the strap to help keep the armor from twisting. It would also give, giving Lobb his movement while pulling the armor piece back into place.
We added a strap across his upper chest to help keep the shoulder straps from sliding outwards.
Next, we did his leg straps.
We had 4 straps total here.
2 front
and 2 back
We made then double layered. The hip to thigh strap which was 1 inch web. The second layer was 1 inch elastic down to the top of the shin.
On each of these we have adjustable tri glides, and buckles.
Once we had the base built we then needed to connect the buckles to the armor pieces.
One of the best ways I have found out to do this was to make a strapping sandwich.
What this means is taking your elastic to the buckle, and then sewing it to a piece of foam.
We then had Lobb rearmor. We did his legs first.
Once he started to put his armor on, I was able to figure out where the buckles needed attached inside the armor.
Use contact cement on the small foam squares, and glue it to the armor.
Let that dry, and then we kept building his armor upwards.
Soon we had the full strapping done. Next will be to make my keyholes, and
P.s. As soon as I get the suit again, I will be making the keyholes. I will update the above post with how those are added, and how it looks with the straps fully hidden.
Attachments
-
 IMG_20201119_211400094.jpg2.3 MB · Views: 411
 -
 IMG_20201119_211418208.jpg4 MB · Views: 349
 -
 IMG_20201119_211505098.jpg3.9 MB · Views: 354
 -
 IMG_20201119_211809241.jpg3.7 MB · Views: 331
 -
 IMG_20201119_211814023.jpg2.7 MB · Views: 329
 -
 IMG_20201119_212619960.jpg2.2 MB · Views: 343
 -
 IMG_20201119_212626203.jpg2.8 MB · Views: 355
 -
 IMG_20201119_212628993.jpg2.3 MB · Views: 348
 -
 IMG_20201119_213921534.jpg2.4 MB · Views: 338
 -
 IMG_20201119_213925131.jpg3.8 MB · Views: 346
 -
 IMG_20201119_214504581.jpg2.5 MB · Views: 336
 -
 IMG_20201119_214631797.jpg2.7 MB · Views: 336
 -
 IMG_20201119_214805857.jpg2.9 MB · Views: 350
 -
 IMG_20201119_214809854.jpg1.9 MB · Views: 353
 -
 received_190233082644462.jpeg542.8 KB · Views: 363
Last edited:
