TurboCharizard's Print File Upload Zone

Updating for the Threat Sensor prop.
Threat Sensor Drawing v1_Page_1.png

All said and done this is another comfortably cosplay scale type thing as opposed to full SPARTAN scale. There's no electronics wiring channels modelled in at this time but there's more than enough room for it to pivot wings and detach from the handle if you're into prop functionality.
Capture.PNG

ThreatSensorBanner.png


Threat Sensor
 
Last edited:
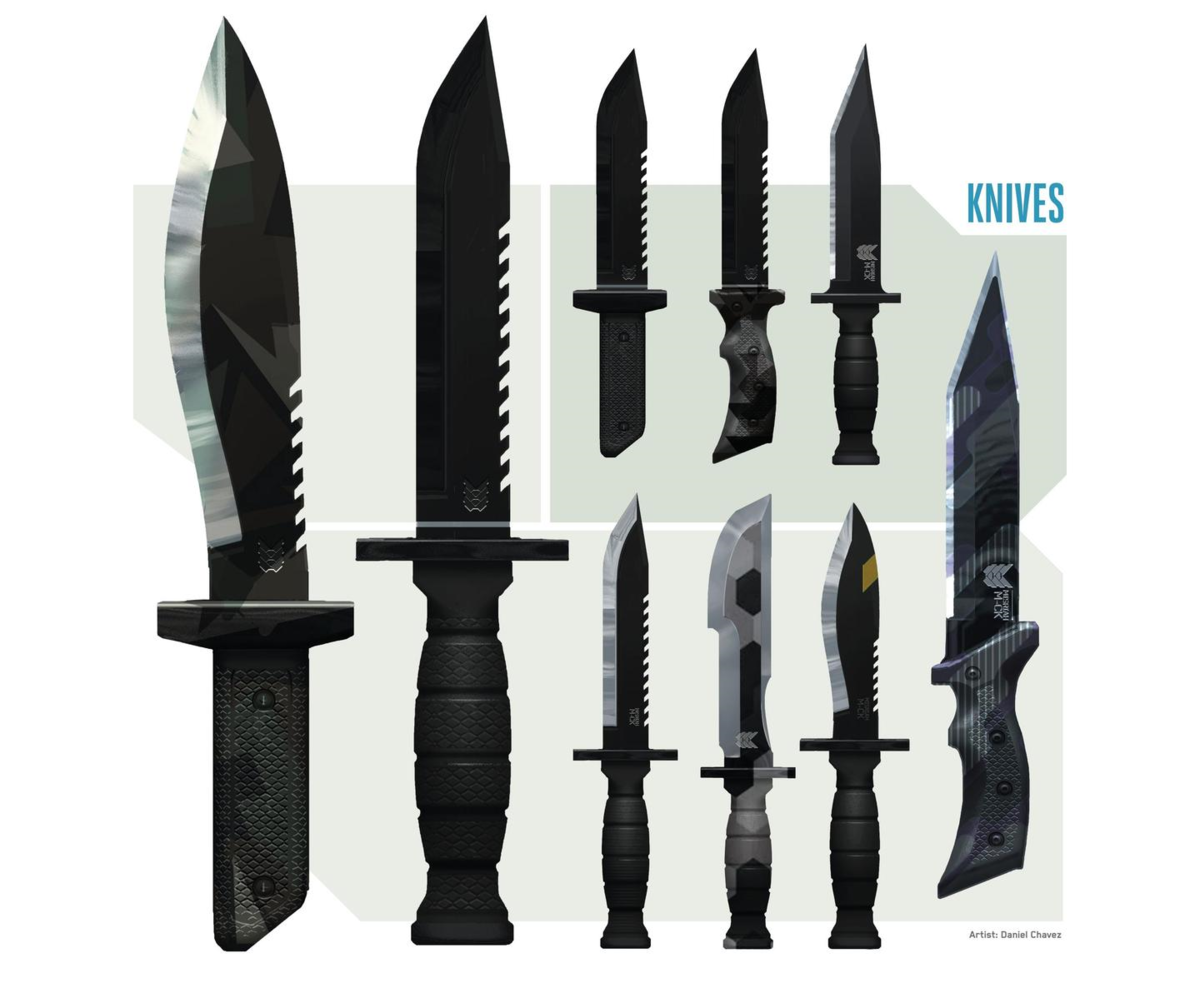
Updating for Model 52 Navy Knife from Halo Infinite.
Combat Knife Drawing.png


This one was done on the 405th Day 2022 Crafting Stream and was really fun overall to rework an existing design of the Reach Combat Knife into a new game and use lessons learned from an old design into an easier build for this one.

Order of operations of assembly matters on this build for full functionality. As well as a 3D printing filament of choice you'll also need
1 - 60mm x 10mm x 3mm magnet or a series of magnets that can fit within the same volume
2 - 2.5mm Ø x 60mm brass rods for alignment
1 - 1mm thick sheet steel or other ferrous material
1 - 2mm foam sheet for gasket material

McMaster Carr item 91292A021 can be used for the four M3 fasteners if they are trimmed slightly and the holes are drilled through. A printable version of the caps is included in the file pack.
91292A021 M3 Fastener Placement.png

The magnet is embedded within the core of the blade and is trapped forever. Yes this might make metal detectors at events a bit of a pain but showing that it's for the magnetic connection is easy to explain.
60mm x 10mm x 3mm Magnet Placement.png


The two brass rods extend between the grip, guard and assembled blade. Brass is not necessary but this diameter is usually easier to find and is cheaper than steel or other materials.
2.5mm Support Rod Placement.png

Before assembling the two halves of the sheath, insert the sheet steel segment cut to size. I recommend a strong epoxy here so that the magnet does not pull out the steel over time. Sand the surface flush and remove any burrs that may marr the painted surface of your knife.

1mm Sheet Steel Placement.png

Add the foam gasket in the lower recess. This is a bit of extra insurance against bumps and jolts in that will dislodge the knife from the magnet. The magnets I listed will be unlikely to let it go but having a press fit material there helps a lot for sanity.
2mm Foam Gasket Placement.png

Overall a super easy build if you have a printer and it was fun to make on Stream.

image1492.png

As always these are provided for free under the Creative Commons BY-NC-ND for personal use. I've had a bunch of headaches recently of people selling Commando kits without asking and all that extra paperwork takes away from time being a Fusion monkey. If you ever see anyone selling this file kit and not doing the makers trade of materials plus a six pack, something is funny.
Model52NavyBanner.png

Good luck and happy printing!

Model 52 Navy Knife
 
Last edited:
Amazing!
I'm gonna be printing this real soon. I *just* got a bunch of those magnets in yesterday too for the rest of my suit...I had been sort of wanting any accessories to be magnetized to the armor so I can customize....do you think replacing the steel sheet with another bar magnet would work or mess things up? (just downloaded the file) Or should I just cram one in the mounting plate?

Also, just a case of beer? Gotta be the cheapest royalties ever! :lol:
I always pair magnet with steel as opposed to magnet with magnet to limit the chance of one of the magnets shattering from hard contact. It's only happened once before but it was annoying enough to fix that it changed the way I design things :lol:
 
I always pair magnet with steel as opposed to magnet with magnet to limit the chance of one of the magnets shattering from hard contact. It's only happened once before but it was annoying enough to fix that it changed the way I design things :lol:
Fair enough. I worry about magnet strength and parts falling off while I'm walking...like my pistol....
I'll experiment
 
Does anyone have a picture of this knife and sheath ingame please?
I don´t play MP anymore^^
Thanks ;-)
I had to guess entirely at the shape of the blade since it isn't ever drawn in game or in cinematics so no guarantees on the accuracy of that part. There are a few good references available on Halopedia.
 
Finished printing and assembly.
Very easy to print and i am doing a little weathering on the retainer part.
Everything printed in the base colors, nothing painted.

I also have the foam gasket used, but i think this one helps more than the magnet system.
I use neodym magnets and a 1mm steel plate, but it doesn´t work very well.
I can feel a little force without the gasket, but not enough.
 

Attachments

  • Navy_knife.jpg
    Navy_knife.jpg
    215 KB · Views: 285
  • navy_sheath.jpg
    navy_sheath.jpg
    203.4 KB · Views: 248
I have this bad habit of getting too worried about the details....like how you can still see a bit of the seam on the top of the knife after filling etc...
Gonna stop getting stalled in that stuff and paint tonight lol
 
Finished printing and assembly.
Very easy to print and i am doing a little weathering on the retainer part.
Everything printed in the base colors, nothing painted.

I also have the foam gasket used, but i think this one helps more than the magnet system.
I use neodym magnets and a 1mm steel plate, but it doesn´t work very well.
I can feel a little force without the gasket, but not enough.
Do you know what size magnet and what strength they were? I designed for a 60mm x 10mm x 3mm N35 or N42 that I have access to and if you had issues with those I can change things up.
 
Do you know what size magnet and what strength they were? I designed for a 60mm x 10mm x 3mm N35 or N42 that I have access to and if you had issues with those I can change things up.
60x10x3 is what I put in my blade, the amazon page says nothing about N35 or N42 though,
Haven't done the sheath part yet but I printed it on a less-than-tolerant printer (get it? Tolerances? hehe) so I might not need anything in the sheath to hold it. Already had to do some sanding and melting on the inside.
 
Do you know what size magnet and what strength they were? I designed for a 60mm x 10mm x 3mm N35 or N42 that I have access to and if you had issues with those I can change things up.
I only got N52 from Amazon. That magnet size isn't available in any of my hobby stores.

Are N52 weaker than the ones you used?
EDIT: Okay, N52 are the strongest at that size if my search was correct.
 
Last edited:
Updating for a link to the thread for the 405th Prop Vise which is great for a booth prop display stand.

Prop Vise Drawing v1_Page_1.png


Prop Vise
 
Last edited:
This thread is more than 9 months old.

Your message may be considered spam for the following reasons:

  1. This thread hasn't been active in some time. A new post in this thread might not contribute constructively to this discussion after so long.
If you wish to reply despite these issues, check the box below before replying.
Be aware that malicious compliance may result in more severe penalties.
Back
Top