A lot of updates will be coming soon!
Armorsmith
I've been a supporter of this software ever since it was in its infancy as an Alpha.
I got this as a tool to alleviate my anxiety, which it did a pretty decent job at.
You may see me complain about it throughout some of my posts, because I tend to push it to its limits and find new bugs.
That's what happens when you have 70+ toggle-able items on a single digital mannequin.
I always had several thighs, cod/belts, and torsos just because they all sat differently, game model vs fan creation.
But my biggest complaint about the software is probably that the way you put the measurements for yourself in, just really isn't the best. Its over simplified, and works better for a mannequin than an actual person.
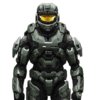
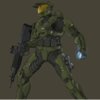
Below is what I envisioned my Spartan would look like fully tricked out. And honestly, this isn't even the latest version of it in Armorsmith at the time of this edit.
Getting all of this finished for Halo Outpost though, is not my goal, I just want to be able to at least get the base components of my armor completed in time for the event.
Despite taking measurements and verifying everything twice, I called up
PerniciousDuke and videochatted with him and got assurance with my measurements. I can't remember at what point during the build it was, so I can't remember if it was to fix something or if it was before I started putting everything together, but it gave me some ease of mind. Thanks bro!
Mark V Reach/CE Hybrid Chest
Original Version (F):
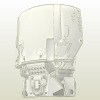
To start, this is what the original reach chest models look like.
This is the streamlined/female version.
Not shown, I have the bulky/Male version where the back slants down outwardly instead of inward.
The spine plates and lower back plate were removed to improve printability and mobility.
Custom Version:
It was based from the released version in Halo Reach but has some subtle changes that pull inspiration from these references below.
For the most part, everything pretty much stays the same except for 3 notable changes:
1) Back/Shoulders - Part of me always felt like something was left out regarding the Mark V armor in Reach, namely the high structures and vents (if that's what they are) that come up the back/shoulders. I really wanted to bring them back.
2) Front Panel - I always found the box that sticks out on the front plate to be... off putting I guess? It sticks out and has no purpose of which that I can tell. It just seemed an eyesore, and wasn't really present on any other incarnation of that Mk.V. It gets dropped.
3) Front Panel - There isn't really anything wrong with the shield emitters on the original, but when you drop the odd shaped box, these needed a style overhaul, and I love the single emitter design.
References:
I want to highlight here, 3 concept images from Halo Reach.
There was a point in time when Bungie was considering including the raised shoulders with the vents (or whatever they are) as well as the single shield emitter on the chest. In this version, the emitter is on the opposite side from what we got in CE.
Diaphram Electronics Box:
After seeing too many of these that I wasn't happy with, I wanted to come up with one that I was.
I 3D Modeled this myself, tossed it into Armorsmith to check how it fit with the torso, and tweaked it.
Technically, it should be as it looks in the first picture...
BUT, with the way things shift around in Reach, keeping it like that and lowering the stomach plate just didn't look right to me at all.
So I shifted it up, and trimmed the upper side to match the underside of the torso.
Finally, I had the idea of "why not make it functional?" So I was working towards making it so that you could drop in lenses, lights, and buttons.
Due to my time constraints, and lack of prototyping capabilities at the time, I ended up just deciding to go with a static version without buttons that worked, but this gives me a way to upgrade and options of where I might put a soundboard.
Shield Emitter Lenses:
WHAT ARE THOSE?
ARE THOSE LINES?
Is what I thought to myself as I zoomed in on screenshots of my MP Photos. These aren't simply little LED covers, these have style to them.


It is also very important to note, that all of them are oriented differently left vs right EXCEPT for the front ones near the armpits (shown above) and the ones on the thighs.
Solution? I 3D Modeled lenses to be printed in Natural PLA so they'd be semi-transparent.
The lenses are given ridges, recessed on the outside to receive a line of black wash paint to make the effect pop even more.
Shown below are two different versions, one with lips to catch from the back and one without.


