Brilliant. What do you use for padding inside? I imagine also you would take that into account when measuring and fitting.Can confirm, before reinforcing my back armor fell of the chair while painting and it shattered back into a couple pieces. You just need more surface area to get a good bond. Ideally with some reinforcement to prevent shearing.
I can't recommend fiberglass though, at least not the loose sheets I bought. They came apart when I was applying the resin and turned into loose fibers/splinters. You do NOT want fiberglass splinters anywhere near you, and sanding them requires a LOT of PPE.
That's why I switched to bug netting/tulle fabric. Easy to cut into the right shape with scissors, tack it down with a dot of superglue and then cover with one or 2 layers of resin. Much safer and (hopefully!) strong enough.
View attachment 345680
You are using an out of date browser. It may not display this or other websites correctly.
You should upgrade or use an alternative browser.
You should upgrade or use an alternative browser.
3D printed mkVI build (Citruspers)
- Thread starter Citruspers
- Start date
To be determined!Brilliant. What do you use for padding inside? I imagine also you would take that into account when measuring and fitting.
I'm thinking of open cell foam (think of eggshell foam, for instance). Springy, and hopefully breathes a little. Maybe some EVA to line the arm holes.
We got some nice weather and I'm getting some more things done. Some base coats for the armor pieces, but more importantly, I got to try the final color for the Plasma Grenade, and made some headway with the cortana chip ")

I used Motip Effect Metallic Violet and man, does it seem a good match for "covenant purple". Pretty stoked to see the whole thing assembled.
I used Motip Effect Metallic Violet and man, does it seem a good match for "covenant purple". Pretty stoked to see the whole thing assembled.
Quite happy with how things turned out today

The plasma grenade still needs some assembly. The original model has space for magnets and LEDs, but I'm not sure if I want to go that far.

I have a ball-chain (like you see on dogtags) on the way that I'm going to thread through the chip.
One interesting thing about this paintjob is that it changes with the light. Soft (indoor) lighting makes the body come out somewhat gunmetal grey, whereas bright light outdoors makes it look more silver. Layers are primer -> glossy black -> metallic silver -> matte varnish
P.S. both models were made by OddWorks: Get more from OddWorks on Patreon
The plasma grenade still needs some assembly. The original model has space for magnets and LEDs, but I'm not sure if I want to go that far.
I have a ball-chain (like you see on dogtags) on the way that I'm going to thread through the chip.
One interesting thing about this paintjob is that it changes with the light. Soft (indoor) lighting makes the body come out somewhat gunmetal grey, whereas bright light outdoors makes it look more silver. Layers are primer -> glossy black -> metallic silver -> matte varnish
P.S. both models were made by OddWorks: Get more from OddWorks on Patreon
Whoops, wrong franchise. Got distracted

ProfugoBarbatus
New Member
Lol, I like it though. Helldivers, Helljumpers, same thing really.
Electronics are really fun in any project, but for a plasma grenade I feel like magnets are a must-have if you've got the option. Nothing better than being able to stick it to something, right?The plasma grenade still needs some assembly. The original model has space for magnets and LEDs, but I'm not sure if I want to go that far.
Lungorthin
Member
Man, I really want that BR...
What paint did you use for that plasma grenade? It looks great?
Also, you should hide snacks inside that bubble shield generator. At least I would haha
What paint did you use for that plasma grenade? It looks great?
Also, you should hide snacks inside that bubble shield generator. At least I would haha
True! But the plasma nade has like 20 magnets inside of it, all of the panels can detach etc. Not sure if I want to go that farLol, I like it though. Helldivers, Helljumpers, same thing really.
Electronics are really fun in any project, but for a plasma grenade I feel like magnets are a must-have if you've got the option. Nothing better than being able to stick it to something, right?
Thanks! The paint is Motip Effect Metallic Violet.Man, I really want that BR...
What paint did you use for that plasma grenade? It looks great?
Also, you should hide snacks inside that bubble shield generator. At least I would haha
Finally got around to finishing up the wiring for my helmet. I still need to bundle and secure the actual wires, but everything's connected now:

Of course I took it outside in the darkness. This is at the lowest brighness:

And this is full-blast

Of course I took it outside in the darkness. This is at the lowest brighness:
And this is full-blast
Progress is slow. I like printing and painting more than rigging, and doing two cosplays simultaneously doesn't help speed things up lol.
Still:
* The helmet now has foam padding and sits rather comfortably. Unfortunately my wiring was a bit **** and now only 3 out of 4 LEDs work. Maybe I'll fix that eventually, but for now it's fine. Still need to figure out the visor though.
* Plasma grenade is finished (though it does need a holder/sheeth). I didn't put any lights in it (for now), but it does look great with a light source hidden behind it


* I bought a proper airbrush and compressor. Wrong franchise again (helldivers), but this is going to help a lot for painting details/accents. Kind of tempted to do a Plasma Rifle now.....not that I need more things to do.

* Chest armor now has buckles (top hinges) and locator pins (all 4 attachments) to prevent side-to-side movement.

* I mounted a bunch of webbing to my armor pieces. (Flexible) Contact cement to hold the strap in place, and epoxy to reinforce the bit at the top where most of the load is pulling the strap away from the armor.

Now I just need to figure out how it all goes together, and see about painting (or reprinting) those comically large thigh pieces (not pictured)...
Still:
* The helmet now has foam padding and sits rather comfortably. Unfortunately my wiring was a bit **** and now only 3 out of 4 LEDs work. Maybe I'll fix that eventually, but for now it's fine. Still need to figure out the visor though.
* Plasma grenade is finished (though it does need a holder/sheeth). I didn't put any lights in it (for now), but it does look great with a light source hidden behind it
* I bought a proper airbrush and compressor. Wrong franchise again (helldivers), but this is going to help a lot for painting details/accents. Kind of tempted to do a Plasma Rifle now.....not that I need more things to do.
* Chest armor now has buckles (top hinges) and locator pins (all 4 attachments) to prevent side-to-side movement.
* I mounted a bunch of webbing to my armor pieces. (Flexible) Contact cement to hold the strap in place, and epoxy to reinforce the bit at the top where most of the load is pulling the strap away from the armor.
Now I just need to figure out how it all goes together, and see about painting (or reprinting) those comically large thigh pieces (not pictured)...
It's becoming real!
The visor is an AGV AX9 motorcycle helmet visor which fits...well enough into the helmet (scaled at 110%). I couldn't really get Worbla transpa-art to work so I'm glad I finally found a prefab visor that works. Visibility is fantastic, though I do need to add a fan to improve comfort and prevent the visor from fogging up.
Next I'll have to commit to gluing the buckles that attach the shoulder plates to the armor (right now they tend to slide/sag), but....this seems to work. After that it's time for some shoulder padding inside the chest armor and attaching the lower arm pieces to the shoulder parts.
Hey where is the battle rifle from looks sick!Update: if anyone doesn't want to scroll all the way to the end, here's a little update how things are going:
View attachment 324544View attachment 343342View attachment 345915
View attachment 342692View attachment 349519View attachment 342693
-----
Hi everyone,
I'm Citruspers from The Netherlands, 31 years old and been a Halo fan for a long time (I'm no stranger to hauling CRT TV's for a system link LAN party, lol). I've obviously played the games and have read most of the books. Favourite game is a toss-up between Halo 3 (finale) and Reach (storytelling/presentation), favourite books are probably the Karen Traviss series.
I've been dabbling with making a Mjolnir costume for years now, starting out years ago with a paper/pepakura model and a massive amount of filler putty. After that, the project had been on ice for a few years until the Halo TV show came around. Disregarding the flaws, their depiction of spartan armor got the itch going again and I found myself low-key 3D printing some parts of Moe Sizzlac's mkVI armor set.
Then Castlefest came around again (finally!) where I walked around in my first (and last-minute) Skyrim cosplay and the reactions I got really motivated me to pursue my Mjolnir armor further.
So that's where I'm at now, my printer (a Voron 2.4 300mm) is busy cranking out more parts as I type this. I'll update this post to become a proper build log, but for now I'm excited to join the community, have a chat and share experiences.
Links to files used:
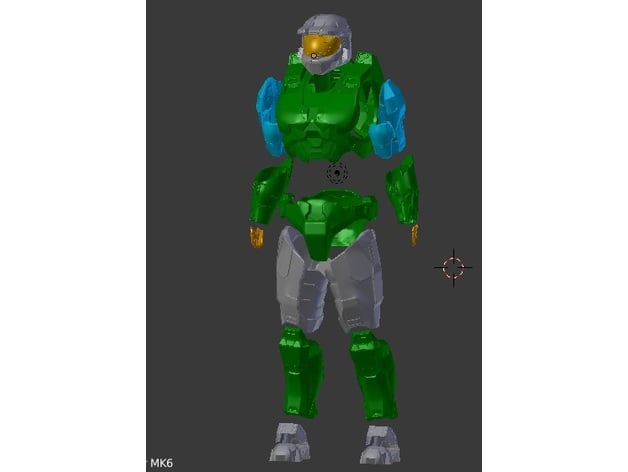
Halo 3 - Mark 6 - Master Chief Armor Set - No Helmet by moesizzlac
Update 11-18-21: Added a 16 piece wrap for the torso. You can individually glue this onto your torso area and it'll look good.Update 08-12-20: Fixed Torso issue.Update 10-02-19: Added Torso details to be printed using TPU Filament (Ninjaflex). Need to give a nod to Phil Shinner and his work...www.thingiverse.com

Plasma grenade, Cortana chip, BR75: Get more from OddWorks on Patreon
Oddworks on Patreon. The link is in the post you quotedHey where is the battle rifle from looks sick!
Halfway done with the rigging
For those worrying about their rigging, here's what seems to work for me.
* Only one strap/buckle is neccessary coming from the armor/shoulder to the upper arm piece. I initially fitted two, but using only the rearmost buckle (towards my back) offers better mobility. I also tried only using the front, but that caused the upper shoulder piece to catch inside the arch of my chest armor, getting it stuck.
* I have 3 straps coming down from the upper arm piece down towards the lower arm piece. The (extra long) piece that goes over my elbow doesn't seem to do much and I can probably do without that.
* The codpiece is glued to a generic belt and works well. However, I do plan on fitting some sort of (quickrelease) harness/suspender system because I don't want all the load from the upper and lower leg pieces on my hips.


Next up:
* Trimming (unneccesary) straps, reinforcing some with epoxy and cleaning up glue stains
* Finishing the upper leg pieces (epoxy, paint, the whole thing)
* Adding one or two fans to the helmet to keep it from fogging up, and give me a bit more comfort
* Making up a harness for the codpiece/leg pieces
* Rigging upper and lower legs
* Starting work on the boots
For those worrying about their rigging, here's what seems to work for me.
* Only one strap/buckle is neccessary coming from the armor/shoulder to the upper arm piece. I initially fitted two, but using only the rearmost buckle (towards my back) offers better mobility. I also tried only using the front, but that caused the upper shoulder piece to catch inside the arch of my chest armor, getting it stuck.
* I have 3 straps coming down from the upper arm piece down towards the lower arm piece. The (extra long) piece that goes over my elbow doesn't seem to do much and I can probably do without that.
* The codpiece is glued to a generic belt and works well. However, I do plan on fitting some sort of (quickrelease) harness/suspender system because I don't want all the load from the upper and lower leg pieces on my hips.
Next up:
* Trimming (unneccesary) straps, reinforcing some with epoxy and cleaning up glue stains
* Finishing the upper leg pieces (epoxy, paint, the whole thing)
* Adding one or two fans to the helmet to keep it from fogging up, and give me a bit more comfort
* Making up a harness for the codpiece/leg pieces
* Rigging upper and lower legs
* Starting work on the boots
So, I got distracted and made an energy sword...

Pretty pleased with how the paintjob came out, especially since I re-used paints I already had.
If anyone wants to know the process:
* Printed segments in ABS
* epoxy + ABS rectangles for reinforcement (inside the sword shells)
* lots of priming, lots of sanding
* primer base coat
* Purple base coat
* clouded white coat
* Another purple coat with a honeycomb screen in between (basically a honeycomb-infil-only print)
* Airbrushed white all around the edges
* Airbrushed white all around the sides
* Airbrushed white lightning streaks on the blade itself
* Final coat with metallic azore blue on the center of the blade
* Glossy clear coat/varnish
3D model: Halo Energy Sword
(I initially started with transparent blue shells and some LED strips but I couldn't get them joined smoothly, so I figured I'd go opaque and try to airbrush it)
Pretty pleased with how the paintjob came out, especially since I re-used paints I already had.
If anyone wants to know the process:
* Printed segments in ABS
* epoxy + ABS rectangles for reinforcement (inside the sword shells)
* lots of priming, lots of sanding
* primer base coat
* Purple base coat
* clouded white coat
* Another purple coat with a honeycomb screen in between (basically a honeycomb-infil-only print)
* Airbrushed white all around the edges
* Airbrushed white all around the sides
* Airbrushed white lightning streaks on the blade itself
* Final coat with metallic azore blue on the center of the blade
* Glossy clear coat/varnish
3D model: Halo Energy Sword
(I initially started with transparent blue shells and some LED strips but I couldn't get them joined smoothly, so I figured I'd go opaque and try to airbrush it
)- Member DIN
- S426
I encoutered this awesome spartan at Castlefest!

So cool to meet another dutch spartan in the wild, even if you were "undercover".
Maybe next year
More pictures incoming once I've found them all.
Maybe next year
More pictures incoming once I've found them all.
Could we possibly make any more noise...?

...I guess so!
...I guess so!
Alright, backstory and progress update:
I came across Apropalypse's rocket launcher which looked excellent...but it was the launcher from Reach. And I've always liked the version from 1-3.
So I decided to try and make my own.
And while I'm at it, let's see if I can make it reloadable, and maybe add some electronics as well?

I came across Apropalypse's rocket launcher which looked excellent...but it was the launcher from Reach. And I've always liked the version from 1-3.
So I decided to try and make my own.
And while I'm at it, let's see if I can make it reloadable, and maybe add some electronics as well?
- Member DIN
- S822
You did an awesome job! It would be epic to see you grab tubes from your back to reload.Alright, backstory and progress update:
I came across Apropalypse's rocket launcher which looked excellent...but it was the launcher from Reach. And I've always liked the version from 1-3.
So I decided to try and make my own.
And while I'm at it, let's see if I can make it reloadable, and maybe add some electronics as well?
View attachment 360387