Have you ever consider forming a visor with a vacum forming table? The real ones cost alot but you can make a home made one for cheap all you need is a PETG plastic sheet, a heat gun, a 10 foot 2x4, a good sized piece of ply wood 1/4 of a inch thick, a sheet of peg board, a shop vac, nails or screws ( if screws then you need a drill ), a saw, duck tape or aluminum foil tape I recomend the foil tape, and a staple gun. In short a trip to home depo  there are some really good tutorials on YOUTUBE if your intrested it gets you the cleanest and clearest visor possible.
You are using an out of date browser. It may not display this or other websites correctly.
You should upgrade or use an alternative browser.
You should upgrade or use an alternative browser.
Custom Halo 4 Armour Build+Lightrifle+Magnum [Commander Button Fox now a musical!]
- Thread starter Zoogami Snowfox
- Start date
- Status
- Not open for further replies.
Can't wait to see the light rifle all do up. Everything is looking great!!
Hopefully it will turn out good.
Had to start again on the light rifle due to the fact that the template I made is 30cm too short.
If I'm going to make them I may as well make them the correct size.
Have you ever consider forming a visor with a vacum forming table? The real ones cost alot but you can make a home made one for cheap all you need is a PETG plastic sheet, a heat gun, a 10 foot 2x4, a good sized piece of ply wood 1/4 of a inch thick, a sheet of peg board, a shop vac, nails or screws ( if screws then you need a drill ), a saw, duck tape or aluminum foil tape I recomend the foil tape, and a staple gun. In short a trip to home depothere are some really good tutorials on YOUTUBE if your intrested it gets you the cleanest and clearest visor possible.
I was thinking about doing a vacuum formed visor, but decided to try to make one out of a motorcycle visor first.
I don't think I will end up making one for this helmet, but if I ever make another helmet like the War Master one, then I definitely will.
Overall with the helmet though, I still need to touch up the paint detailing and also add lights... at some point.
......................................................................................................................................................................................................................................
Hey all,
The new template for the lightrifle is complete... now to begin making it.
This template is a 1-1 scale of the in-game lightrifle (1/2cm short).
Pretty much what I am going to be planning to do when it comes to the electronics (with the help of my trusted friend Arcsaber) is as follows:
There will be a button on the trigger that can turn on and off the lighting on the gun.
As well as this there will be another button on the trigger which when pressed makes the gun look like its shooting (also with sound affects).
Instead of just this, I decided that it should reload after the amount of shots in a chamber, so when that many shots have been fired,
the gun will flick up the chamber bit ready to reload.
Once it is pressed back down, the electronics reset (hence its in a loop / another chamber has been put in)
As well as this I plan to somehow have a countdown mechanism on the scope that will let me know how many shots I have left before I need to reload.
Still got to work out the best way to connect the wires from the scope to the rifle without ruining the effect of the scope hovering.
Anyways planning to be working on the lightrifle today, so when I work it out / do some more, will let u know.
Attachments
ARCsaber987
Jr Member
I don't remember mentioning a counter! (But I have studied how to do them now/ you can do it with off the shelf chips). Do you want an 7-segment display (think alarm clock) or just a warning light (would fit the look better I think).
But unless you want to do some wireless signals somehow I think there is going to need to be a couple of wires linking to the top section to tell it when the trigger has been pressed and when a reload has occured. Maybe we could use infared LEDs? I can't work out exactly how to make the latch/spring work for the reload work though, maybe someone watching the tread has an idea? All I can think to do is just a compression spring under a small door hinge and then a motor with a rack and pinion the moves back allowing the spring to launch the hinge up, then reset by pushing the hinge back down and pressing a button to reverse the motor.
Anyway new size looks much better, keep it up!
Ok been working on the lightrifle again, and the base layers are now done.
Time to start detailing.

The reason why there are 3 layers for each rifle is:
The middle layer will be kept separate from the gun till the end so that the electronics can be made along the way.
The outer layers will be used to detail the gun on the outside while I am still able to access the interior.

The following image shows the main idea for the rifles electronics.
Some of it still needs to be worked out, but this gives you an idea into what I am thinking.

Let me know what you think about the concept / if you know a good way to do some of it...
......................................................................................................................................................................................................................................
Ok update time:
During this week, any chance I could get, I have been working on detailing the back part of the lightrifles.
I thought the easiest way to do this was in layers.
Firstly I drew up a template to show which pieces needed to be higher than others.

Using this template, I was able to create the base layers I required.
This is thus far


I still need to do the fine details on this part, but I plan to do that after I complete the rest of the detailing to this stage.
As for the electronics, the idea is still the same as above, but I am also adding speakers into the rifle, to create the fire and reload sounds.
Time to start detailing.
The reason why there are 3 layers for each rifle is:
The middle layer will be kept separate from the gun till the end so that the electronics can be made along the way.
The outer layers will be used to detail the gun on the outside while I am still able to access the interior.
The following image shows the main idea for the rifles electronics.
Some of it still needs to be worked out, but this gives you an idea into what I am thinking.
Let me know what you think about the concept / if you know a good way to do some of it...
......................................................................................................................................................................................................................................
Ok update time:
During this week, any chance I could get, I have been working on detailing the back part of the lightrifles.
I thought the easiest way to do this was in layers.
Firstly I drew up a template to show which pieces needed to be higher than others.
Using this template, I was able to create the base layers I required.
This is thus far
I still need to do the fine details on this part, but I plan to do that after I complete the rest of the detailing to this stage.
As for the electronics, the idea is still the same as above, but I am also adding speakers into the rifle, to create the fire and reload sounds.
Attachments
-
 LightrifleProgress4_zpse3f05111.jpg67.2 KB · Views: 242
 -
 LightrifleProgress5_zps35bf026e.jpg65.5 KB · Views: 229
 -
 LightrifleProgress6_zps9cb06668.jpg65.2 KB · Views: 230
 -
 LightrifleProgress7_zps30cd7303.jpg69.1 KB · Views: 226
 -
 LightrifleProgress8_zps4eb94628.jpg67.2 KB · Views: 228
 -
 LightrifleProgress10_zpsb7475d5e.jpg90.2 KB · Views: 223
 -
 LightrifleProgress9_zpsb52147e5.jpg73.9 KB · Views: 219
WOW! that is looking AMAAAAAAAAAAAA-ZING!
Very nice work mate
Looks great, can't wait for more!
Firstly a big thanks to U513, and nanobot for your comments on the progress thus far.
Also thankyou to everyone else who has commented / watching this build, it gives me alot of motivation to keep this project moving forward.
To reward you I have another update on the lightrifle.
I have finished the base layers on the bottom half of the rifle.
Once again I started with making templates for that part of the gun.
This new piece also needed to have fine detail added to it, but I will do that after the top half, and scope / small mid chamber bits are at this stage.
On a random note when I was gluing the pieces together I noticed that when u put both sides together that it looks similar to a beam rifle...
Maybe if I make a beam rifle use the same idea?
Starting to somewhat dread deciding to make 3 at once, but all good lol.
More to come...
......................................................................................................................................................................................................................................
I noticed that the pic of the lightrifle wasn't very good in the last post so I took this one:
The rifles are still in 3 pieces so that I can do the electronics later, but the pic still gives you an idea of the size and thickness of the design.
Attachments
Kinggoobero
Member
I REALLY love that template idea for the details! Also how thick is your foam and where did you get it?
ARCsaber987
Jr Member
Wow, I mean I knew you had a good eye for detail but wow. I'm worried your putting my AR to shame!
TheReconSpartan
Member
Wow man. I'm very impressed! (not to offend) You should stick to foam, you're way too talented for pepakura!  Keep up the amazing job! Your light rifle is turning out better the DFT's!
I REALLY love that template idea for the details! Also how thick is your foam and where did you get it?
Thanks
So far its working better than I thought it would.
After cutting out the templates I just glue them together with hot glue.
The foam is 6mm thick and due to where I live I got it from a foam store 3hrs away.
I was going to get normal Eva foam but for some reason it was $75 a sheet (2m x 1m).
Last time I got some it was only $25 so idk...
Instead I got some cheaper Eva foam sheets which work fine (they are more flexible).
Your builds look pretty awesome too.
Wow, I mean I knew you had a good eye for detail but wow. I'm worried your putting my AR to shame!
Don't worry your AR in my opinion is pretty damn good too.
Wow man. I'm very impressed! (not to offend) You should stick to foam, you're way too talented for pepakura!Keep up the amazing job! Your light rifle is turning out better the DFT's!
Thanks
After starting to use foam I would have to agree with you it seems alot better / easier to use than pepakura.
I am planning on making the rest of the armour out of foam.
Your Battle Rifle looks pretty awesome too, just don't cut yourself next time lol.
WOW! Those lightrifles are looking pretty darn amazing! Puts my poor little plasma pistol to shame. lol I'm really impressed with your weapon work here, and your Livian design is really intriguing! ^^
Thanks
On the topic of the Livian design, all I need to do now is paint it and start on the next piece which are the claws.
Your plasma pistol and grunt suits you made are awesome, and I am still a bit jealous of your cool looking suit.
......................................................................................................................................................................................................................................
Ok now for an update on the lightrifle.
I managed to cut out all the top half templates but have only been able to attach them to 1 rifle due to running out of hot glue
Once again I used the same template technique.
To help understand it a bit better:
Each colour = different height layer
So as I make the higher layers I don't trace around the lower level.
Ie: 1st layer = whole temp (Green, Red, Orange, and Yellow).
2nd layer = Red, Orange, and Yellow only.
3rd layer = Orange, and Yellow.
4th layer = Yellow only.
So anyway this is it thus far, enjoy.
EDIT:
Got some more glue and attached the other 2 together, got to work out the moving parts now and do the scope.
......................................................................................................................................................................................................................................
Small Update:
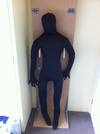
Morphsuits arrived and my mannequin has been put together.
Currently building a stand / background for it.
I'm thinking of having it as a forerunner wall with the Mantle symbol on it and have some text like:
The Mantle of Responsibility shelters all.
Once it is done I plan to work on the undersuit and chest piece next.
As for the lightrifle, just working on the moving bits at the moment and am going to have to start taking the rifle apart soon to get ready for the electronics.
Still got finer detail to do on it too.
More pics to come soon ...
......................................................................................................................................................................................................................................
Ok update time:
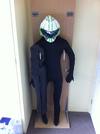
Finished Building my stand for my mannequin, only have to paint it at some point.
Now that it is down, planning to begin on the finer details on the lightrifles.
Here are some pics of the stand/mannequin.
Note in the pics, the black morphsuit is being used as the undersuit, but I just need to add detail to it still.
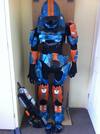
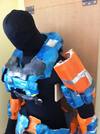
I decided to see what my old suit would look like on it:
After doing so I realised I have lost a bit of weight since the last time it was worn.
Unfortunately over time it has taken alot of damage, and is slowly falling apart.
To be honest I am surprised it hasn't completely been destroyed yet.
It was a bit of a rush job in the end, and that is mainly why it hasn't lasted very long. (As well as I did the build progress completely wrong)
Will post some more pics of the rifles as soon as I have worked on it today.
Attachments
-
 LightrifleProgress16_zpseaa17f96.jpg124 KB · Views: 214
 -
 LightrifleProgress17_zpse301db6d.jpg89.4 KB · Views: 219
 -
 MannequinProgress1_zps9a004909.jpg45.4 KB · Views: 219
 -
 LightrifleProgress19_zpse95a44ec.jpg94.1 KB · Views: 223
 -
 LightrifleProgress18_zps7748783f.jpg84.6 KB · Views: 234
 -
 FinishedSuit1_zps907050c1.jpg74.4 KB · Views: 218
 -
 MannequinProgress2_zps4b63df4e.jpg54.3 KB · Views: 211
 -
 FinishedSuit2_zpsfb69dfed.jpg92.8 KB · Views: 229
ARCsaber987
Jr Member
Poor guy looks so dejected in the last shot. Seeing the rifle compared to a person now makes you realise how impossing they are. What's currently inside the morph suit?
Poor guy looks so dejected in the last shot. Seeing the rifle compared to a person now makes you realise how impossing they are. What's currently inside the morph suit?
I know, at the moment he is very sad because he has to wait to armour up
Inside the morphsuit (aka the costumes undersuit) is another morphsuit of which I stuffed with lots of plastic and taped up.
I tried taping the morphsuit up while wearing it first... just to let anyone know don't try it cause it doesn't work especially if you tape yourself really tight like I did.
It was a real pain to get off again.
After that fail I pretty much stuffed it bit by bit to match myself while not wearing it.
......................................................................................................................................................................................................................................
Ok time for a big update (build completion wise):
For the last 3 days I have been working on the final base detail layers for the lightrifles.
I can say after the hard work I am glad to get it done.
I worked out that I did a total of 144 layer cutouts (48 per rifle, 24 per side).
I did this by using templates again.
The parts that needed to be done were:
The front, front mid, mid, and back chambers
The top back reload piece.
The scope.
This is a pic of when I finally finished cutting out the pieces.
This is the rifle thus far.
Note that the back chamber is sitting above the spot for now due to the fact I need to begin taking the rifles apart to attach it / prepare for the electronics.
Just on a mathematical note:
A total of 258 pieces have been made so far for these rifles (86 per rifle).
The finer detail comes next as well as the electronics...
Hope you enjoyed the update.
Attachments
-
 LightrifleProgress21_zps274ec5f6.jpg84.6 KB · Views: 214
 -
 LightrifleProgress22_zpse19ac357.jpg89.7 KB · Views: 211
 -
 LightrifleProgress23_zpsc009a72f.jpg79.4 KB · Views: 208
 -
 LightrifleProgress24_zps4aba2c8b.jpg86.4 KB · Views: 233
 -
 LightrifleProgress25_zps50a9e02d.jpg61.8 KB · Views: 217
 -
 LightrifleProgress27_zps0b0674a4.jpg75.2 KB · Views: 201
 -
 LightrifleProgress26_zps6bb42e06.jpg70.4 KB · Views: 197
Oh so you have 2 rifles.......EPIC lol now you can dual wield!
Oh so you have 2 rifles.......EPIC lol now you can dual wield!
Making 3 Lightrifles in total
Dual wielding would be pretty cool, but I'm going to step it up another notch and Tri wield.
2 are for friends and 1 for me.
......................................................................................................................................................................................................................................
Ok, I thought I would put some pics up of how the lightrifle moves when it will reload.
Just touching up stuff now and beginning on finer detailing...
Enjoy
...............................................................................................................................................................................................................
Hey all,
Just a small update:
Lightrifles are slowly being fine detailed while waiting for the electronics.
To complete the detailing though on some spots, I have to install the electronics.
As for the chest piece, I have been looking at all the different types and decided I am going to combine the
Recon front, and the Rouge back piece together.
On the topic of my Livian Head, I finally got around to beginning to paint it.
So far I have only done the base blue airbrush layer, but plan to finish it soon.
...............................................................................................................................................................................................................
Hey all, it has been a while since my last post, so I have an update for you.
Recently I have been working alot (mainly due to Christmas) so I haven't been able to make much.
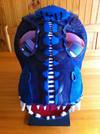
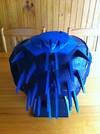
I decided that before I did anymore Halo costuming, I would complete my Livian Head Concept.
9 months since I first began to make this come to life, I am relieved that I can finally say that it is complete.
The design was inspired by: The Argonian Race from Skyrim, Jackals from Halo, and some dinosaurs (ie T-rex / Raptor).
Now that this is done I am planning to make the Rogue Chest piece next for the Halo Armour.
As for the lightrifles, there has been no progress on them.
My friend Arcsaber987 is still working on the electronics, so I will wait patiently until its done before I do anymore to them.
Until next time
...............................................................................................................................................................................................................
Hey all,
Just a small update today.
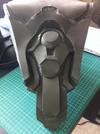
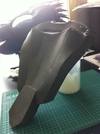
I have started to build my rouge chest piece.
I thought the best way I could make it would be in a few pieces and when they are done connect them all.
Here are some pics of it so far.
I decided to start with the back of the chest piece.
Next update soon...
Attachments
-
 LightrifleProgress28_zpsadbdebe3.jpg81 KB · Views: 204
 -
 LightrifleProgress30_zps1d8a2f98.jpg62.9 KB · Views: 211
 -
 LightrifleProgress31_zps522d95f4.jpg70 KB · Views: 212
 -
 LightrifleProgress32_zps7f2848e4.jpg81.4 KB · Views: 214
 -
 LightrifleProgress29_zps33b1aef5.jpg75.9 KB · Views: 207
 -
 LightrifleProgress33_zps600c4b53.jpg74.4 KB · Views: 217
 -
 LivianHeadComplete2_zps3d1ae808.jpg97 KB · Views: 206
 -
 LivianHeadComplete3_zps6498cfae.jpg98.4 KB · Views: 199
 -
 LivianHeadComplete1_zpse48c8075.jpg105 KB · Views: 198
 -
 RogueChest1_zps6f3d9736.jpg98.9 KB · Views: 192
 -
 RogueChest2_zps74d2a50d.jpg92.5 KB · Views: 197
 -
 RogueChest3_zps24b1be3a.jpg75.1 KB · Views: 190
 -
 LivianHeadComplete4_zps9b7a6cd2.jpg97.2 KB · Views: 195
rainbow dash
Well-Known Member
Following this because of your sliced lightrifle build.
Hey all.
Firstly before anything,
MERRY CHRISTMAS EVERYONE!
and have a happy new year
Secondly:
Thankyou for supporting comments.
I am hoping to get back into finishing the lightrifles soon, but have to waiting patiently for the electronics.
Until then though I will continue building the other pieces.
Which brings me to this big update.
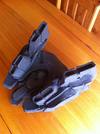
For the past few days I have been working crazily on the rogues back thruster pieces, and finally
today I have completed attaching them together to the rest of the back.
NOTE: I have been using Aztan's Rogue Chest File as a major reference in building this.
A big thankyou to him!
Here are some pics of it so far, enjoy.


I have been thinking for a while now, when I am wearing this armour, where will I carry my wallet and car keys?
I decided that seeing that the back chest piece is hollow at some points, it gave me the idea to add a flap of which I can place them in,
instead of wearing a bag or something.
This is what I came up with.


Now I only need to touch up the gaps and add a bit of extra detail to this half, but will do that after making the front piece.
Going to be mainly using gap sealant like U513 mentioned a while back after I made the helmet.
Anyway enjoy, be merry, and until next time peace out...
...............................................................................................................................................................................................................
Hey, just a small update today:
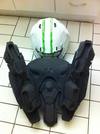
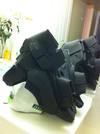
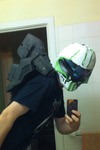
Did the next 2 pieces of the rogue chest after work tonight, and took a few pics for fun.
This 1st one is pretty much showing the size difference between the Pathfinder helmet and the chest.


These 2 was me trying to keep the piece sitting in place while trying to take a photo at the same time

Anyway, I am working alot currently, but am trying to get the foam stage complete by Wednesday...
So with that expect to here from me again soon.
...............................................................................................................................................................................................................
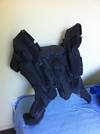
Small update today:
I have been working on the lower side pieces of the chest, and here are some pics.


Starting on front half now.
Firstly before anything,
MERRY CHRISTMAS EVERYONE!
and have a happy new year
Good to see you are back on it!! Keep it up buddy
Following this because of your sliced lightrifle build.
Much Slice
So Light Rifle
Such Awesome
Keep it up!
Secondly:
Thankyou for supporting comments.
I am hoping to get back into finishing the lightrifles soon, but have to waiting patiently for the electronics.
Until then though I will continue building the other pieces.
Which brings me to this big update.
For the past few days I have been working crazily on the rogues back thruster pieces, and finally
today I have completed attaching them together to the rest of the back.
NOTE: I have been using Aztan's Rogue Chest File as a major reference in building this.
A big thankyou to him!
Here are some pics of it so far, enjoy.
I have been thinking for a while now, when I am wearing this armour, where will I carry my wallet and car keys?
I decided that seeing that the back chest piece is hollow at some points, it gave me the idea to add a flap of which I can place them in,
instead of wearing a bag or something.
This is what I came up with.
Now I only need to touch up the gaps and add a bit of extra detail to this half, but will do that after making the front piece.
Going to be mainly using gap sealant like U513 mentioned a while back after I made the helmet.
Anyway enjoy, be merry, and until next time peace out...
...............................................................................................................................................................................................................
Hey, just a small update today:
Did the next 2 pieces of the rogue chest after work tonight, and took a few pics for fun.
This 1st one is pretty much showing the size difference between the Pathfinder helmet and the chest.
These 2 was me trying to keep the piece sitting in place while trying to take a photo at the same time
Anyway, I am working alot currently, but am trying to get the foam stage complete by Wednesday...
So with that expect to here from me again soon.
...............................................................................................................................................................................................................
Small update today:
I have been working on the lower side pieces of the chest, and here are some pics.
Starting on front half now.
Attachments
-
 RogueChest8_zpsc5b4bc8e.jpg90.4 KB · Views: 185
 -
 RogueChest5_zps3928e9ac.jpg105.8 KB · Views: 191
 -
 RogueChest6_zps75438825.jpg93.1 KB · Views: 183
 -
 RogueChest7_zps5313582e.jpg74.9 KB · Views: 192
 -
 RogueChest9_zpsa84c5691.jpg78.9 KB · Views: 188
 -
 RogueChest10_zpsbd5e02ad.jpg68.2 KB · Views: 182
 -
 RogueChest11_zpse95fbf2f.png1.2 MB · Views: 193
 -
 RogueChest12_zps92f38be1.jpg59.1 KB · Views: 175
 -
 RogueChest13_zps1c246691.jpg90.1 KB · Views: 184
- Status
- Not open for further replies.


