Custom Halo 4 Armour Build+Lightrifle+Magnum [Commander Button Fox now a musical!]

Status
Not open for further replies.
Nice, its taking shape. What glue gun are you using? I only ask because there is a lot of glue on the joints. It can make life hell later on. For me, when I use to glue parts. I only use to apply very little bits to the edges 5cm at a time and then stick the part on. Enough so that it sticks but not too much. Once I was happy with everything I would then apply the bulk of the glue at the back for strength. i'd add globs spaced evenly , set the foam piece where I want it and wait from them to cool and then fill the gaps with glue again. A metal nozzle at the end of the glue gun helped no end when it came to spreading the hot glue around evenly at the joint.

also, didn't realize you were from Australia! Its been my dream to move there as a permanent resident ever since I paid the east coast a visit. Its just soo complicated even though I have a Masters in civil eng!!

Thanks :)
Just using a regular glue gun with a technique close to yours.
You can blame my dodgy gluing on my many mistakes I did while attaching it together.
As I have been working on the front half, I feel I am doing a lot better job with it now.
(Australia is pretty awesome, have always wanted to go visit England some time)


Ok MEGA update today.
Finally completed the front half, as well as attaching it and the back together.
Lucky the chest piece didn't need to stay in 2 pieces to get it on.
Its not the easiest to get on and off by myself, but at least I am able to do so.

Now that its all connected, the smoothing stage (ie fixing up the excess glue, and using gap sealant).
There's alot I still need to do to it, but slowly I am moving forward.

Anyway here are some pics, enjoy:

RogueChest14_zps8cbbb2e0.jpg

RogueChest15_zps25301c2a.jpg

RogueChest16_zpsdbf06107.jpg

RogueChest17_zpsc7ad0e76.jpg

RogueChest18_zps18f3248a.jpg

More to come, sooner than later...
 

Attachments

  • RogueChest14_zps8cbbb2e0.jpg
    RogueChest14_zps8cbbb2e0.jpg
    91.8 KB · Views: 215
  • RogueChest15_zps25301c2a.jpg
    RogueChest15_zps25301c2a.jpg
    84.5 KB · Views: 217
  • RogueChest16_zpsdbf06107.jpg
    RogueChest16_zpsdbf06107.jpg
    60.7 KB · Views: 212
  • RogueChest18_zps18f3248a.jpg
    RogueChest18_zps18f3248a.jpg
    81.8 KB · Views: 211
  • RogueChest17_zpsc7ad0e76.jpg
    RogueChest17_zpsc7ad0e76.jpg
    62 KB · Views: 211
You little ripper!

That looks brilliant! Glue work on the frant is great too! I think the scaling is spot on. Well done! Whats next?
 
You little ripper!

That looks brilliant! Glue work on the frant is great too! I think the scaling is spot on. Well done! Whats next?

Thankyou U513 :)
You have given me a big motivation boost.

What's next you say:

For the chest: Smoothing rough edges and painting.
I am going to wait a little before I do this though and begin making my Rogue Shoulders.

I have to say a really big thanks to Aztlan and your chest file.
The file was fantastic as a 3d model reference, and I am sure your shoulders will be just as good.
 
Jesus this build is going great :D awesome work mate... i have to ask a question where do you get the thinner foam from that you used for the light rifle? iv been after it but cant find any on the north side of Brisbane :S
 
(lurk off)

Man, you totally nailed the Rogue torso! I keep looking at mine, and grimacing at the fact that I am just beginning still! Also, it seems funny now that I think about it, but the similarities of our builds is a bit uncanny! I do have to admit though, I swear I have looked at this thread a hundred times and just now realized that you were not building two Rogue backs, but it was in fact a reflection from the mirror you posed the piece in front of. (palm to forehead moment inserted here!) When are we going to get an update of the rifle and what are your next steps for the armor?

(lurk on)
 
Did you hot glue the visor pieces together?

Yes.
I used hot glue, and when it set, removed any excess and coloured the glue blue.

Jesus this build is going great :D awesome work mate... i have to ask a question where do you get the thinner foam from that you used for the light rifle? iv been after it but cant find any on the north side of Brisbane :S

Thanks :)
Throughout this whole build I have been only using 6mm eva foam.
I was lucky enough to find a foam store in Canberra called 'Act Foam & Rubber'.
I don't know if there would be a store like that where you are, but there most likely will be a Clark & Rubber.
Hope this helps.

(lurk off)

Man, you totally nailed the Rogue torso! I keep looking at mine, and grimacing at the fact that I am just beginning still! Also, it seems funny now that I think about it, but the similarities of our builds is a bit uncanny! I do have to admit though, I swear I have looked at this thread a hundred times and just now realized that you were not building two Rogue backs, but it was in fact a reflection from the mirror you posed the piece in front of. (palm to forehead moment inserted here!) When are we going to get an update of the rifle and what are your next steps for the armor?

(lurk on)

Thanks man :)
I have been using Aztlans file as a 3d model reference, so I would say that's why they look similar :p
I still think yours is going to look awesome when finished (probably even better than mine).
In the end Rogue Chest Piece = Winning :p

The next lightrifle update will be when my electronics for it arrive, but just got to be patient.
Currently working on the Rogue Shoulders.

Here are some pics of it so far.
Apologises for the bad quality in the pics.

RogueShoulders1_zps2d96bdc1.jpg

RogueShoulders2_zpsce778f96.jpg

Should have them completely attached either today or tomorrow, so when that happens I will post some better pics.
 

Attachments

  • RogueShoulders1_zps2d96bdc1.jpg
    RogueShoulders1_zps2d96bdc1.jpg
    89 KB · Views: 202
  • RogueShoulders2_zpsce778f96.jpg
    RogueShoulders2_zpsce778f96.jpg
    78.8 KB · Views: 208
thanks mate ill take a look, unfortunately clark rubber up here don't carry many types of eva foam :( ill have a look around again and see what i can find :)
 
Hey all big update today.

Managed to complete the rogue shoulders yesterday, so as promised here are some better pics of them.

RogueShoulders3_zpsf7deabbf.jpg

RogueShoulders4_zps1871cf8c.jpg

RogueShoulders5_zps0b41cede.jpg

I now am working both the chest and shoulders by
touching up rough edges with gap sealant / adding a little bit more detail / pva coating for extra strength and smoothness.

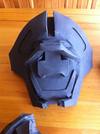
EDIT: The prepping for the gap sealant is done, thought I would post a pic of it before so that the difference can be seen after.

ArmourPrep1_zps49a89028.jpg
 

Attachments

  • ArmourPrep1_zps49a89028.jpg
    ArmourPrep1_zps49a89028.jpg
    93.4 KB · Views: 235
  • RogueShoulders5_zps0b41cede.jpg
    RogueShoulders5_zps0b41cede.jpg
    91 KB · Views: 209
  • RogueShoulders4_zps1871cf8c.jpg
    RogueShoulders4_zps1871cf8c.jpg
    71.9 KB · Views: 212
  • RogueShoulders3_zpsf7deabbf.jpg
    RogueShoulders3_zpsf7deabbf.jpg
    76.3 KB · Views: 209
WOW! Awesome job! I can't wait to see the next step completed :) Yay Rogue sets!
 
WOW! Awesome job! I can't wait to see the next step completed :) Yay Rogue sets!

Thanks :)
As for the next stage, I have now applied the gap sealant where needed, and as soon as it dries
I will smooth it down to add the pva glue coat.

ArmourPrep2_zps01390705.jpg

More to come...
 

Attachments

  • ArmourPrep2_zps01390705.jpg
    ArmourPrep2_zps01390705.jpg
    108.6 KB · Views: 201
Sweet! Just curious, have you worked with acrylic paint yet? I am testing it out now on a scrap of EVA but I am thinking with the way it is working out, I may use it on my Binary Rifle and then figuring some sort of hardened matte clear coat to give it the rigidity I want. That or epoxying the EVA, then painting... still undecided. I want to hear what you are planning for after the PVA.
 
so are you going to keep them black or are you planning on something else.

Sweet! Just curious, have you worked with acrylic paint yet? I am testing it out now on a scrap of EVA but I am thinking with the way it is working out, I may use it on my Binary Rifle and then figuring some sort of hardened matte clear coat to give it the rigidity I want. That or epoxying the EVA, then painting... still undecided. I want to hear what you are planning for after the PVA.

I used acrylic paint on the pathfinder helmet, but had a few issues with it.
If your going to use acrylic paint on eva foam it is best to have a layer on top of the foam (ie something like pva glue)
because the foam soaks up most of the paint.
I had to put 5 white layers of paint onto the helmet and you can still see the foam a little underneath.

I am planning on going a different method with these pieces.
Once pva glued and sanded smooth, I am putting 4 coats on.
1st: Spray-paint Matt Black
2nd: Spray-paint White
3rd: Detail paint Green
4th: Emblem / extra detail

The gap sealant is now dry so onto the next stage...


......................................................................................................................................................................................................................................


well the armor looks pretty BA with just the black. but it's your build.

Thanks :)
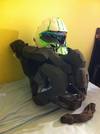
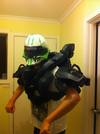
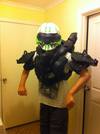
If you think it looked good in black then I have some pics of it with the matt black layer complete.

ArmourOn1_zps12531ce4.jpg

ArmourOn2_zps367ce22d.jpg

Had to hold my hands up like that because I haven't attached the shoulder pieces together yet.
Was pretty funny trying to pose like that while balancing the shoulders in place :p

So since the last update, I had a ALMOST major disaster.
In the last photo I posted, I was letting the gap sealant set outside.
Doing some other things while waiting, the foam began to heat up from the hot sun.
About 45min later when I went to check on the pieces, I discovered that the foam had become so hot that the
glue attaching the parts together had began to melt.
As the glue heated up, pieces were coming apart, so when I took it inside the glue reset in its new form.
I spent the next 3 1/2 hours repairing the damage to the pieces.
If I had of checked in on it about 10min later, I would have had to start from scratch again.

SO I send this warning to all foam makers:
Never leave exposed foam in the heat of the sun for longer than 30min.

Anyhow to finish off, the chest and shoulders have now been pva coated, sanded back, and 1st layer painted.

Hoping to finish the painting soon...
 

Attachments

  • ArmourOn2_zps367ce22d.jpg
    ArmourOn2_zps367ce22d.jpg
    63.5 KB · Views: 215
  • ArmourOn1_zps12531ce4.jpg
    ArmourOn1_zps12531ce4.jpg
    66.6 KB · Views: 239
Hey all update time:

Today I finally completed stage 2 / 4 for the chest, shoulders and I thought I will upload some pics thus far.
Enjoy

ArmourPrep3_zps7d7ddafd.jpg

ArmourPrep4_zpsf1edcfd9.jpg

Hoping to work on stage 3 and 4 tomorrow.


......................................................................................................................................................................................................................................

Hey all major update today.

I can FINALLY say that my rogue chest and shoulders are 100% complete.

So glad that they are done.

Getting the electronics for the lightrifles next weekend, so will begin to finish them off soon.
Meanwhile I plan to begin working on the thighs / legs / boots next.

I am planning to get this fully completed by the 10th of April to wear it to Supanova in Melbourne on April 11th. (Fingers crossed I get it all done it time)

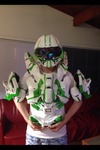
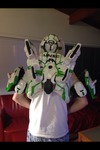
Anyway I'll stop talking now and show you some pics.
Enjoy

RougeChestShouldersComplete1_zpscba61bfb.jpg

RougeChestShouldersComplete2_zpscc6dbf83.jpg

RougeChestShouldersComplete3_zps207e85ea.jpg

RougeChestShouldersComplete4_zps7c15e86a.jpg


......................................................................................................................................................................................................................................

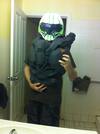
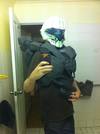
It finally got cool enough to be able to try the armour on (without having to wear the undersuit) without the pieces sticking to me from the heat.
Anyway here you go:

ArmourOn3_zpsce32f075.png

ArmourOn5_zps524a7126.png

ArmourOn6_zpsa90c1c49.png
 

Attachments

  • ArmourPrep3_zps7d7ddafd.jpg
    ArmourPrep3_zps7d7ddafd.jpg
    71.1 KB · Views: 214
  • ArmourPrep4_zpsf1edcfd9.jpg
    ArmourPrep4_zpsf1edcfd9.jpg
    73.5 KB · Views: 211
  • RougeChestShouldersComplete1_zpscba61bfb.jpg
    RougeChestShouldersComplete1_zpscba61bfb.jpg
    101.5 KB · Views: 202
  • RougeChestShouldersComplete2_zpscc6dbf83.jpg
    RougeChestShouldersComplete2_zpscc6dbf83.jpg
    90.6 KB · Views: 211
  • RougeChestShouldersComplete3_zps207e85ea.jpg
    RougeChestShouldersComplete3_zps207e85ea.jpg
    95.2 KB · Views: 209
  • RougeChestShouldersComplete4_zps7c15e86a.jpg
    RougeChestShouldersComplete4_zps7c15e86a.jpg
    90.7 KB · Views: 201
  • ArmourOn3_zpsce32f075.png
    ArmourOn3_zpsce32f075.png
    1.2 MB · Views: 229
  • ArmourOn5_zps524a7126.png
    ArmourOn5_zps524a7126.png
    1.1 MB · Views: 239
  • ArmourOn6_zpsa90c1c49.png
    ArmourOn6_zpsa90c1c49.png
    1.3 MB · Views: 248
Looks good! What are you doing in regards to electronics? Just the Lightrifle, or are we going to be seeing some lights on that armour?

And besides, it may have been hot in NSW, but I think it was hotter in WA. At least, that's what Sky News NZ says.
 
Status
Not open for further replies.
Back
Top