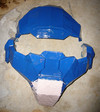
Glitch's Caboose Build!

Status
Not open for further replies.

Glitch

Jr Member
Hello 405th!
Head to the latest page to see what's new!

check out the Robina Zing store opening video for a look at my suit!
(I also got into this year's EB Expo 2015 video for a few seconds with the same clip :p)
>>
<<


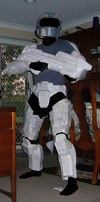
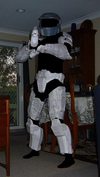
Completed Suit:
17252956846_7093ea2a3c.jpg


Thread Start:

I'm Glitch (Sean) and I've been checking out 405th builds for a long time so I decided i'd finally join up here!
I've been a 501st member for 2 years or so now, and built a lot of armour as you can see!
9442408376_0896eabfaa.jpg


It's my main hobby now, and I've even delved into pep work before,
I built a psycho mask from pep, fibreglass and a 500g tin of car filler
(I also built the rest of the costume) And for sydney supanova this year, I made my own 3D file for GIR's head from Invader Zim and pepped and fibreglassed him!
the rest is made from filler, foam and various other materials
19588142788_e51eea25cc_z.jpg
9682133383_0665acfaf8.jpg


His head plate flips up and it's signed by Richard Horvitz and Rikki Simmons, the voice of Invader Zim and the voice of GIR!
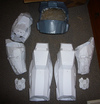
Anyway, Over the last month or so I've been building a MKVI Spartan.
I decided I'd do my favourite character Caboose from Red Vs Blue
(Who I'd actually met in 2012 at Gold Coast Supanova!!!)
So I got to pepping a MKV halo 3 bucket and decided to start the horrible task of resin and hardening
9685463794_66e91985eb.jpg
9685172440_a8bdbd4d00.jpg


I actually learned a lot of information about pep and resin/fibreglass/filler work from Cereal Killl3r's youtube videos!
an Incredibly helpful resource!
I thought fibreglassing the helmet would make it very heavy, so I went for 'Rondo-ing' Resin and fibreglass filler so as to try a different approach,
however the glass filler is a bit different to regular car filler and it went a bit differently than I expected
9681928355_57ce20b31d.jpg
9685165096_7b561afaf4.jpg


I then did a coat of primer to see how it was looking, I'm pretty happy with it so far, but I still have a bit of work to do on the inside of the helmet to harden it,
I've been putting in fibreglass cloth strips because It's just not strong enough :s But hopefully I'll find out if it's working when it cures! :)
9681923083_692b7e693c.jpg


Stay Tuned for updates now and again!


17252956846_7093ea2a3c.jpg


9442408376_0896eabfaa.jpg


19588142788_e51eea25cc_z.jpg


9682133383_0665acfaf8.jpg


9685463794_66e91985eb.jpg


9685172440_a8bdbd4d00.jpg


9681928355_57ce20b31d.jpg


9685165096_7b561afaf4.jpg


9681923083_692b7e693c.jpg
 
Last edited by a moderator:
Caboose is my favorite character as well! Will be keeping a close on your build, can't wait to see more.
 
Caboose is definitely a favorite in this house, too! He has a lot of lines that are "quote friendly" for the boys, if you know what I mean. Tucker is a terrible role-model.

Can't wait to see more of this one; those projects already under your belt look rather impressive! That GIR is adorable.
 
Update:

Thanks everyone!
Had a busy weekend but got back into it,
cut out two pages of my left forearm and the MKV's visor!

9714564005_7f15b46e70.jpg


Did some cleanup on the inside too, gonna do another layer of resin/fibreglass cloth in some areas on the inside
then it's onto filing down the ridges and body filler!
 

Attachments

  • 9714564005_7f15b46e70.jpg
    9714564005_7f15b46e70.jpg
    176.7 KB · Views: 288
Update:

Progress so far!
9811812316_a345389037.jpg


I've also printed out the chest, cod, thighs and the other bicep piece!
Slowly getting there...
 

Attachments

  • 9811812316_a345389037.jpg
    9811812316_a345389037.jpg
    169.6 KB · Views: 277
Update:

Thanks Nayr,
He's currently being upgraded! wire armature and new arms!

10068416015_1fd62749ba.jpg


I'm also much closer to the end of all this pep work!
just the chest and boots to go!

10068520893_ea54f4dbde.jpg


Out of curiosity, would any of my fellow aussies be able to tell me where they get their fibreglass resin?
I've just been using the Digger's stuff from bunnings, but if there's a cheaper and larger amount of resin I can get that'd be good to know!
 

Attachments

  • 10068416015_1fd62749ba.jpg
    10068416015_1fd62749ba.jpg
    133.6 KB · Views: 322
  • 10068520893_ea54f4dbde.jpg
    10068520893_ea54f4dbde.jpg
    103.2 KB · Views: 262
Out of curiosity, would any of my fellow aussies be able to tell me where they get their fibreglass resin?
I've just been using the Digger's stuff from bunnings, but if there's a cheaper and larger amount of resin I can get that'd be good to know!

I'm not Australian, but I think I recall seeing someone mention picking up their supplies at Super Cheap Auto? Does that sound familiar? I have no clue whether or not that's even a real place, I'm from the U.S., I just remember hearing that.
 
I'm not Australian, but I think I recall seeing someone mention picking up their supplies at Super Cheap Auto? Does that sound familiar? I have no clue whether or not that's even a real place, I'm from the U.S., I just remember hearing that.

Picked up a 2.5kg tin of Septone Car filler (our equivalent of bondo body filler) from there today actually!
supercheap sells fibreglass resin too, but only in little 500ml tins, whereas you can get 1kg of resin from bunnings :S
Your boots look sweet! hopefully mine will turn out that good! :p
 
Picked up a 2.5kg tin of Septone Car filler (our equivalent of bondo body filler) from there today actually!
supercheap sells fibreglass resin too, but only in little 500ml tins, whereas you can get 1kg of resin from bunnings :S
Your boots look sweet! hopefully mine will turn out that good! :p

Oh, alright XD well, I tried, sorry I couldn't be more helpful.
Thanks for checking out my build! Hopefully the rest of my armor comes out just as well :)
 
Pep work looks great! I can't tell if they're in there or not, but Carpathia designed some great supports for the MkVI codpiece that might help keep it's shape during the resin process. Might be some for the thigh openings too, can't remember for sure, but they'd be very helpful. I ended up having to build some custom supports for my cod, as it's prone to warping.

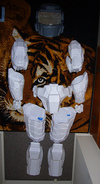
Side note, as soon as I saw the photo with the tiger, all I could think of was "There's a jungle cat in the bathroom!".

Hahaha
yeah I couldn't print some of the supports out on a single page, so i'm going to make custom ones before i resin coat the armour
been looking through many many threads, but any tips are appreciated!
 
Update:

Found an amazing source of resin!
A little repairs place down the road sold me 4kg of resin and an equal amount of fibreglass matting for $40!!!
scored there!

I'm also halfway through pepping an assault rifle, and the chest is next on the pep list!
And now I can start putting resin on pieces!

10152486606_1b736bb80b.jpg


Also I've finished upgrading GIR!


10152399445_f5286c714c.jpg
 

Attachments

  • 10152486606_1b736bb80b.jpg
    10152486606_1b736bb80b.jpg
    134 KB · Views: 274
  • 10152399445_f5286c714c.jpg
    10152399445_f5286c714c.jpg
    128.1 KB · Views: 267
Update:

Got most of the armour and AR resin coated over the last 2 days!
just need to coat the right shoulder, shins and cod piece on the inside!

Also taped it up for a try on!
just got to put a chest and boots together, you can also see where i've started some bog work on the helmet.


10188683324_b158cfc26c.jpg
10188876963_0ccfee1062.jpg
 

Attachments

  • 10188683324_b158cfc26c.jpg
    10188683324_b158cfc26c.jpg
    92 KB · Views: 370
  • 10188876963_0ccfee1062.jpg
    10188876963_0ccfee1062.jpg
    104.3 KB · Views: 281

Attachments

  • 13053485104_87f3bf7a64_z.jpg
    13053485104_87f3bf7a64_z.jpg
    177.3 KB · Views: 215
Update:

Been working hard at this for a day or two,
(ignore the blue, I'm using it to prime) So here's some pictures

Hands have been filled (but require sanding)
13164553223_fb935d1ce7_z.jpg

Cod/butt piece is fibreglassed and now being bogged
13164442375_979ed27d83_z.jpg

Left bicep is fibreglassed and being bogged
13164702264_8bb78d64ca_z.jpg

Boots have been resin coated inside and out and are now up to fibreglassing
13164703134_dc08a36f40_z.jpg

Left forearm has been fibreglassed
13164706784_378f8a3569_z.jpg

Chest has been resin coated on inside and outside!
13164706884_17d5cddba3_z.jpg

And last but not least, my never ending bogging of my helmet,
its nice and smooth on top, just a few holes to fill with bog and a bit of work on the back and it'll be ready to prime
13164550433_9953d84ab1_z.jpg

13164552863_092da3f046_z.jpg


potentially more fibreglassing, bogging and sanding tomorrow!
 

Attachments

  • 13164553223_fb935d1ce7_z.jpg
    13164553223_fb935d1ce7_z.jpg
    135.6 KB · Views: 257
  • 13164702264_8bb78d64ca_z.jpg
    13164702264_8bb78d64ca_z.jpg
    98.6 KB · Views: 270
  • 13164442375_979ed27d83_z.jpg
    13164442375_979ed27d83_z.jpg
    162.2 KB · Views: 248
  • 13164706784_378f8a3569_z.jpg
    13164706784_378f8a3569_z.jpg
    87.2 KB · Views: 241
  • 13164703134_dc08a36f40_z.jpg
    13164703134_dc08a36f40_z.jpg
    164.3 KB · Views: 303
  • 13164550433_9953d84ab1_z.jpg
    13164550433_9953d84ab1_z.jpg
    145.3 KB · Views: 252
  • 13164706884_17d5cddba3_z.jpg
    13164706884_17d5cddba3_z.jpg
    141 KB · Views: 299
  • 13164552863_092da3f046_z.jpg
    13164552863_092da3f046_z.jpg
    138.8 KB · Views: 306
Looks great. Looking forward to the final product. After I finish my current project, I'm going to do a Grif build.
 
Status
Not open for further replies.
Back
Top