Alright, new update!
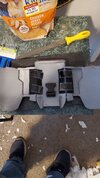
Due to how concave it is I believe it won't work with film unfornatuatly. Womp Womp.
Gotta go get me some Chrome spray.
Got any suggestions?
At the moment I'm looking at
Ultimate Mirror Chrome Aerosol Paint 3.5oz
Amazon.com
From the online reviews it looks ok but are there any opinions out there?