TurboCharizard

Sr Member
Member DIN
S068
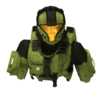
So far in terms of costumes I've done a bunch of generic mooks that are effectively just my personal avatars in game, I want to switch things up a bit and go for something a with a bit more lore crunch to it. May I introduce you all to my next planned Spartan suit, Spartan Daisy-023 from Halo Legends: Homecoming.

421px-Homecoming_poster.jpg

If anyone here is noticing a theme in my builds, yes I am a card carrying member of Red Team and I really, really like the CQB aesthetic. In Legends Daisy as a Spartan II wears a stylistic GEN1 Mark VI C Variant painted a rusty red to match the desert sands of Sargasso as camouflage. The animators slightly changed the Halo 3 version of the Mark VI armour so I will be using the Halo 3 armour set as reference in this build and add a few of their flair pieces as details because some of their design choices would require me to be both female and anime in proportions and I don't know if I can manage that.
7bf72f0b435c965cd9483490512643d0a85b333av2_hq.jpg

H3_CQB_ref.jpgHL_CharacterDesign_DaisyArmor.pngHL_CharacterDesign_DaisyBear.png


Daisy's loadout is simple and practical
  1. M6C Personal Defense Weapon System
  2. MA5B Individual Combat Weapon System
  3. Sniper Rifle System 99C-S2 Anti-Matériel
  4. Teddy-bear Charm
Daisies_-_Homecoming.pngDaisy.jpg

I plan on using the files created by MoeSizzlac as a base for the legs, bracers, biceps and backpack portion of the suit and modelling the CQB chest, helmet and shoulders. The suit will be fully printed and finished with an external coating of XTC-3D and internal coating of EpoxAcoat GREY for strength and clumsy-resistance. The props will be a mix of EVA foam and 3D printed accent pieces to keep them light weight and easy to sling onto the back of the armour.

My goal is to have this suit finished for the first big convention of 2019 in Victoria so this build will progress relatively quickly for the 3 month completion time.

As usual I will use the original post as an index to link to other posts of note as well as a tracking sheet for progress and material consumption.

Wish me luck folks.
Daisy_(3).jpg


Scaling - Armorsmith
Reference Collection - 2 hours
Helmet - CQB - Complete
Modelling - 7 hours
File Cleanup - 10 hours
Visor
Chest - CQB - Complete
Modelling - 10 hours
File Cleanup - 12 hours
Shoulders/Biceps - CQB(R)/CQB(L) - Complete
Modelling - 6 hours
File Cleanup - 1 hour
Gauntlets - Mark VI - Complete
Printing - 50.9 hours
Assembly - 0.25 hours
Thighs- Mark VI - Complete
Shins/Boots - Mark VI - Complete
Under Suit - Complete

M6C Personal Defense Weapon System - N/A
MA5B Individual Combat Weapon System - Patterned

Patterning - 1.5 hours
Sniper Rifle System 99C-S2 Anti-Matériel - Patterned
Patterning - 2 hours
Teddy-bear Charm - Patterned
Patterning - 1 hour
Combat Knife - Complete
Modelling - 1 hour

Materials Consumed
eSun PLA+ Gray - 12kg
6 Minute Epoxy - 1 Syringe
Devcon 5 Minute Epoxy - 25oz Kit
BSI Insta-Cure+ CA Glue - 1 Bottle
BSI Insta-Set Spray Accelerator - 1 Bottle
Smooth Cast 65D - 1.9lb Kit
XTC-3D Epoxy Resin -
Krylon Triple Thick Clear Glaze
Krylon Chalky
Rustoleum 2X Primer
Rustoleum Colonial Red
Rustoleum Canyon Black
Rustoleum Clear
Vallejo Model Air Black Metallic
PETG
Jacquard iDye Poly Yellow
Jacquard iDye Poly Orange
Alclad II Chrome

Expendable Materials Consumed
Sanding Pads - 9 x 80grit, 5 x 120grit 5 x 220grit
Sanding Drums - 4
Sanding Sponges - 3
Respirator Filters - 2 changes
Mixing Cups
Chip Brushes
Sponge Brushes
Cling Wrap
Green Painters Tape
Yellow Frog Tape
Nitrile Gloves

Printer Replacement Parts
1 x NEMA17 Stepper Motor - 48mm TEVO Tornado Y-axis replacement
2 x 0.4 mm MK8 Brass Nozzle
1 x 0.4 mm MK10 Brass Nozzle
30cm PTFE tubing

Consumables Consumed
Number of Coffees Consumed - 22
Number of Rims Rolled Up - 15
Number of winning Rims - 1 x Coffee, 2 x Doughnut
Number of Energy Drinks Consumed - 5
Volume of Alcohol Consumed - Yes
 
Last edited:
Aw dude yes I loved this story in legends, you may not be anime enough but I think being a licensed professional meme incarnate will do you just as well.

And if I ever see you at a con someday I would be honored to be your sickened clone double in a wheelchair...just don't shoot me in the face plz
 
If you can pull it off, I'd love to see it!

I'll get it done one way or another! I have to knock bucket list costumes off the list to get further down the list to get to the even better stuff! If you're ever on the west coast of Canada or PNW of the US, give a shout and I can show you parts of the Skookum Armoury.

If anyone can pull it off, TurboCharizard can.

Good luck!

High praise, let's see if it's warranted :p

Aw dude yes I loved this story in legends, you may not be anime enough but I think being a licensed professional meme incarnate will do you just as well.

And if I ever see you at a con someday I would be honored to be your sickened clone double in a wheelchair...just don't shoot me in the face plz

I plan on this being the costume that can travel without use of a car so I might be able to bring it to Ontario one day and I'll take you up on the offer. I'll get you the wheelchair if you buy the sundress. No promises on not glacking you.
 
OMG yes! I love that people are getting the legends suits going. But we have to get you and starwolfstudios (currently doing Halsey from legends) together for the epicness
 
Well this is a little awkward. I've neglected this thread for a bit over a month. That being said, I've not been slacking on the build. Over the last few weeks I've had the joy of rebuilding printers and doing upgrades to them, reorganizing the Crafting Dungeon and building the majority of Daisy's extremities. To keep things easy to link to the first post index I'll be breaking up the photo updates into sections based on armour pieces. Unfortunately I've had some commission work in this time frame as well so I haven't been able to dedicate the printers 24/7 to Daisy and the spool count is slightly skewed by overlapping with other projects.

Speaking of spool count, because I'm a dork and wanted to track progress in case of repairs or building another suit in this manner, data is compiled for the prints expected time, actual time, filament usage, scaling, print settings and several other useful bits of knowledge. To save you from looking at a giant spreadsheet, here's the summary box of where we're at in the build.
upload_2019-1-27_21-34-8.png


Because actual progress photos are a thing that people come to these threads for, lets look at some gauntlets!

Gauntlets - Printing and Prep
Just before Christmas vacation and time away from the house I wanted to get the Gauntlets printed since they were fairly small and manageable pieces. Because of these pieces I learned a cool fact about my body! I broke my right wrist twice through sports when I was younger and because of that apparently I can't curl my right hand as much as my left which led to needing to rescale and reprint to make the parts wearable.
DSC_2017.JPG received_526439124520413.jpeg 48985050_464603604063728_3753218022706249728_n.jpg

I upped the scale factor by an additional 7% to give another centimeter of diameter at the cuff. Overall each Gauntlet is 275g without the resin coating. When sanded, resin coated, painted and padded I'm expecting each gauntlet to weigh about 400g (almost one pound for you American folks) which is similar to what my finished foam Reach Mk. V gauntlets weigh, I'm A-okay with that!

During the course of printing these early pieces I was fiddling around with print settings to maximize speed as best as possible. Thanks to the tinkering with the machine and settings I have the Tevo Tornado putting out good quality prints with a print speed of 60mm/s and an infill speed of 100mm/s. You can almost see the spool of printer goo pump into the hot end and the overall print quality isn't taking a hit which is fantastic.
DSC_2016.JPG DSC_0007.JPG DSC_0005.JPG

After a successful first batch of pieces, I needed to try them on and wave them around.
DSC_0021.JPG DSC_0023.JPG

Yes, I did duct tape the handplates on for the sake of a picture.
 
Looks great!

Thank you good sir! At this point though most of the kudos go to MoeSizzlac though for quality models. All I did was have reliable printers :lol:
That is looking Awesome!

12 pounds of filament? Wow, I feel like it's going to weigh a little more than foam.
You also need to consider brims and support material which is waste material. I try to optimize supports in my prints but sometimes you just have to have giant towers of support to have crisp overhangs.

Nicely done as usual TurboCharizard
We'll see how it goes once surface finishing and paint is on (y)
 
I did some large piece assembly today and although I want to post ALL THE UPDATES at once, I wanted to use this one to showcase two products that I use that make my life easier when doing big 3D printed projects. Don't worry, updates soon because the lower half of Daisy is fully printed and I'm starting the torso.

First up is Devcon 5 Minute Epoxy which is a product that I picked up out of frustration at buying the tiny two part epoxy syringes from Home Depot for almost $10 each. This stuff is ten times the volume for twice the price so it's a bit of a no brainer as to why I jumped on it. Some prop makers will fight tooth and nail against using an epoxy adhesive for 3D printed parts since it adds volume and ruins fit tolerances but on large armour pieces like this that are being attached at a plane cut and then being sanded to heck, who cares. In most cases this join with epoxy will be stronger than the base 3D printed parts so that works for me.
DSC_0047.JPG

The one downside of using a adhesive with a non-instant set time is that you have to clamp parts in place and wait for the epoxy to cure. Unfortunately our pieces that we work with in Halo costuming are usually a lot less square than woodworking clamps are best for so we have to get creative so parts don't slide around while waiting for chemical reactions.
DSC_0048.JPG

To make the clamping quicker and to stop parts shifting while adding clamps I sometimes cheat by using a BSI Insta-Cure+ and Insta-Set to tack down an edge in the right spot, apply pressure with clamps to press the epoxy and two or more mating surfaces together firmly. I'm notoriously clumsy and this helps stop any possible catastrophes that may knock parts out of alignment while the clock is rapidly ticking down on an epoxy that has a short pot life. Yes, I could be more cautious but ha, no, I just use tricks that speed up my workflow and are possible carcinogens.
DSC_0049.JPG

How do you folks build up 3D printed or other plastic pieces? Do you have any cool tricks? I'm always excited to see how other people approach different problems!
 
I've been looking up on the best way to glue 3D printed pieces as well.....Just another project in the works for me......This is a review by a modeler called Phil of Mars who indicates that a plastic weld works best. Here is his review:

The best kind is tenax, or ambroid, or one of the other plastic welders. they actually MELT the plastic together forever! Push the peices together and brush it on the crack, then as the pieces slightly melt, the pressure forces out a bead of plastic, scoop it off with an xacto or some knife, and let it cure. It will NEVER come apart.
Some newer plastics won't hold together with old fashioned model glue.
super glue works too, but it's messy.

I'm not sure how this would be effected or effect 3D plastics........
 
I've been doing a few last tweaks to the models to get everything as game accurate as possible. Some of the armour pieces are kind of funny thanks to older, low poly models that added detail with texture maps but such is life.

I hooked up the XBox 360 to my Hauppauge capture device and did a few different rotations to make sure that I had everything correct.

My main take-away from this whole experience is that Bungie kind of didn't consider what to do with shoulders since the majority of the armour variants have the top of the shoulder covered. CQB they kind of just use the base Mark VI shoulder and then just black out the section below where the hexagonal Mark VI plate would be. I'm going to have the coloured sections be printed solid and then have a soft part section to fill in the details where they just shrugged and said "I don't know? Nothing?".
 
The past little bit has been all about modelling pieces that either don't exist in the wild or are only slightly higher resolution than game rip. In other words I've been a happy chappy playing around in Fusion 360 and digging up obscure reference images. I'll keep these next three posts separate (helmet, bicep/shoulders and chest) to let everything be linked easily and to help keep a few different modelling approaches in their own post to not muddy waters for anyone attempting to pick up some design techniques.

Daisy's helmet is an interesting design challenge for a few reasons.
  1. It does not follow typical CQB pattern (narrows toward pointed chin, converges towards helmet front in style similar to ODST variant) and cannot be built off of a game rip.
  2. Anime even from big budget studios goes "off model" frequently to speed up the animation process, this creates inconsistencies in geometry of objects between frames.
Point 1 is best illustrated with the character reference from the animation studio compared directly to the Halo 3 armour variant portraits.
HL_CharacterDesign_DaisyArmor.png CQBArmor.png
Point 2 is best seen in the fight sequence at the opening of Homecoming during flips and acrobatics.

Since this model was a bit of fun for me I documented the key steps in building everything in hopes to inspire some other members to join on team 3D design. I captured my design history as well so that all major steps can be followed roughly as a timelapse video, and yes, it does include some of my flubs and reworks. This is also my second crack at the helmet because the first attempt just didn't scream "Daisy" to me, it was too generic of a CQB.

1. References and Setting up Canvases
Nothing makes designing accurate models easier than having a series of references to trace off of. Many of the armour permutations that we love in the 405th have design documents from Bungie/343i that have orthographic projections that make recreation of objects in 3D a breeze. Another fantastic resource is The Armory with plenty of game rips and pep files that can be easily turned into .obj files and imported into Fusion 360 as a mesh that you can compare scaling and curvature to. Since this specific helmet isn't one that has been included in the games, I had to use the animation studio character reference, crop to the specific sections using Inkscape and then aligning view angles with the appropriate axes in Fusion.
HelmetFront.png HelmetSide.png received_1877541369034473.png

2. Establishing Base Form and Refining Shape
A semi-hidden feature that makes helmet design much easier in Fusion is the Sculpt Workspace. In the free version you can access this by right clicking your project in the left pane and selecting "Do not capture design history" or under Create>Create Form if that previous statement causes you distress. This allows you to use the Sculpt feature of primitive shapes such as the Quadball. By creating a Quadball with a mirror plane along the direction from nose to back of head you can make a vaguely helmet shaped potato blob through a combination of the Edit Form and Insert Edge tools to adjust the curvature. Doing this requires a little bit of finesse, stopping and stepping back to check if everything looks correct. It definitely takes a bit of practice. For a more in depth description I highly suggest the Autodesk Design Academy video on creating a Formula 1 helmet. Switching between views frequently and making everything align with your canvases may take some time but having a solid base form to cut and manipulate will make the rest of the project that much easier.
1.png 2.png

3. Add Main Features
In the Model Workspace we can start cutting or adding on features to the base form. For the CQB helmet in particular there is a series of layered shells to reduce impact and hopefully protect the operator. These layered shells let us use some trickerey. By creating a copy of the base form, making a Scale copy of it and centering it where needed we've made a sometimes difficult operation of making offsets into two clicks and a reposition of an object. Now to show this awesome offset trickery, create a sketch of the main features using Line, Arc, Control Point Spline and any other drawing operations to create simple forms that can be used to cut away from the base. Using Extrude with the Cut operation we can trim down sections that are no longer needed. If you remember back to the second step, we made this helmet symmetric across a plane so we only really need to design one half of the helmet as well which means less clicking around chasing edges for fillets and chamfers later on!
3.png 4.png 5.png

4. Fillets, Chamfers and Splitting Bodies to Make Them Fancy
Unfortunately not everything is made of LEGO blocks and we have to remove some of the sharp edges to give our project the manufactured and machined look. Using a mix of the Chamfer and Draft tool we can adjust surfaces to be angled more closely to our reference images. Offset depths can be determined by comparing lines in the canvases and chamfer angles can be adjusted to meet mating surfaces as appropriate. Some areas need the Fillet tool to smooth out transitions but I tend to avoid it on UNSC projects because harsh angles are humanity's jam in the 26th century. Occasionally you'll find that you want to either work on a specific portion of a body or create a cut using a sketch, this is where Split Body shines. A great example on this helmet is on the cheek mounted heat sink a sketched curve is created that matches the curvature of the helmet, is used to split the heat sink and the extra piece is removed.
6.png 8.png

5. Offset Planes, Projections and Sketches to Add Text and Raised/Recessed Surface Details
Once your models approach completion they start to get... crowded with sketches. Creating Offset Planes and grouping design elements lets you keep things more organized and more importantly, Project to surfaces. For raised details such as the fins on the forehead and the raised visor detailing creating a sketch in a plane and then projecting it along a vector makes adding detail a breeze. Two parallel lines are all that's needed for the fins, projected to the forehead and then extruded as a square Pipe. The visor detailing is just as easy with a projection of the curves, Split Faces and then a Press Pull to offset to a desired height.
7.png 9.png 10.png

6.Final Detailing
Sometimes there's a few things that are just nice to leave to the end. In the normal CQB helmet there is three vents/ports that are simple sketches that then use the Revolve tool to create a simple form. Because anime these are even lower detail on Daisy and are effectively a simple truncated cone. Select everything, create a Mirror and admire your finished piece.
11.png 12.png 13.png

There was a few compromises in the design to make it fit a human head, but overall I'm happy with how this looks. It definitely reads as Daisy-023, even without the colour scheme applied. This is just a rundown of how to make a fancy shape, not one that is wearable. I talk about hollowing out a form in another post on a previous build thread but I'm always down to answer questions.
14.png Daisy_(3).jpg

As promised, the timeline view. After doing this I realized I still haven't installed a video editor on my tower after I had to reinstall Windows. So ha, weird.
 
This thread is more than 7 months old.

Your message may be considered spam for the following reasons:

  1. This thread hasn't been active in some time. A new post in this thread might not contribute constructively to this discussion after so long.
If you wish to reply despite these issues, check the box below before replying.
Be aware that malicious compliance may result in more severe penalties.
Back
Top