halo warthog build (power wheels)

Status
Not open for further replies.

MysticMakings

New Member
halo-warthog-mini-build-1234128_718791468146721_1148069648_n-1-.jpg
HTML:
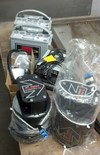
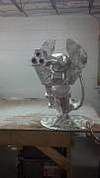
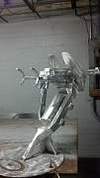
Wow found out where to post on this site. Im building my first warthog and making it for my daughter it is quite a few pictures so far but I hope everyone enjoys that comes across this thread
halo-warthog-mini-build-558611_718791364813398_760364064_n-1-.jpg
halo-warthog-mini-build-524514_718791304813404_667957422_n-1-.jpg
halo-warthog-mini-build-533781_718791584813376_668287450_n-1-.jpg
halo-warthog-mini-build-1233561_718791611480040_642160705_n-1-.jpg
halo-warthog-mini-build-1238078_718791868146681_736552489_n-1-.jpg
halo-warthog-mini-build-946335_718792111479990_712837811_n-1-.jpg
halo-warthog-mini-build-970349_718792058146662_3820628_n-1-.jpg
halo-warthog-mini-build-9-25-2013.jpg
halo-warthog-mini-build-9-28-2013.jpg
halo-warthog-mini-build-golf-cart.jpg
halo-warthog-mini-build-img_20131002_153532_617-1.jpg
halo-warthog-mini-build-img_20131002_171632_933-1.jpg
 

Attachments

  • halo-warthog-mini-build-1234128_718791468146721_1148069648_n-1-.jpg
    halo-warthog-mini-build-1234128_718791468146721_1148069648_n-1-.jpg
    61.7 KB · Views: 1,424
  • halo-warthog-mini-build-9-28-2013.jpg
    halo-warthog-mini-build-9-28-2013.jpg
    579.3 KB · Views: 429
  • halo-warthog-mini-build-9-25-2013.jpg
    halo-warthog-mini-build-9-25-2013.jpg
    3.3 KB · Views: 307
  • halo-warthog-mini-build-970349_718792058146662_3820628_n-1-.jpg
    halo-warthog-mini-build-970349_718792058146662_3820628_n-1-.jpg
    3.3 KB · Views: 276
  • halo-warthog-mini-build-946335_718792111479990_712837811_n-1-.jpg
    halo-warthog-mini-build-946335_718792111479990_712837811_n-1-.jpg
    3.8 KB · Views: 270
  • halo-warthog-mini-build-1238078_718791868146681_736552489_n-1-.jpg
    halo-warthog-mini-build-1238078_718791868146681_736552489_n-1-.jpg
    3.2 KB · Views: 248
  • halo-warthog-mini-build-1233561_718791611480040_642160705_n-1-.jpg
    halo-warthog-mini-build-1233561_718791611480040_642160705_n-1-.jpg
    2.6 KB · Views: 255
  • halo-warthog-mini-build-533781_718791584813376_668287450_n-1-.jpg
    halo-warthog-mini-build-533781_718791584813376_668287450_n-1-.jpg
    4 KB · Views: 249
  • halo-warthog-mini-build-524514_718791304813404_667957422_n-1-.jpg
    halo-warthog-mini-build-524514_718791304813404_667957422_n-1-.jpg
    4.5 KB · Views: 255
  • halo-warthog-mini-build-558611_718791364813398_760364064_n-1-.jpg
    halo-warthog-mini-build-558611_718791364813398_760364064_n-1-.jpg
    3.8 KB · Views: 283
  • halo-warthog-mini-build-golf-cart.jpg
    halo-warthog-mini-build-golf-cart.jpg
    38.3 KB · Views: 871
  • halo-warthog-mini-build-img_20131002_153532_617-1.jpg
    halo-warthog-mini-build-img_20131002_153532_617-1.jpg
    580.3 KB · Views: 749
  • halo-warthog-mini-build-img_20131002_171632_933-1.jpg
    halo-warthog-mini-build-img_20131002_171632_933-1.jpg
    334.2 KB · Views: 304
halo-warthog-mini-build-img_20131023_172541_803-1.jpg
halo-warthog-mini-build-img_20131024_163126_246.jpg
halo-warthog-mini-build-img_20131025_153440_040-1.jpg
halo-warthog-mini-build-img_20131025_211953_115-1.jpg
halo-warthog-mini-build-img_20131025_220122_100.jpg
halo-warthog-mini-build-img_20131025_220305_444.jpg
halo-warthog-mini-build-img_20131025_220246_417.jpg
halo-warthog-mini-build-img_20131025_220801_814-1.jpg
that is where im at so far
 

Attachments

  • halo-warthog-mini-build-img_20131024_163126_246.jpg
    halo-warthog-mini-build-img_20131024_163126_246.jpg
    4.7 KB · Views: 309
  • halo-warthog-mini-build-img_20131025_153440_040-1.jpg
    halo-warthog-mini-build-img_20131025_153440_040-1.jpg
    3.6 KB · Views: 241
  • halo-warthog-mini-build-img_20131025_211953_115-1.jpg
    halo-warthog-mini-build-img_20131025_211953_115-1.jpg
    3 KB · Views: 245
  • halo-warthog-mini-build-img_20131025_220122_100.jpg
    halo-warthog-mini-build-img_20131025_220122_100.jpg
    4.3 KB · Views: 317
  • halo-warthog-mini-build-img_20131025_220305_444.jpg
    halo-warthog-mini-build-img_20131025_220305_444.jpg
    4.3 KB · Views: 307
  • halo-warthog-mini-build-img_20131025_220246_417.jpg
    halo-warthog-mini-build-img_20131025_220246_417.jpg
    5.2 KB · Views: 288
  • halo-warthog-mini-build-img_20131025_220801_814-1.jpg
    halo-warthog-mini-build-img_20131025_220801_814-1.jpg
    4 KB · Views: 256
  • halo-warthog-mini-build-img_20131023_172541_803-1.jpg
    halo-warthog-mini-build-img_20131023_172541_803-1.jpg
    4.7 KB · Views: 283
I've got to admit, if I saw your kid coming at me in that - I'd only be mildly terrified.

Fantastic start! Can't wait to see more.
MS7
 
This is the coolest kid's toy ever!!! And I thought driving the neighbor's Power Wheels jeep was cool, I can only imagine your daughter pwning the neighbor kids with this thing! Just don't teach her about splatter sprees ;)
 
Thanks for stopping and taking a look at the build. I'm worried now about this build because my daughter loves to crash here jeep. Mainly into the railroad ties I use for boarders.... well this thing pops over them and keeps going. She may invent her own splattering spree but I just don't know what yet.
 
Looking very cool! My son loved his PowerWheels before he outgrew it. It looks like you've made a metal chassis and metal shell. PowerWheels motors are usually very weak so the vehicles are manufactured in plastic to keep the weight down (as well as production costs). Even then the battery still needs frequent recharging. Did you rebuild the drive system too so it has more torque than they typically have (for dealing with the weight of metal rather than plastic)?
 
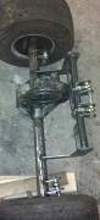
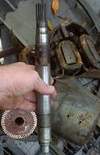
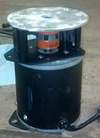
Yes it is a modified chassi. I took the front and rear off the golf cart. The 36volt motor was trash. I needed the shaft out of the original motor so... I tore it apart and pressed the shaft out of the rotor. Now I'm using 2 gel batteries and a 24 volt motor off a gurney. I combine the shaft and the new motor with a love coupler (and machining) Tada. The smaller motor can push 300+lbs by itself. I put the shaft in the axle a 200+ lb man in the cart it took three fingers to rotate the shaft and push him and the cart. Almost no resistance with the gearing.
 
halo-warthog-mini-build-img_20131101_080857_367.jpg
what is left of the old electric motor
halo-warthog-mini-build-img_20131101_080834_869.jpg
took the motor apart for the rotor shaft to be fabbed to fit on the new motor
halo-warthog-mini-build-img_20131101_081312_710.jpg
 

Attachments

  • halo-warthog-mini-build-img_20131101_080857_367.jpg
    halo-warthog-mini-build-img_20131101_080857_367.jpg
    5.1 KB · Views: 282
  • halo-warthog-mini-build-img_20131101_081312_710.jpg
    halo-warthog-mini-build-img_20131101_081312_710.jpg
    4.6 KB · Views: 273
  • halo-warthog-mini-build-img_20131101_080834_869.jpg
    halo-warthog-mini-build-img_20131101_080834_869.jpg
    7.5 KB · Views: 283
halo-warthog-mini-build-img_20131101_081312_710.jpg
halo-warthog-mini-build-img_20131101_145830_123.jpg
halo-warthog-mini-build-img_20131101_150200_019.jpg
halo-warthog-mini-build-img_20131101_151459_274.jpg
halo-warthog-mini-build-img_20131101_175459_529.jpg
 

Attachments

  • halo-warthog-mini-build-img_20131101_145830_123.jpg
    halo-warthog-mini-build-img_20131101_145830_123.jpg
    5.1 KB · Views: 271
  • halo-warthog-mini-build-img_20131101_081312_710.jpg
    halo-warthog-mini-build-img_20131101_081312_710.jpg
    4.6 KB · Views: 262
  • halo-warthog-mini-build-img_20131101_150200_019.jpg
    halo-warthog-mini-build-img_20131101_150200_019.jpg
    4.6 KB · Views: 255
  • halo-warthog-mini-build-img_20131101_151459_274.jpg
    halo-warthog-mini-build-img_20131101_151459_274.jpg
    4.1 KB · Views: 272
  • halo-warthog-mini-build-img_20131101_175459_529.jpg
    halo-warthog-mini-build-img_20131101_175459_529.jpg
    5.4 KB · Views: 254
the last post from left to right 1: i had to remove all of the top parts and pulleys to see what adapters i need. 2: adapter parts 3: shaft was too long so i trimmed it up. 4: adapter placed and top reinstalled. 5: i need an adapter to fit the motor to the diff. on the axle. I used the bolt pattern off the top plate of the electric motor and the bolt pattern off the original gasket.
 
halo-warthog-mini-build-img_20131101_180427_319.jpg
halo-warthog-mini-build-img_20131101_180449_129.jpg
halo-warthog-mini-build-img_20131101_180918_495.jpg
halo-warthog-mini-build-img_20131101_180940_060.jpg
 

Attachments

  • halo-warthog-mini-build-img_20131101_180940_060.jpg
    halo-warthog-mini-build-img_20131101_180940_060.jpg
    4.3 KB · Views: 252
  • halo-warthog-mini-build-img_20131101_180427_319.jpg
    halo-warthog-mini-build-img_20131101_180427_319.jpg
    4.4 KB · Views: 266
  • halo-warthog-mini-build-img_20131101_180449_129.jpg
    halo-warthog-mini-build-img_20131101_180449_129.jpg
    5.7 KB · Views: 254
  • halo-warthog-mini-build-img_20131101_180918_495.jpg
    halo-warthog-mini-build-img_20131101_180918_495.jpg
    4.2 KB · Views: 239
last post left to right. 1: plate fit nicely to the new motor with the clocked pattern for the axle. 2: the bolts have to be countersunk to fit flush. 3: the motor FIT!!! 4: side view Next week i will get the original shaft turned down on a lathe to fit the adapters i choose.
 
I LOVE this forum!!! You people come up with the coolest ideas and actually move forward with them! It's motivating and inspiring. Keep up the good work, I definitely want to see the finished Piglet.
 
halo-warthog-mini-build-new-shocks.jpg
AWSOMENESS!! my shocks came it today. I may cut some of the coil out it is still a little stiff. Im going to try and install them tomorrow.
 

Attachments

  • halo-warthog-mini-build-new-shocks.jpg
    halo-warthog-mini-build-new-shocks.jpg
    2.9 KB · Views: 275
Dear lord this is amazing! I wish I would've had you as my father as a child! This would've been the best toy from age 5-...14 maybe... awh who am I kidding I'd still be driving it now and I'm 21 haha! Excellence!
 
Status
Not open for further replies.
Back
Top