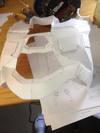
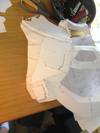
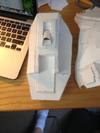
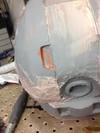
It's really coming along great. You've got some skills working with body filler haha. I think it's a good idea to take the extra time to grind down the pep detail and rebuild them. It'll pay off in the end I think.
You are using an out of date browser. It may not display this or other websites correctly.
You should upgrade or use an alternative browser.
You should upgrade or use an alternative browser.
HALOSPRTAN's Master chief Halo 4 suit WIP *First Build*
- Thread starter HALOSPRTAN
- Start date
- Status
- Not open for further replies.
It's really coming along great. You've got some skills working with body filler haha. I think it's a good idea to take the extra time to grind down the pep detail and rebuild them. It'll pay off in the end I think.
Thanks for the kind words
Ive actually only been using body filler for 2 months, as i am 14 and havent had a cause to use it before this build. More progress Soon with the built up detail. hopefully i will get to it tonight or tomorrow. I plan on rebuilding the temple area, chin bumps, andother areas. Stay tuned
Attachments
I have made a bit of progress on the helmet, i have done a coat of glazeing puddy on the top left side, with a shot of primer. I have refined the indentations in the helmet, and i am filling the side part and refining the rim.
Here are some pics of my progress
side deatail filled.

side detail rough sanding

indent with spot putty


More updates soon, i want to finish all of the bondo work on the crown of the helmet, then go to the jaw and back to do more work, then i will do my detailing all at once. then comes painting and whatnot
Stay tuned
Here are some pics of my progress
side deatail filled.
side detail rough sanding
indent with spot putty
More updates soon, i want to finish all of the bondo work on the crown of the helmet, then go to the jaw and back to do more work, then i will do my detailing all at once. then comes painting and whatnot
Stay tuned
Attachments
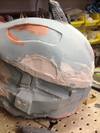
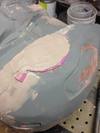
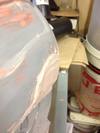
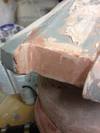
I have progressed a bit farther on my helmet. I have been working in the side detail for the raised portion on the crown of the helmet.
Here is my initial bondo filling with foamies as barriers:

Came off relatively well...


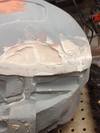
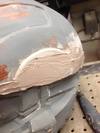
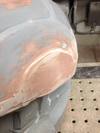
Did a bit of sanding and there was pits that were too big for bondo to fill, so i did another layer

Spot putty applied

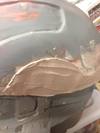
sanded

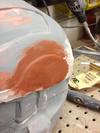
A bit of spot putty applied to front area of helmet

I have end of year assignments due, so probably no more progress for at least a day or two,
Until then,
Cheers
Here is my initial bondo filling with foamies as barriers:
Came off relatively well...
Did a bit of sanding and there was pits that were too big for bondo to fill, so i did another layer
Spot putty applied
sanded
A bit of spot putty applied to front area of helmet
I have end of year assignments due, so probably no more progress for at least a day or two,
Until then,
Cheers
Attachments
-
 5086E2E3-C44F-44D7-9497-DB65BB44AB34_zps8dcfopzw.jpg58.6 KB · Views: 217
 -
 212F62DB-5B76-48B9-9A6B-815DF7FBDEDF_zpsh2ntkema.jpg52.4 KB · Views: 210
 -
 B54D2C66-99D2-46B3-8E58-E6103BA16916_zps8xewrzlr.jpg74.5 KB · Views: 203
 -
 F978D482-3D94-40F3-9CF4-7E7B59C844C0_zps2ukatmqc.jpg67.5 KB · Views: 204
 -
 76E01D51-3F95-414B-AE51-F94D2C8FCF42_zpshqbk3aig.jpg58.2 KB · Views: 209
 -
 8E8F9E86-38D7-403C-9D4E-A93AA15E14E9_zpsgkkspkqn.jpg60.9 KB · Views: 201
 -
 A85198C6-EA2F-4BF9-BE8A-EA8A8529C80E_zpsfzacnsbe.jpg76 KB · Views: 217
Hi that's looking so good. This is one I will follow I'm new toll this. Good job man.
Thanks for the kind words, its good to know that people want to follow my build, it gives me motivation. This hobby can be very lonely, and the community keeps me going.
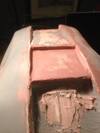
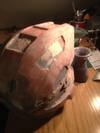
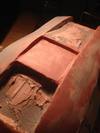
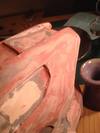
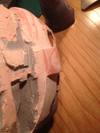
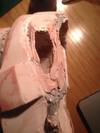
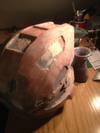
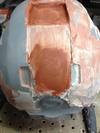
I have a small update, i have been working on the step things on the top of the helmet, and i have glazed/sanded the right side of the helmet.
Here is a picture of the steps on the helmet.
Right side glazed
Worked a bit on the right light area
Had to fill this area with bondo, it was getting unstable
Sorry for the bad lighting, was working late at night. More work next week, thats all for now 405th
Attachments
-
 316B7D9E-4844-4A62-9966-714891FBBD7F_zpsrfm51lt7.jpg49 KB · Views: 203
 -
 30FA594A-F134-4734-B17B-32F77A3ECCEE_zpsykkyx6qt.jpg50.7 KB · Views: 214
 -
 021E0788-1E16-4ACD-92C0-4C33BCAA65F2_zpsgckjlbl1.jpg72.6 KB · Views: 201
 -
 3D93845A-0390-471F-B809-AC315DA59E34_zps3pgc8lqs.jpg60.6 KB · Views: 216
 -
 FFB9C0D8-E166-438B-9CFA-D59EC6A4C7D2_zpshmmrygec.jpg63.3 KB · Views: 208
 -
 DAC533FC-D9B5-44EE-ACC2-E68B3EA2EB45_zpsetztanfo.jpg61.2 KB · Views: 211
 -
 30FA594A-F134-4734-B17B-32F77A3ECCEE_zpsykkyx6qt.jpg50.7 KB · Views: 205
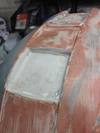
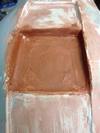
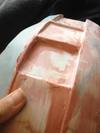
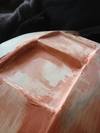
I have a small update for you 405th, I have been able to do a bit more work on the top portion, here is what ive done.
Bondo work in the step,

Glazed


sanded and a bit more applied

Close up

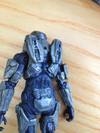
I also purchased a mcfarlane toys h4 master chief for a referance when building, they did a very good job with it.


Railgun

More work soon
Stay tuned !!!
Bondo work in the step,
Glazed
sanded and a bit more applied
Close up
I also purchased a mcfarlane toys h4 master chief for a referance when building, they did a very good job with it.
Railgun
More work soon
Stay tuned !!!
Attachments
-
 742EBA52-454D-4C33-A95A-6679A70C8879_zpsbkgrgq8y.jpg67.5 KB · Views: 216
 -
 5558D6D5-6EAB-4D6D-AD3B-27D1A4A9C6B3_zpsw9y5sup5.jpg81.5 KB · Views: 217
 -
 BB73B3CC-677F-4151-A9DD-4CB4E1EA672C_zpsk2mrzfjv.jpg74.8 KB · Views: 205
 -
 EE00FD12-1A16-4286-996E-C7A6707FE6E3_zpsxkvqbtzd.jpg82.8 KB · Views: 197
 -
 B6F9B881-53FF-4BFF-AE26-DA15A5502ED3_zpsrpsitzre.jpg57.3 KB · Views: 210
 -
 B33311AB-2AFC-4260-80EB-568E84175644_zps9mjz4rbp.jpg63 KB · Views: 188
 -
 A5481715-9333-4A8E-A6D5-4B3375C360B3_zpsc2qo6lse.jpg92.3 KB · Views: 210
 -
 B846F733-4D87-4E34-B1CF-708F04D8CC85_zpsmebzhyny.jpg41.6 KB · Views: 208
SUBSCRIBED!! I don't know how I've been missing this build but I'm glad I saw your latest comment on EVAkura's build about his pistol holstering idea.. 14 YEARS OLD!!! OUTSTANDING!! My sons age.. Just on a small side note--- don't keep asking for opinions or criticism as it makes you sound desperate. Believe me, These guys and gals will comment when they have ideas, opinions or criticisms, they are fantastic that way as they want to see you succeed as much as you do. I don't know if you want a little"real life" accuracy but my buddy and I use a spray paint called "oregano" and a texture paint. First base coat with oregano and then a VERY LIGHT coat of texture spray paint, then finish with a final coat of oregano. It gives a textured pattern like our real military as they want to break up any shiny surfaces to make you less noticeable in the field. One other idea for you, instead of costly 3d printing any detail parts, try using thin sheets of polystyrene to build those parts and hot glue them in place for crisp, clean edges..
Best of luck to you in your schooling AND your build
Best of luck to you in your schooling AND your build
SUBSCRIBED!! I don't know how I've been missing this build but I'm glad I saw your latest comment on EVAkura's build about his pistol holstering idea.. 14 YEARS OLD!!! OUTSTANDING!! My sons age.. Just on a small side note--- don't keep asking for opinions or criticism as it makes you sound desperate. Believe me, These guys and gals will comment when they have ideas, opinions or criticisms, they are fantastic that way as they want to see you succeed as much as you do.I don't know if you want a little"real life" accuracy but my buddy and I use a spray paint called "oregano" and a texture paint. First base coat with oregano and then a VERY LIGHT coat of texture spray paint, then finish with a final coat of oregano. It gives a textured pattern like our real military as they want to break up any shiny surfaces to make you less noticeable in the field. One other idea for you, instead of costly 3d printing any detail parts, try using thin sheets of polystyrene to build those parts and hot glue them in place for crisp, clean edges..
Best of luck to you in your schooling AND your build
Wow, thank you so much for your advice and compliments. I got desperate, because i had initially started a halo 3 build in augest, but it got scrapped and i have been working straight since then, and i hit a couple of mental roadblocks, and just need someone elses opinion on where to go. I have learned now, and and less desarate
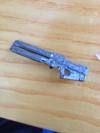
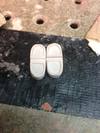
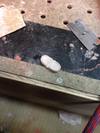
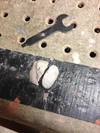
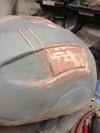
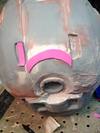
With the issue of 3d printed parts, i have now started doing my details out of carved bondo like this:
installed
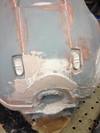
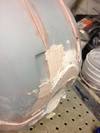
I have also been working on the side areas on the top of the helmet, and i have finished the vent area thing
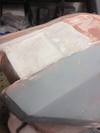
I also have been working on the first step area and had to remake the angle because of warping here
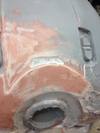
Finished area
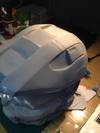
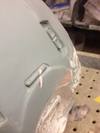
Working on the AI chip area
Now i have to go back to sanding and appliying, over and over
Attachments
-
 02461DCC-4703-42D8-ABF5-BAD55A4C2752_zps0riss7ed.jpg93.5 KB · Views: 203
 -
 3481ABE4-DC12-4BBE-AC1C-8B7B02B3F748_zps1qpsgz9l.jpg78.4 KB · Views: 213
 -
 95310F89-4964-40D4-9CDD-9B0B1BF6FDB7_zpszz4weutx.jpg117.8 KB · Views: 200
 -
 6290BEB8-170C-4FFC-8B0E-FF82AC41CB4C_zpsgfzap5na.jpg63.5 KB · Views: 209
 -
 3C99C2FB-E8C5-4C0E-851D-D4F10871E067_zpslkvlrk7x.jpg66.5 KB · Views: 183
 -
 78013D77-5FB4-49CB-B0BD-57EC59964785_zpsiv9fum1s.jpg50.2 KB · Views: 187
 -
 2E3FB5D0-3E8B-492F-9538-C2130263D908_zpsotljtim3.jpg44.7 KB · Views: 182
 -
 EE4BA23D-A3F1-4745-A2FF-0AF2EB234AA3_zps7ns6liic.jpg77.4 KB · Views: 202
 -
 53446553-3D28-47F8-B2DB-43DDB9A37E4D_zpsruioo7vr.jpg65.7 KB · Views: 187
it's very cool your Dad is an engineer with a workshop he shares with you. I have a workshop as well that I share with my son, daughter and wife although it is only myself, son and my friends that use it. I'm lucky enough to have an engineer friend as well as electronics and robotics friend with others that are retired military that help us keep my stuff functional and help me work out any kinks in the road. My best friend is the one you taught me how to fiberglass and mold and is a great inspiration as he's done this stuff for over 25 years and myself for only 5 years.
I think your Dad is going to be very impressed with your work and possibly might even want to get involved down the road
I think your Dad is going to be very impressed with your work and possibly might even want to get involved down the road
it's very cool your Dad is an engineer with a workshop he shares with you. I have a workshop as well that I share with my son, daughter and wife although it is only myself, son and my friends that use it. I'm lucky enough to have an engineer friend as well as electronics and robotics friend with others that are retired military that help us keep my stuff functional and help me work out any kinks in the road. My best friend is the one you taught me how to fiberglass and mold and is a great inspiration as he's done this stuff for over 25 years and myself for only 5 years.
I think your Dad is going to be very impressed with your work and possibly might even want to get involved down the road
I wish my friends used the shop, but they all live on the other side of the city... My dad works 1.5 hours away, and he is working a lot, so its essentially my shop now:rolleyes Unfortuanately i am the only person i know who does stuff similar to me, hopefully that will change when i go t high school, my high school next year has shops (woodworking, metal, etc.) My dad is a mechanical engineer, and when he retires he wants to do more work in the shop and make furniture etc, but i keep him updated with my work and he loves it. Im going to get more work done tonight, im going to try and finish the other side of the top by next week.
Thanks again for the sub and the kind words.
Attachments
-
 D7D15E88-AD90-4563-A337-5DC74E0B1891_zpsqerqvzzk.jpg57.6 KB · Views: 182
 -
 67B00281-448D-407B-8143-6CBA51CB6DEE_zpsmcsap5ob.jpg79.1 KB · Views: 184
 -
 075E3B2A-8F1F-4282-893D-EC576C4F412C_zps7xyyaffg.jpg46.4 KB · Views: 194
 -
 D27E9E75-1061-4229-B600-1951F2F5FB02_zpsoxl9lxs0.jpg73.6 KB · Views: 170
 -
 3607E97C-C4CB-4FC2-ADCD-2EACFEE75201_zpsozxljz61.jpg78.2 KB · Views: 174
 -
 A73148EC-DDDC-4666-8259-7632B786292A_zpsms0x5tay.jpg23.5 KB · Views: 175
 -
 C949B01B-5922-486F-9E42-80A23B744FC9_zpsbz1baesf.jpg72.2 KB · Views: 173
 -
 81205168-5DF6-45E1-AFF1-58E3B980FAAF_zpsunlhs5pw.jpg92.6 KB · Views: 168
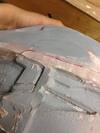
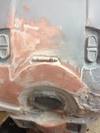
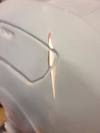
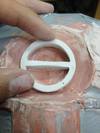
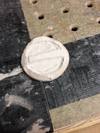
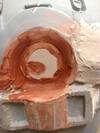
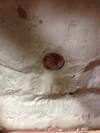
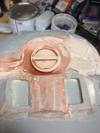
Soo, sorry for the doub post, i just wanted to put this up, This is the AI chip port finished with the new plug area i redid. Here you go!!!
Cut out the old area

put in my plug and sealed it with spot putty and some epoxy on the inside for noshow

New ring put in with cyno

sealed the seam with spot putty to be sanded tomorrow

Inside plug

So my next steps are to finish the other side of the crown of the helmet, then i am going to work on the vent detail and the finish up wtih sides and front. More work done over the weekend and end of the week,
Stay tuned!
Cut out the old area
put in my plug and sealed it with spot putty and some epoxy on the inside for noshow
New ring put in with cyno
sealed the seam with spot putty to be sanded tomorrow
Inside plug
So my next steps are to finish the other side of the crown of the helmet, then i am going to work on the vent detail and the finish up wtih sides and front. More work done over the weekend and end of the week,
Stay tuned!
Attachments
-
 C31EB896-9A03-4CDA-8E87-3A70373387B1_zpswx7klouv.jpg68.7 KB · Views: 182
 -
 EB84056D-7DF8-476D-9622-1E9233140CBA_zpsplk43gwv.jpg72.5 KB · Views: 183
 -
 4150104C-45A9-4263-92F6-9876EA36E88C_zps77y81o1i.jpg55.4 KB · Views: 173
 -
 792A9CE7-06B6-4B85-90AB-F006406C3527_zpsiu0rwqi9.jpg63.7 KB · Views: 166
 -
 79C4A9C7-3EF2-48AB-9894-5D772418D07E_zpspuyr9ps5.jpg47.8 KB · Views: 161
That AI port looks great! I am also totally digging the battle damage... clean and intentional... IMO, much more appreciated than the "I couldn't get it sanded down so I will just make it battle damage" look 
Hint: Your little detail pieces are coming out great. If you are not already, try making them out of Rondo by making a rough mold out of craft clay first. For some reason, the Rondo is really tough and files and sands very well and crisp. Wet sand for final perfection.
Hint: Your little detail pieces are coming out great. If you are not already, try making them out of Rondo by making a rough mold out of craft clay first. For some reason, the Rondo is really tough and files and sands very well and crisp. Wet sand for final perfection.
That AI port looks great! I am also totally digging the battle damage... clean and intentional... IMO, much more appreciated than the "I couldn't get it sanded down so I will just make it battle damage" look
Hint: Your little detail pieces are coming out great. If you are not already, try making them out of Rondo by making a rough mold out of craft clay first. For some reason, the Rondo is really tough and files and sands very well and crisp. Wet sand for final perfection.
Thanks for the tip, i am currently just carving these from solid bondo(time consuming) Iwill definetly try your method as I always do
- Member DIN
- S124
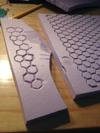
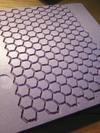
I have actually inproved my method even further, I took this hexagon graph paper and cut the design into the foam like so

And then i use the router attachment for my dremel with a pointed stone tool and carved out each of them by hand

compared to my previous attempt

I plan on making a plaster mold and then casting latex sheets for the undersuit. More progress soon.
And then i use the router attachment for my dremel with a pointed stone tool and carved out each of them by hand
compared to my previous attempt
I plan on making a plaster mold and then casting latex sheets for the undersuit. More progress soon.
Attachments
- Status
- Not open for further replies.
Similar threads
- Replies
- 12
- Views
- 649

