Hey look, another ODST. (WIP) (Pic heavy)

Status
Not open for further replies.
Yes, the visor is vacformed.

Yes and no. I picked the color scheme just because its cool. But, I do have the CQC shoulder, it just needs to be smoothed out and painted.
 
Alright! So, I have finally got some free time, and have really been able to get back to work here.

I did a good bit of bondo work today, so hopefully within the next few days I'll have some major updates. For today, I just have some minor detail stuff I managed to do in my free time.
odst__details__chest_clips_by_jimmydamoose-d3g4yhf.jpg

The chest clips! They work great, and really help to tie it together. They required a little extra work since I used Kirrou's chest with Hugh's torso, but it looks great.

Also, I'm hoping to due a video update of all of my current armor in the next few days, so stay tuned for that.
 

Attachments

  • odst__details__chest_clips_by_jimmydamoose-d3g4yhf.jpg
    odst__details__chest_clips_by_jimmydamoose-d3g4yhf.jpg
    86.4 KB · Views: 209
What did you use for the clips? I'm doing ODST armor too(I just started, so I only have a shoulder-and-a-half done(plus they came in three peices, so I may restart since they don't really fit together) but I hope to have them turn out like yours!), and I haven't even thought about the clips yet.


On an unrelated note, how did you do the chips in your paint? The condiment way, or the sanding-the-paint way?
 
Hugh Holder's Models
Kirrou's Models

The armor I'm using comes from these two amazing modelers. Most of my armor, including the clips, comes from Hugh's files, since he has a full set. My helmet, chest plate, stomach plate, and eventually the gauntlets are Kirrou's.

If you're doing ODST armor, I highly recommend their stuff, its the best ODST stuff on here. If you do, make Hugh's chest plate, too. I made Kirrou's because it was the first file I found, and I really like it, but it doesn't fit quite right with his chest core.

As for the paint, I've been experimenting on techniques, this is my first build, so I'm only learning painting now. The chest plate was painted silver, then I used tooth paste where I wanted chips, and wiped it off after the red paint. As for the rest of the armor, the "damage" is brushed on with a paint brush. Just spray paint on the end of a coarse paintbrush, and paint it on. Personally, I like it much better.

I hoped this helps and wasn't some massive wall-o-text.
 
A very fine choice in blood type i must say : D
Im an O-. Apparently its like some universal donor and makes up 9% of the whole blood types.
That's actually why I picked O-, because it works with everything.

Alright, so I've been doing a good bit of pep work the past few days. I completed my other shin, which will not be pictured because it looks exactly like the first. The shins are nice, but are a pain to do.

Just recently, as in 20 minutes ago, I finally finished Hugh's "tactical fanny pack". It was easy to do, but there were a crap ton of seams, so it just took a while.
odst__butt_plate_by_jimmydamoose-d3giuk2.jpg


From this point on, I only have the gauntlets to pep and I'll have all of the base armor done!
 

Attachments

  • odst__butt_plate_by_jimmydamoose-d3giuk2.jpg
    odst__butt_plate_by_jimmydamoose-d3giuk2.jpg
    115.4 KB · Views: 205
Dude, looks amazing. I have to ask, where did you find the pep for the CQB shoulder (the one Mickey wears in the ODST game) that you made? I have been looking all over for it and haven't found it.
 
There are a few odd angles to it, so I've been putting it off, but I have put rondo on it. I actually just got some more sandpaper, so I think I'm going to try and work on it today. Hopefully it will be done by Monday.

The visor is vacu formed.
 
I lied. The shoulder is ready today!
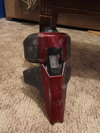
odst__complete__cqc_shoulder_by_jimmydamoose-d3gzp58.jpg

I accidentally got black marker on it.

Now all I have to do is add straps. It is a bit on the heavy side, but its worth it.
 

Attachments

  • odst__complete__cqc_shoulder_by_jimmydamoose-d3gzp58.jpg
    odst__complete__cqc_shoulder_by_jimmydamoose-d3gzp58.jpg
    150.3 KB · Views: 194
well i think im going to use your model... nice work!! :D

Awesome! I should warn you, I ended up cutting it into 3 pieces to smooth it. Its currently held together with a strip of metal and tons of glue. The little piece on the back is screwed back on though, since it can't be seen.
 
Wow man...that is amazing! I love it! I just starting cutting the paper for mine; we'll see if I can get mine to look that good.
 
Status
Not open for further replies.
Back
Top