Recon H3 my first prop build ever

Status
Not open for further replies.
im going to "attempt" to replicate some of the ideas in the 3d render i posted. like the "air vents" on the top i like that idea, but first i got make my 2nd layer of bondo nice and clean before i can detail. hopefully my thanksgiving break is uninterupted and benificial.
 
That hex pattern is amazing! I never would have thought about something like that. If you have an airbrush, I know that there is a thread around (creative discussion I think) that you could use to tint that visor too.
 
i went up to my father house last weekend (this kinda sucks) but had i waited a couple of weeks my dad would have gotten one and i would have been able to use. next time. also i would go buy this
http://www.ebay.com/itm/CREATIVE-ME...578&pid=100011&prg=1035&rk=4&sd=261103558944&
and i would cut out this paper puncher on contact paper and would have done this a whole different way.

ill try to salvage this sucker , but i will try a differnet method next time
 
well visor looks alot better now, my step dad walked down the hall and stopped and looked into my room and saw my visor and told me to try a felt polishing wheel to get rid of the nasty gunk on my visor and it looks so much better im glad i didnt start over. i wont post a pic of it, ill wait till i have it mounted :) hopefully that will happen before my surgery.
good night all
 
Looks good, but I thought you were going to spray a matte clear coat around the hexagons. Then, when you took them off, it would have a neat design.
 
Looks good, but I thought you were going to spray a matte clear coat around the hexagons. Then, when you took them off, it would have a neat design.

You r 100% correct that is what I did. I cut out about a billion little hexagons,spaced them out"evenly", then used a matte spray paint and layered the paint like 4 coats, then carefully removed the hexagons , and using the felt buffering wheel on my dremel I cleaned up the nasty gunks on the inner edges. :) and the oral surgeon said I should be fine when I get home but I won't be able to eat any real food only mush like apple sauce and cold oatmeal.....yay lol that's on Tuesday
 
UPDATE TIME

Day 1
~Installation of Visor~
148541_438007112927108_1132100818_n.jpg


TA-DAH

This mother trucker gave me so much trouble today. almost as bad as the bonus rounds in halo 3: Odst lol

I used BLACKULA727's installation tut

602621_438007202927099_1162909677_n.jpg


used 1/4in aluminum posts with screws, used 2 part epoxy stick and some super glue

406786_438007169593769_160978252_n.jpg


the blue light is from one of my led flash lights inside and outside the helm to give u guys a real good looking at the visor it self. (which im not thrilled with)

46425_438007136260439_182330805_n.jpg


finaly a side pic the ugly nature of recon helms is the top part is farther inward then the chin piece so im going to need alot of magic sculpt to fill in those cracks

HELP: so as i said no happy with my visor in the pics it looks fine but having it in my hands it annoys me. 2 things; first, how could i clean of my visor both inside and outside without flaking of the paint. the main annoyance is finger prints and smudges. second how can i make it look better cus as of now there are parts (the paint between hexagons) where it has flaked off and or is white because of the removal of the wood hexagons. the problem is theres a contrast between the ugly stuff and the good stuff which are perfect parts where a frosty line is clean and matte colored.

20317_438007222927097_1632143245_n.jpg


jfsag: heres a pic from inside. you can kind of see what my problems are.
 
UPDATE TIME

Day 2
~Sand baby sand
image-2.jpg


finaly getting that ugly mud colored primer off my helmet

major objective complete
-make the back of the neck look nice and smooth but still have nice defined edges
-make the chin piece look more extended
-fix the detail piece on top (looks beautiful in person lol crappy pics (thanks apple))

image-5.jpg


image-4.jpg


not alot of pics today but tomorrow hopefully i can get alot done.

stay tuned...
 
Day 3
~ Moar sanding

i thought pics would be pointless today not much of a difference then yesterdays pics.

tomorrow idk if ill get alot done (thanks to oral surgery -_-) but hopefully ill start to make some detail pieces out of my basswood that will make my helm look a little more like the 3d render i posted back on page 1.

Wish me luck tomorrow
 
:Note:

I GOT MY INFANTRY STATUS YAY!!! :D

i feel special lol

anyway sorry for...posting back to back 5 times in a row now (my bad)
ive been doing alot of research and looking for tips on how to detail and will have a nice update by the end of this weekend.

thanks
~TS
 
::UPDATE::
~the chin pieces and top vents

image-6.jpg

image-7.jpg

image-15.jpg


the thing in the center was removed due to the fact that im stupid and didnt realize that the rondo i would pour would make that piece impossible to remove at a later time lol

image-8.jpg


the first ever pour (i think it went pretty well for a first time)

image-9.jpg


image-10.jpg

(woops... i had to put my finger on it when it was setting)

image-11.jpg

image.jpg


i used some resin to go over areas where paper was poking through so try and cover the fibers from the paper up

image-2.jpg


now i have a question: should i do a rondo pour like i did for the chin pieces, for the wood details? simple english: i would use the card dam trick and out line the wodd pieces with playing cards, the remove the wood and pour the rondo. or should i try and cover the wood in bondo and the smooth out the intersection where the wood meets the bondo?

if i get a reply soon... like in an hour, ill have pics of that up fix tonight

thanks everyone
~TS
 
Its been awhile...therefore im sorry lol

small update
image-16_zps189cbc8d.jpg


image-16_zps068731be.jpg


i used BlackULA727's visor instalation tut

a little rough needs to be touched up

also a little peek

image-16_zps130c9df8.jpg


not the best vision but spartans dont care lol

i dont know how long it will be before i can get back to work, school is a mother trucker and takes all of my time and with my robotics season starting ill be even more distracted

ill post what i have been working on right here
2_zpse53d965a.png

1_zps745e3dc1.png


if any members are fimiliar with FIRST robotics, this is my teams driver station and yes we do actualy use xbox controllers...i know its awsome lol
so thats been my main time consumer right now hopefully it will be all done soon .
if u guys want to see more progress on the driver stations let me know and ill make a new thread :)

thanks guys and gals
 
Well ive hit the wall... i think i might put this build to rest. :( i knew that my first piece would not be my best, but i feel that i have just made a laundry list too long for a first project. i'm not giving up on prop making but with my robotics season kicking off, school getting harder and my ocd/perfectionist personalty going crazy, i think its time to take a pause. If you guys, a wonderful supportive community, would like to see any progress of my robotics shindig, let me know and ill start a new thread in the creative section unless i should post non-halo stuff else where. i will continue my driver station thread(also in creative) b/c i got insipration from the halo 2 rocket ammo. anyway just wanted you all to know what is up. thanks again for all the help but its time to take a break and drill down on school.

Peace out,

TS
 
ts you have a great build going on,i think you should keep going and finish since you have so much work and time into your first piece. you made it past the hardest part in my eyes, the pep stage. your so close to finishing if anything slow it down and do a little bit here and there when you have an open window and taker your time to complete it to YOUR liking. just my two Pennies bro. on a another note send it to me and i will finish it for you than send it back.
 
ts you have a great build going on,i think you should keep going and finish since you have so much work and time into your first piece. you made it past the hardest part in my eyes, the pep stage. your so close to finishing if anything slow it down and do a little bit here and there when you have an open window and taker your time to complete it to YOUR liking. just my two Pennies bro. on a another note send it to me and i will finish it for you than send it back.

Sonny thanks man that means a lot to me, idk going into the second trimester of the school year i decided to slow down and every time i tried to get a little work done some school thing,or the gf wanted to hang out or a family event got in the way and stalled any work. i was hoping to be done with this before christmas and that didnt happen. also idk this helm is first for me in the world of prop stuff and i scaled the dang thing to big so even if i do finish it, ill never be able to wear it. lol really? youd finish it for me? thats so awsome!
 
Sonny thanks man that means a lot to me, idk going into the second trimester of the school year i decided to slow down and every time i tried to get a little work done some school thing,or the gf wanted to hang out or a family event got in the way and stalled any work. i was hoping to be done with this before christmas and that didnt happen. also idk this helm is first for me in the world of prop stuff and i scaled the dang thing to big so even if i do finish it, ill never be able to wear it. lol really? youd finish it for me? thats so awsome!

Man i know how it goes. There will always be something more important that comes along that prohibits your build but that is also why we have this as a hobby. most of us don't get paid to build these, we do it for fun, something to take up spare time. I have three kids on the average that i take care of and sometimes i only get half an hour to work on a project, sometimes it gets put on hold because of funding, sometimes it gets put on hold because I need a break. but it gets done when it reaches the stage that you are at. in my eyes you have gone too far to give up and let it collect dust or be tossed to the trash can. and who cares if it doesnt fit, atleast it would be an awesome looking piece to hang on your wall. I would love to see you finish this but if you don't.... and i will not say can't because I KNOW YOU CAN, than yes I am willing to offer my services and finish it for you than send it back, just send money for the visor and shipping you got a deal :)
 
:Small update:

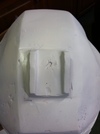
did a little sanding and shaping. worked on the chin vents and the attachment piece on top. i might need some help on the vents as i have already ballsed them up
0D2EEB88-E0E6-4BA4-AA68-CE09C5E12ECD-1904-0000029BB0CE6F11_zpsa8acc6f2.jpg

840BAE89-7A56-4DCA-85E0-05BFC33800BB-1904-0000029BA55558CF_zps0359269d.jpg


the top looks pretty good for my liking ill add the detail lines later
B3FF4000-059A-4BB1-A604-3059718636FC-1904-0000029BA9FCC5EC_zps45ec8771.jpg


thanks to white primer i can see where i need to fix almost everything, almost everywhere lol
8F1314FA-0C85-426B-9BCA-7563726808CD-1904-0000029BADA771C2_zps9ef80297.jpg

F7A94794-92B3-4AEE-AA4F-05181AE34EC1-1904-0000029BB3DF0CD8_zps3f37afc6.jpg


the top piece could use alittle more sanding to almost be perfect.
840BAE89-7A56-4DCA-85E0-05BFC33800BB-1904-0000029BA55558CF_zps0359269d.jpg


Untill next time,

TS
 

Attachments

  • 840BAE89-7A56-4DCA-85E0-05BFC33800BB-1904-0000029BA55558CF_zps0359269d.jpg
    840BAE89-7A56-4DCA-85E0-05BFC33800BB-1904-0000029BA55558CF_zps0359269d.jpg
    203.9 KB · Views: 184
Status
Not open for further replies.
Back
Top