Second Foam Build, Reach MK V[B]

Status
Not open for further replies.
If you don't want it may I suggest giving it to somebody on this forum. The problem you described using plasti dip seems as if there was too much humidity in the air. The same thing has happened to me before. Plastidip can be thinned out with naptha which is definitely helps a lot.

Sent using Tapatalk Pro Gamertag: RYNOx666
 
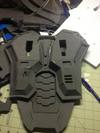
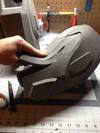
started my new torso.

8408B6D6-BE06-4A2A-BBA7-E3B6E585F75C_zpsl2kxtgzy.jpg

0E475963-A631-49FD-AD1F-189E17FA62D4_zpswqdbcjjq.jpg
 

Attachments

  • 8408B6D6-BE06-4A2A-BBA7-E3B6E585F75C_zpsl2kxtgzy.jpg
    8408B6D6-BE06-4A2A-BBA7-E3B6E585F75C_zpsl2kxtgzy.jpg
    63.4 KB · Views: 285
  • 0E475963-A631-49FD-AD1F-189E17FA62D4_zpswqdbcjjq.jpg
    0E475963-A631-49FD-AD1F-189E17FA62D4_zpswqdbcjjq.jpg
    71.2 KB · Views: 269
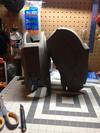
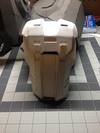
Benn a While since my last update, but here is the fully assembled torso, minus some small details which I plan to put in after paint for the sake of ease

84EB2081-66F8-46C7-BCDB-0F704227B812_zpsbjqhiyvo.jpg

C649C078-9E1A-40F7-9D26-D9C2F37AA7EB_zps97q8oiyp.jpg

1B148F5C-768D-465C-B638-4FD4458ACD17_zpsy8bugspt.jpg
 

Attachments

  • 1B148F5C-768D-465C-B638-4FD4458ACD17_zpsy8bugspt.jpg
    1B148F5C-768D-465C-B638-4FD4458ACD17_zpsy8bugspt.jpg
    88.9 KB · Views: 275
  • C649C078-9E1A-40F7-9D26-D9C2F37AA7EB_zps97q8oiyp.jpg
    C649C078-9E1A-40F7-9D26-D9C2F37AA7EB_zps97q8oiyp.jpg
    78.8 KB · Views: 273
  • 84EB2081-66F8-46C7-BCDB-0F704227B812_zpsbjqhiyvo.jpg
    84EB2081-66F8-46C7-BCDB-0F704227B812_zpsbjqhiyvo.jpg
    86.7 KB · Views: 279
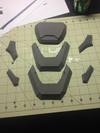
spine plates and ab wrap and belt

316A6EA8-CB1B-48B3-B304-8318651821C4_zpsknfpzqri.jpg

F968B177-E6E3-44EB-9A8B-2C3A6355D4F4_zpsh3hd11vy.jpg
 

Attachments

  • F968B177-E6E3-44EB-9A8B-2C3A6355D4F4_zpsh3hd11vy.jpg
    F968B177-E6E3-44EB-9A8B-2C3A6355D4F4_zpsh3hd11vy.jpg
    53.8 KB · Views: 234
  • 316A6EA8-CB1B-48B3-B304-8318651821C4_zpsknfpzqri.jpg
    316A6EA8-CB1B-48B3-B304-8318651821C4_zpsknfpzqri.jpg
    92.5 KB · Views: 263
Nice work with the details! I have started a Reach build myself, but I put it on hold until I finish my UNSC Officer uniform.
 
Just a quick update, I am still working on my armor, had to take a break due to moving, but I finally got my armor crafting tools unpacked and getting back on it. Hopefully I can have pictures of my belt up soon and can start on my legs
 
Cant wait to see some pics :)

oh by the way, i forgot about it until i just looked at your thread again. but were you still wanting to get rid of that extra torso you made? or did you already do that?
 
YAY more pictures! Looking good. :)
I like your idea of attaching the pistol. Cant wait to see how well it works out.
 
I haven´t thought about this way of attaching the pistol on the thigh.
*saves pictures
I guess I will use it on my ODST V2 and Spartan IV V2!

And you are doing a really good job! keep this up! :)


Pat-
 
past few days ive been working my tail off! check it out!
F8E0F0B8-9231-4525-9D26-F23442D1BADC_zpsffzpdfnb.jpg

0A82C44F-34E6-4289-A2FC-CBAB36AEE52A_zpskvboq1yo.jpg

3DC78283-B067-4A13-AB80-171FD3BDF15B_zpsucvutyeb.jpg

ADF63D9D-B05A-4E69-89A8-09D22E1D73DA_zpszdkdxrtb.jpg
 

Attachments

  • 0A82C44F-34E6-4289-A2FC-CBAB36AEE52A_zpskvboq1yo.jpg
    0A82C44F-34E6-4289-A2FC-CBAB36AEE52A_zpskvboq1yo.jpg
    103.8 KB · Views: 240
  • F8E0F0B8-9231-4525-9D26-F23442D1BADC_zpsffzpdfnb.jpg
    F8E0F0B8-9231-4525-9D26-F23442D1BADC_zpsffzpdfnb.jpg
    97.5 KB · Views: 241
  • ADF63D9D-B05A-4E69-89A8-09D22E1D73DA_zpszdkdxrtb.jpg
    ADF63D9D-B05A-4E69-89A8-09D22E1D73DA_zpszdkdxrtb.jpg
    83.6 KB · Views: 236
  • 3DC78283-B067-4A13-AB80-171FD3BDF15B_zpsucvutyeb.jpg
    3DC78283-B067-4A13-AB80-171FD3BDF15B_zpsucvutyeb.jpg
    89.8 KB · Views: 262
Holy cow! How are you getting such pretty seams?! everything is looking fantastic :)
 
I've found a few tricks with seams, though they don't always work because of where they are. One is the tape method, tape along the outside seam the two pieces together, then glue from the back and press together, peel off tape after it cools. Another is just judging how much glue you're putting between the pieces, when you put glue on one piece, spread it out a little so it doesn't all push out when you press two pieces together. Another method is to cut your pieces so they are only flush on the outside, but a little apart on the inside, so it makes a valley, then full with glue from inside. And probly the most common method for me, if globs push out when you press the pieces together, lick your finger and swipe it across the glob quickly so you don't get burned, it will cool quickly then you can peel off the excess. Another piece of advice, change blades often! Since I started this suit I've been through over 100 blades! Keep them sharp!
 
Wow thanks for the major tips on getting great seems, I watched someone here on the forums say they licked the hot glue if it globed out of the seem real quick O_O

This armor is so beautiful ;-; I really like the paint you used on the helmet to give it that reach style "been through the thick of it" look. The added tidbit with the silenced sidearm with the door stops on it is AMAZING!
 
lol I wouldn't recommend licking it, I don't know about your gun, but my hot glue gun is super hot! It could give a nasty burn! Thats why I lick my finger and then run it on the glob
 
Thanks for the tips. I have done the licking the finger and swiping the glue before and that works okay. Although i never thought about peeling off the excess. *facepalm* i cant believe i didnt think about it lol.
I also know to keep the blades sharp, foam dulls them quick. But i didnt feel like buying a whole bunch of blades, so i went to walmart and bought a little knife sharpener in the kitchen department and i use that when my blades start to dull. It actually works wonders and sharpening the blades. This way i dont have to swap out blades as often :)
Keep up the great work buddy.
 
Status
Not open for further replies.
Back
Top