You are using an out of date browser. It may not display this or other websites correctly.
You should upgrade or use an alternative browser.
You should upgrade or use an alternative browser.
Second Foam Build, Reach MK V[B]
- Thread starter Zero 071
- Start date
- Status
- Not open for further replies.
Attachments
-
 CCBDC6DE-213C-4DD9-ABEE-652931CD0BBA_zps4fdmnhrc.jpg86.2 KB · Views: 352
 -
 A0A32EA0-5F34-4B4C-B66A-66D61B24287B_zps7rh4gpem.jpg71.5 KB · Views: 341
 -
 D83D7278-9669-476C-961C-6CDC48B0ABA1_zpsstn96pwz.jpg31.7 KB · Views: 350
 -
 81D8D3DE-1FF0-49F4-B99B-FA8F370E2234_zpsli9217vc.jpg96.4 KB · Views: 324
 -
 20C5EA76-A859-4333-BA51-875890065FEE_zpsfgeg45do.jpg81.9 KB · Views: 349
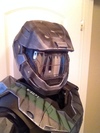
Hey there, I was admiring your work and wondering a few things.
1. How did you you do your helmet decals? (yellow triangles and white letters)
2. how did you etch your visor? id assume it was the standard tape it with painters tape and scratch it out?
Thanks for the help in advance
Attachments
the helmet decals i had made at a local sticker kiosk in the mall, most of those guys can make a skicker of just about any image you can find on the internet, I had to look up the font online for the unsc and other letters, then just measured how big i needed them and had them make it.
The visor etching was done in 3 main steps, first was tape off the visor with blue painters tape and draw the etching on with a pencil, cut it out with an xacto, the second step what using a wire brush on my dremel and VERY CAREFULLY did the bulk of the etching, last I used the xacto to get any small corners or spots I missed. It is important to be careful with the dremel because the tape will only protect the visor for a second against the dremel, so I recomend taking your time and stay away from the tape as best you can, then go back and clean up with the xacto
The visor etching was done in 3 main steps, first was tape off the visor with blue painters tape and draw the etching on with a pencil, cut it out with an xacto, the second step what using a wire brush on my dremel and VERY CAREFULLY did the bulk of the etching, last I used the xacto to get any small corners or spots I missed. It is important to be careful with the dremel because the tape will only protect the visor for a second against the dremel, so I recomend taking your time and stay away from the tape as best you can, then go back and clean up with the xacto
blueofhills
New Member
Every thing looks Great. I am having trouble locating where to by foam. all I can find is 2 mm foam or 10 mm nothing in between. can you help me out with that?
I buy the floor mats from harbor freight, the vary from 10-12 mm, the 2mm and 6mm i buy from michaels or joanns craft store. another good place to buy online is www.wesellmats.com
Attachments
-
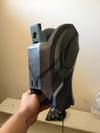 7A46ADFB-810A-46BE-9758-4FE095B1938A_zps7lmpi6cb.jpg41.8 KB · Views: 324
 -
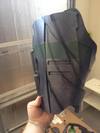 08675E18-E41C-45FA-BA16-71A557C5A3D0_zpstrgcshb0.jpg60.7 KB · Views: 345
 -
 F6143DDB-70D1-48B0-BC56-80BCE464929B_zpsefhlnjp8.jpg119.7 KB · Views: 321
 -
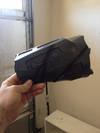 05C14472-3FB3-4C59-B0BD-3544F452A4D1_zps0xwesoqi.jpg45.3 KB · Views: 330
 -
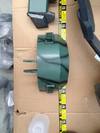 05878FA4-8345-46AC-A447-B4834586FCB2_zpsxxnsmzvp.jpg81.2 KB · Views: 349
Man this is looking pretty freaking slick! Nice work!
I have bought foam from Sears, Big Lots, Academy, and Harbor Freight.Every thing looks Great. I am having trouble locating where to by foam. all I can find is 2 mm foam or 10 mm nothing in between. can you help me out with that?
Attachments
-
 51FA74EC-DBCB-4C5F-8BAB-E3D08DE0D363_zpseow9maaq.jpg67.5 KB · Views: 347
 -
 B5C2FD84-2266-4382-B3A0-997B16136D29_zpsctzpcell.jpg97.4 KB · Views: 334
 -
 F23173B7-2060-4D78-8F77-B0A1AC24653E_zpshbq4mhgb.jpg56.7 KB · Views: 332
 -
 1C9F69D2-DECC-41D8-9322-AC1344F9BE5C_zpslub2pzr4.jpg57.8 KB · Views: 335
 -
 10251CDC-A254-49F6-AD7C-BB4C66212228_zpszzxcn0df.jpg110.5 KB · Views: 344
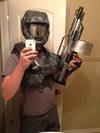
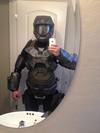
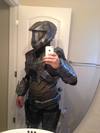
You're armor looks great, I love that you made an undersuit.
You should totally post some more pics of your armor and some close ups of the different pieces!
You should totally post some more pics of your armor and some close ups of the different pieces!
The undersuit is a zentai I had modified. I will post every photo I have when I return home
What exactly is a zentai if you don't mind me asking?
- Status
- Not open for further replies.
Similar threads
- Replies
- 4
- Views
- 392
- Replies
- 4
- Views
- 353

