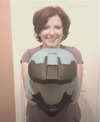
Calladar's Kat WIP

Status
Not open for further replies.
This is coming along pretty nicely. The prosthetic arm looks pretty good too.

I have FINALLY started on my Kat build. Started it before the release of Reach and obviously never finished and I am now doing it on foam. I started a thread if you wish to follow my progress. :p

I was thinking about airbrushing mine, but I don't feel like spending more money on the paint. :p I did a paint test to see how it would work on the foam and it works great WITHOUT the plasti-dip so that saves me more money. Of course I need a clear coat though or something.

Looking forward to seeing this finished.

thanks you... i have been a fan of your stuff for a while now and made several of the models you unfolded.

ok update. got home from work and started over on my mold of the helmet. rocked it this time with a set of scales that were accurate. just got done with the third coat and letting it cure up all the way for the night and will put on the mother mold first thing in the morning. any luck i will be doing my first pull tomorrow night if all goes well.
 
mother mold off. silicon mold off. put it back together and began poring.. now waiting on plastic to cure... hope to have my first pull here in a little bit.. learned alot with my first glove mold. the silicone worked like a champ once i had my scales. do need to make it thicker though in places especially around the neck area. while roto-casting i noticed the neck area being thin walled allowed for it to fall away from the mother mold a little bit. solved this by using gravity and hanging the helmet from the top while the first batch of roto-csting cured. this kept the neck in place and prevented any warping effect. hope to have some pics up here soon. my son has a party he is going to this afternoon and so he broke out the Snow Chief and is going wear that to the party and then wants to go wander the new walmart.
 
Wow yer wife is actually smiling during the test fit...what a good sport:). You guys are gonna have a blast on Halloween
 
If the neck is floppy you can use something like paper clips to hold it in place. I have the same problem with the neck on mine. What are you using to cast? I can hardly wait to see how it turns out!

aa.jpg
 
If the neck is floppy you can use something like paper clips to hold it in place. I have the same problem with the neck on mine. What are you using to cast? I can hardly wait to see how it turns out!

thanks for all your advise, helped alot.. i would have most likely really screwed it up without it. i am using easy flow 120.

well, got my first pull out. i am tickled with it. my son was looking at me weird when i started whootin and hollerin.. without further adieu here is the first pull:

original and pull:
DSCN2575.jpg


DSCN2576.jpg

DSCN2577.jpg

DSCN2578.jpg


well i am now making another mother mold. after the pull i realized the mother mold was just way too weak and was beginning to brake.. so what i did was put the mold all back together make sure everything was straight and begin another pour. after getting a good thickness (several layers later) i pulled the mother mold off and then started another one. i think i got impatient and was in a rush with the mother mold. this time i am taking my time to make sure it lasts.
 

Attachments

  • DSCN2575.jpg
    DSCN2575.jpg
    32.2 KB · Views: 169
  • DSCN2576.jpg
    DSCN2576.jpg
    16.3 KB · Views: 170
  • DSCN2577.jpg
    DSCN2577.jpg
    12.1 KB · Views: 173
  • DSCN2578.jpg
    DSCN2578.jpg
    17.3 KB · Views: 176
That looks awesome! I think I might have to have that for my collection.

thanks brandon..

well i came home from work yesterday morning and found the wife painting. she was so excited to get to paint the helmet and wants to get it done so she can wear it and show it off. have to admit... it made me feel good. this is my long week at work and my days off are tied up with court so won't be able to get much done this week. only 120 more days to Dragon Con. i have to get to work. still have my wife's, my son's, my daughter's and mine to get done. wow i may have bit off more than i can chew.

mms95picture.jpg


mms95picture_04.jpg
 

Attachments

  • mms95picture_04.jpg
    mms95picture_04.jpg
    14.8 KB · Views: 152
  • mms95picture.jpg
    mms95picture.jpg
    30.7 KB · Views: 170
So are you and the wife going to dcon? If so you will love it! Be prepared to get stopped by everyone and have your pic taken constantly! Look forward to seeing you there!
 
Beautiful work. The visor seems to just naturally mate to the helmet. This is top notch, it looks like one of the helmets those London SPARTANs wore to the Reach launch.
 
Very cool build. and your helmet is so clean i could eat off of it! It is simply a match made in heaven with that visor:) Movie quality
 
So are you and the wife going to dcon? If so you will love it! Be prepared to get stopped by everyone and have your pic taken constantly! Look forward to seeing you there!

yup.. already ordered tickets.. reserved hotel room.. now have to get geared up to go.. will be first dragon con.. we have gone to comicon several times but never dressed up soo looking forward to it.
 
did some work this morning when i got home from work. worked on painting the helmet some more

DSCN2579.jpg


then did some sanding and finished up the helmet attachment and it is ready for molding

DSCN2580.jpg


then went to bed.
 

Attachments

  • DSCN2580.jpg
    DSCN2580.jpg
    11.2 KB · Views: 156
  • DSCN2579.jpg
    DSCN2579.jpg
    27.6 KB · Views: 152
That attachment does look nice. I haven't seen a pep file that includes the little knobs and stuff so I am guessing you added those on? I was thinking about adding a small red light for mine, but unfortunately, the only small red light I have, blinks, and I don't know how to change that, IF it's even possible to stop it from blinking.

I recently just finished my shoulder pieces and it was a fast, crappy job I did for them. XD I just sort of threw them together. Didn't really put much time into them at all. They are in my WIP thread.

As for my helmet, I'm waiting to see what FR is gonna put up. :p

yea i am going to cut the front of the attachment open and put a few leds in it for lighting so the wife can see walking around in the dark. going to cut the cap off the back and make it where it screws open to be able to put batteries in it and add a functioning switch to it. i added the knobs trying to get it close to game accurate but i was not able to find any really good reference pics of it so i went with what seemed natural. going to use magnets to be able to mount it to the helmet so it can be put on and then removed.
 
THen you should have asked me first! I got LOADS of reference shots for ALL of Kat's armor. I amde sure to gets shots and focus on every bit of detail to try and build the most accurate armor I possibly could! I have pictures showing detail that people overlook. XD I got some good images of the attachment as well.
 
wish i had. pm you see if i can get some from ya.

well i was sitting there looking at the helmet thinking about putting fans in it and putting the visor in and it dawned on me.... i was making the attachment but had painted the helmet before finishing the mounting system i wanted to put in it. crud... well time to mess up the paint job. so i went to work. what i did was mount 2 magnets in the helmet and 2 corresponding magnets in the attachment.. this would 1 give it more strength to hold it to the side of the helmet but also help to prevent the spinning effect.

DSCN2583.jpg

DSCN2581.jpg


i then put a thin coat of spot putty to smooth the helmet and the attachment back out. once sanded it was time to fix the paint and put in the fans and the visor. after a few hours of work here is the end results:

DSCN2586.jpg

DSCN2587.jpg

DSCN2588.jpg


now to finish the attachment.
 

Attachments

  • DSCN2586.jpg
    DSCN2586.jpg
    34.7 KB · Views: 169
  • DSCN2581.jpg
    DSCN2581.jpg
    21.5 KB · Views: 170
  • DSCN2583.jpg
    DSCN2583.jpg
    17.7 KB · Views: 154
  • DSCN2587.jpg
    DSCN2587.jpg
    35.3 KB · Views: 168
  • DSCN2588.jpg
    DSCN2588.jpg
    36.8 KB · Views: 155
Wow! Just simply WOW!

I've been watching this thread for a while...

I'm speachless!

This is one of the nicest builds that I am watching. Your going to make one AWESOMELY EPIC Spartan.

Keep up the fantastic work!

Photo%20on%202011-03-20%20at%2014.12.jpg
 

Attachments

  • Photo%20on%202011-03-20%20at%2014.12.jpg
    Photo%20on%202011-03-20%20at%2014.12.jpg
    73.3 KB · Views: 157
That helmet is SICK! Your work just keeps getting better and better man. How does the wife feel about it? I bet she is getting pretty pumped.
 
Status
Not open for further replies.
Back
Top