Calladar's Kat WIP

Status
Not open for further replies.
Ha! You used an idea that I had, but I want to make it so that my tactical hardcase that goes on my thigh will be able to hold stuff. Since it looks like there is a buckle, I am going to to use a buckle so that it won't be easy for people to steal anything. D:

As for the helmet, it looks like it came out pretty good. :)

yea i am going to do the same. only thing is i don't like the pep file for it sooo thanks to your reference pics i am working on one from scratch. it is coming out but i make about 2 inches deep so with the curve of the thigh piece there is not alot of room. but much more and it will stick off the thigh too far.
 
thanks..

well i was able to get the cod together today. still working slower than usual. still not feeling real well and have to take breaks alot. but i was able to finish the other "pocket" for the cod and put it all together and start smoothing seams to be able to put on a little of paint.

cod.jpg


have to get to work on the shins and boots. and if i can get those done i can get back to the grunt and then Carter.
 

Attachments

  • cod.jpg
    cod.jpg
    39.4 KB · Views: 169
ARGGGGG... SHAKING FIST AT THE ARMOR GODS!!!!!!

Well that's a day gone and half a sheet of foam down the drain. spent the better part of today making a shin and wouldn't you know it i made it do darn small. too big i could have worked with. needless to say i am done for today. going to smoke and be disgusted with myself for about 10 minutes. then going to play REACH and get some frustration out. nothing like the satisfaction of getting a kill and knowing there is someone in the world yelling at their TV.
 
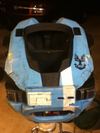
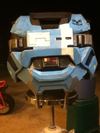
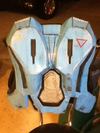
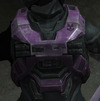
well didn't really feel like building so i decided to do a little painting:

chest2.jpg

chest.jpg

chest4.jpg

chest3.jpg


still have a little more touch up to do. i also painted the cod but did not take pics. more to come.
 

Attachments

  • chest2.jpg
    chest2.jpg
    45.2 KB · Views: 158
  • chest.jpg
    chest.jpg
    38.8 KB · Views: 174
  • chest4.jpg
    chest4.jpg
    62.6 KB · Views: 168
  • chest3.jpg
    chest3.jpg
    19.7 KB · Views: 160
Lookin' good. I like the UNSC symbol on the chestplate. Was that a template? A sticker??

Also, I am curious to know what is the name of the blue color that you used? The color I tested on my chestplate and then ultimately used for my shoulders is called Heaven Blue. It's an acrylic paint since it's much easier for me to paint my armor that way since it's still too darn cold here to be using spray paint outside.
 
honestly I'm very curious about the little area above the ab plate, looks very well done, don't think I've seen anyones have that much color added to it. chest piece looks wicked all together, I wants a pic of her wearing what she has made! (with the helm attachment light on too!) lol

keep up the great work!
 
Lookin' good. I like the UNSC symbol on the chestplate. Was that a template? A sticker??

Also, I am curious to know what is the name of the blue color that you used? The color I tested on my chestplate and then ultimately used for my shoulders is called Heaven Blue. It's an acrylic paint since it's much easier for me to paint my armor that way since it's still too darn cold here to be using spray paint outside.

used the template which came as a bonus with my reach game. it is in pdf format so i converted it to a jpg and then transferred it to my craftrobo software and sized it and found the outline and used some vinyl to cut it out to use for a stencil and then painted it. here is the converted jpg if anyone wants it:

unscsencil.jpg


i am using acrylic paint as well i find it works the best on the foam. has a little flex to it and doesn't crack or chip. the color i am using is 2246 ocean cruise made by FolkArt.

Pipinacan - honestly I'm very curious about the little area above the ab plate, looks very well done, don't think I've seen anyones have that much color added to it.

I have the Kat action figure that i have been using as a reference and noticed that there was some box with red and yellow marking on it that i had not noticed before so i figures what the heck and just made it and put it in there. i used some creative license on the chest piece. wife out of town with the kids visiting the in laws (got out of it.. yay me) and when she gets back going to have her put it on with helmet and cod and see whether i need to do some changing.
 

Attachments

  • unscsencil.jpg
    unscsencil.jpg
    30.5 KB · Views: 153
Thanks for the UNSC logo template! I plan on doing the exact same thing as you (making a template from vinyl cut on a CNC cutter; my sister has a Cri-cut), but I was worried that the logo I was planning on using was too detailed to get properly cut out at the scale I will need. This one has much less detail, but looks just as good.

Keep up the great work, the chest piece looks fantastic! I really think that adding small details like text and logos really helps make a piece look more believable, though not many people seem to do it.
 
Every thing is turning out great Calladar. You should be really proud of your work bro. It is fantastic.
 
Looking great. Love the detail on the chest plate, The paint job just makes it stand out from all the others. This build is just coming along so nicely that I can't wait to see what you do next.
 
i am using acrylic paint as well i find it works the best on the foam. has a little flex to it and doesn't crack or chip. the color i am using is 2246 ocean cruise made by FolkArt.
Ah, folkart brand. I stick with my Delta Ceramcoat. :p Anyway, the heaven blue color that I have chosen seems to work pretty well. I have seen Kat in different color variations so I don't think my blue is going to make much of a difference. XD My color seems pretty close and plus I add the black wash to it so it will sort of darken the color down a bit anyway in some areas.

And speaking of paint, I bought a VERY awesome color.........sterling silver metallic!!! It IS acrylic and the brand is folkart! haha XD I didn't see a color like that in my normal brand, plus this came in a large bottle. I'm gonna use that for the steel colored parts and once I add my black wash to it, I think it will look very nice! :D
 
funny i have the same sterling silver metallic. word of warning i found with it. it is really transparent and takes several coats to cover any other colors. what i started doing was i have a steel grey color paint and i do a base coat with the steel grey and then the sterling silver metallic goes on soo well and only takes like 2 coats to get a nice metallic Finnish.

ok i was thinking of something for the chest and could have sworn i had seen somewhere where there was a "KAT-B320" on the chest on the right hand (robot arm side) virticle by the neck seal. so I started looking at game pics, game videos, and finally found where i had seen it. it was on the halo reach live action trailer. now i am thinking that i can not find it anywhere in the game like this but i kinda like it. so thinking about putting it on there. now this may go away from "cannon" or "game accurate" but i have already used some creative license on it so that is already out of the picture.. although i do want to try and keep it as accurate without straying toooo far. was wondering what some of you think?

go with it or leave it off?

this is what i am talking about:
kat5.jpg
 

Attachments

  • kat5.jpg
    kat5.jpg
    40 KB · Views: 169
Really, it's all up to you if you want to add it or not. If you like it and want to put it there, then I say go ahead. I guess it all depends on a personal preference. I know I won't be putting it there since I never noticed it on the in game version and it seems that it ONLY appears in the live action trailer.

Also, if you are curious to see some of the chestplate detail on the area at the top of the ab plate:

33zfthw.jpg

2pskhzr.jpg


**IMPORTANT: Keep in mind that these pictures were taken from the BETA and I have already noticed that detail seen in the beta and what was actually released in the game has changed.
 

Attachments

  • 33zfthw.jpg
    33zfthw.jpg
    34 KB · Views: 149
  • 2pskhzr.jpg
    2pskhzr.jpg
    23.8 KB · Views: 137
wow, so after looking at this, then roxyroo's, then halogoddess', I'm REALLY craving to do a foam build! =X it looks SO much easier, but then again, everything looks easier than it really is. I don't really have time right now to go through EVERY page of your thread, but I was wondering if you made the helmet yet, and if so, did you go with foam or fiberglass/bondo? keep up the AWESOME work and you've really inspired me to start my own!
 
I was wondering if you made the helmet yet, and if so, did you go with foam or fiberglass/bondo? keep up the AWESOME work and you've really inspired me to start my own!

yes it is all done. went with pep, fiberglass, rhondo, and then bondo, sand and repeat. i then molded it and cast it out of easyflow 120.

alix965.. that was the picture i was trying to find and thank you soo i am going with it.

halogoddess thanks for the ref pics. that little box thing was like an afterthought right before painting. lol. Do you have any good reference pics of the lower legs (shins and boots)? that is the next thing on the to do list.
 
Status
Not open for further replies.
Back
Top