My first armor: master chief mark VII

Status
Not open for further replies.
OK..so this is the plan:

1) thin layer of resin in the outside, avoiding the parts with small details
2) If the helmet is already hard enough, I'll take the visor off...otherwise:
3) Rondo inside, trying to not cover the visor if I didn't remove it in the previous step
4) Remove the visor, if still there
5) a coat of fiberglass cloth + resin if not hard enough
6) damn.....bondo.....
 
guys, I've lost the link to this built:

8363605774_d36c9169b7_zpsc49cc3da.jpg


I looked for it tonight but I didn't find it....Does someone of you know it? Thanks!
 

Attachments

  • 8363605774_d36c9169b7_zpsc49cc3da.jpg
    8363605774_d36c9169b7_zpsc49cc3da.jpg
    112.8 KB · Views: 232
Gray...thanks!!!! I looked for this thread for two nights and I just gave up!!!!! This is how I want to do my undersuit!
 
Gray...thanks!!!! I looked for this thread for two nights and I just gave up!!!!! This is how I want to do my undersuit!

I actually was thinking of doing that with the undersuit too! It looks really nice, but even more so... accurate! Although... I feel as if I will take a different approach to my undersuit, like that EVA foam front piece. I don't know yet... Still researching! But this one I like too!
 
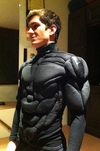
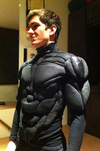
For what I saw in the various thread, this is the one method that better reproduce the chief undersuit, and it gives the "muscles-effect" that I need to look cool with the armor (better than do some workout ;) )
 
Update:
I've applied the first two coats of resin in the outside of the helmet....and luckily there are no bumps..

Helmet_Firstcoatsofresin_zps42e9af2d.jpg


Next update: rondo in the inside and the shins completed (they're driving me crazy...)
 

Attachments

  • Helmet_Firstcoatsofresin_zps42e9af2d.jpg
    Helmet_Firstcoatsofresin_zps42e9af2d.jpg
    75.1 KB · Views: 251
I've started yesterday to cut the first pieces...it'll be fun (never done something like this before ;) )
 
I've applied a layer of fiberglass cloth inside the helmet:

Helmet_December28_zpsed190fe2.jpg


...and....who said that it is not possible to make the resin cure at sub-zero (celsius) degrees? ;)

Dicembre282_zps6566e11d.jpg
 

Attachments

  • Dicembre282_zps6566e11d.jpg
    Dicembre282_zps6566e11d.jpg
    143.8 KB · Views: 255
  • Helmet_December28_zpsed190fe2.jpg
    Helmet_December28_zpsed190fe2.jpg
    77.5 KB · Views: 244
Finally...the shins are completed....well....there is some detail that I want to add before painting, but they're almost done..

This is after between 2 and 4 coats of bondo and a difficult sanding giving the shape of the shins:

Shins_December28_zps947a2b44.jpg


And this is after one coat of primer:

Shins_December30_zps3c8e8f38.jpg


Any suggestion on how to fix cracks in the bondo like this? :

Shin_crack_zps9bc83398.jpg
 

Attachments

  • Shins_December30_zps3c8e8f38.jpg
    Shins_December30_zps3c8e8f38.jpg
    57.3 KB · Views: 255
  • Shins_December28_zps947a2b44.jpg
    Shins_December28_zps947a2b44.jpg
    39.3 KB · Views: 240
  • Shin_crack_zps9bc83398.jpg
    Shin_crack_zps9bc83398.jpg
    90.9 KB · Views: 219
I'd suggest reinforcing the inside so there can be no movement at all, then spot puttying the outside to cover the damage.
 
Update:

These are the patterns for the front part of the undersuit:

Undersuit_patterns_zpsc7896d3a.jpg


Commets, before I start sewing....?
 

Attachments

  • Undersuit_patterns_zpsc7896d3a.jpg
    Undersuit_patterns_zpsc7896d3a.jpg
    64.9 KB · Views: 226
Commets, before I start sewing....?

I'm assuming you're sewing each piece individually and then together. If that's the case make sure you've got plenty of extra fabric around the edges of each piece. I learned the hard way with my undersuit with quite a few pieces that didn't have enough material to sew the foam onto. Otherwise your build is looking awesome, keep up the good work.
 
I think I'll sew the pieces over a T-shirt, after cutting away the sides...but not 100% sure yet. Thanks for the tips. I like a lot what you've done with your undersuit!
 
The scariest step....but it went well:

Chest_cut_4December2_zpsabfdac78.jpg
 

Attachments

  • Chest_cut_4December2_zpsabfdac78.jpg
    Chest_cut_4December2_zpsabfdac78.jpg
    108.9 KB · Views: 241
your suit looks great so far. i don't know how you still enjoy doing this because i've already gotten sick of pepakura. i'll still finish it but it'll probably take a while. I've still got the rest of one forearm to make then the other forearm, both thighs, both shins, both boots, both biceps, and both shoulders to make. ugh. maybe i'll start a build thread to keep me motivated. i guess the reason i got sick of pepakura so fast is because i made the helmet and torso and then decided to start over. i then built half of another helmet using a different model and realized i didn't like the way it looked and started over again. anyway i hope to have this done by next Halloween.
 
Thanks a lot.

What can I say....the pepakura method is a pain...long and not simple, mainly when you think that it'd be much faster when you start, as I did....But it is totally cool to handle and wear a completed piece which looks like a real armor not just because of the shape, but also because of its hardness and compactness....

Maybe your problem was that you started with complicated pieces such as helmet and torso. I've started from the forearm, and then I did the shoulders...it was a good idea because I acquired a good skill before facing more complicated pieces...
 
Maybe your problem was that you started with complicated pieces such as helmet and torso. I've started from the forearm, and then I did the shoulders...it was a good idea because I acquired a good skill before facing more complicated pieces...

I agree, I also started with some individual pieces, not a whole build. It allowed me to see a finished result sooner, rather than wait up to a year to see the finished result. Pep can be a pain, but it can be really worth it in the end if you do it right!! Morkar's build is looking fantastic and I can tell once it's done, it'll have been worth every minute of pain and patience it took to make it!
 
Status
Not open for further replies.
Back
Top