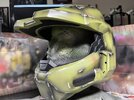
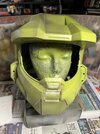
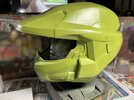
Foam My Halo Infinite Chief build!

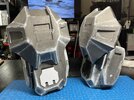
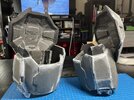
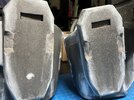
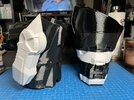
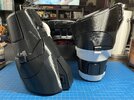
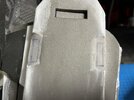
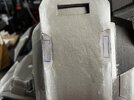
Shoulders are done and awaiting the filling, yada yada yada.
406163517_7511853528843933_7629269768169101795_n.jpg

407116367_7511853548843931_4288975647520437265_n.jpg


Trust me, I didn't yada yada over the best part. Anyway, those vertical side holes on the front and back are gonna get filled with foam clay. My brain just wasn't figuring out make those details with foam. Foam clay it is.

The pauldron parts like to stick up a lot, and show off the floor mat pattern, but I figure with some velcro at the top (I grinded spots for it), it should mesh well with velcro on the undersuit and not expose the floor mat pattern. If this works, I'll likely add a bit more of foam between the pauldrons and bicep parts to really secure it in it's proper place.
 
Very clean foam work as always!! It looks great!

I thought the shoulders sticking up and revealing the foam mat pattern would be a problem too. But I've found that you really can't ever see the texture, even in pictures! If you point it out to folks and move your arm in a certain position to reveal the mat texture people will be able to see it, but for the most part it stays completely hidden! Usually the chest piece hides the inside of the shoulder, and when you move over enough that the chest piece is no longer blocking the inside of the shoulder, you'll be looking at the piece straight on and still can't see the texture.

It's not a bad idea to hide it to be sure, but it's wouldn't be that noticeable if you didn't. I think you've got some good ideas there!
You're probably right, but there's always that little voice telling you the whole world is going to see it.

Well, time for some updates.

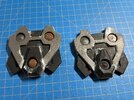
Shoulders are still WIP, a lot of back and forth with the filling and sanding kwik seal, but nearly there. Still gotta smooth out/fill the foam clay and carve in those little rectangles. Then its onto painting.
IMG_8900.jpegIMG_8901.jpegIMG_8902.jpeg

Hand plates are done and gaunlets are WIP.
IMG_8883.jpegIMG_8884.jpegIMG_8885.jpeg

I had these gauntlets printed out a few years ago for some reason? I think I even tried to sell them, but good thing I didn't. I really wanted to make these out of foam, but neither the Heroes Workshop or Shanedark's/OCDA's files played well in Armorsmith and trying to size them to my avatar was damn near impossible. The hand plates were fairly straightforward, but artistic interpretation' was needed. I bore those holes with a stone bit, and half of them had this good looking bump, but the other three looked like Cthulhu's bunghole. So, I did I what I could to remove them and added 3D printed domes inside.

Also, looks like I'm going to have to adopt a 'complete parts from start to finish before moving on' method because I'm loosing space in the apartment having half-painted parts lying around. Which is probably good, I had a lot of smaller projects going on before I started this I could get done while waiting for painting...

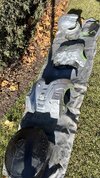
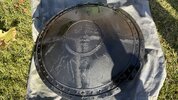
Slight update, since it’s actually a nice day out. Got to the next layer of paint.
IMG_8904.jpeg

Speaking of side projects to catch up on. Pretty sure Solaire would be jolly enough to join a game of Halo, but he might frown upon tea bagging. (I’ll make a separate thread for our pal Solaire in the right section)
IMG_8906.jpeg
 
Last edited:
Progress time.

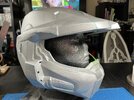
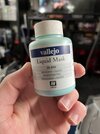
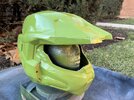
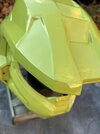
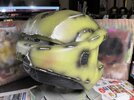
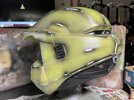
I went in and used Vallejo Liquid Mask on the helmet. Its my first time using it, so its a bit a wild card to me, atm. I'm going to finish up the helmet's paintjob first, so I know if I'm using the stuff properly. Then sprayed with the Rustoleum Eden. I'll get to the airbrushing in a few days.
409202220_7552628148099804_2011558682988189284_n.jpg409213546_7552628318099787_4131435620697904470_n.jpg410320776_7552628158099803_2306088236160814067_n.jpg410336474_7552623108100308_5335390854681036547_n.jpg

Also, with the foam clay dry, I got in the little rectangles.
410366209_7552705818092037_9203063623947236326_n.jpg410314438_7552705864758699_1019578488169610557_n.jpg

Interestingly enough, discovered foam clay doesn't open up gouges/scores with a heat gun, like normal eva foam does. So, I hope the rectangles come up after all the paint.
 
Last edited:
Decided to save the Kwik Seal and foam clay work for the very last. Today I dremel'd the edges, and took care of rigging. View attachment 338839
View attachment 338838
View attachment 338840View attachment 338841

The very last circle detail on the hexagon piece will probably be the last thing on the back. I probably have to cut it up for the magnets.
View attachment 338837View attachment 338836View attachment 338835

If I remove that plastic piece between the magnets, those two will definitely fit. This is my first time doing this, so is this a good spot? I can't seem to find another place where these big guys will fit. If it helps, I bought these (suggested in another thread): Amazon.com
I love the sharpness of your cuts ..really awesome. Aunt there yet but slowly trying to get there..looks really
 
First (mostly) finished piece! LETS GOOOOOO
409325357_7557748540921098_5122243900310283015_n.jpg

410391024_7557748824254403_3297047284082618833_n.jpg410342347_7557748950921057_5122630368556817001_n.jpg410341914_7557748677587751_7041381858738519285_n.jpg

This Vallejo liquid mask is great! Just have to remember all the area you put it on... Gonna take pics of the pieces after the application so I know.

I went with two 'mini-layers' with the Tamiya Dark Green 2 (RAF).
First was the highlighting one:
410459040_7557748847587734_6042630211638717654_n.jpg


Then a second layer, where I misted all over it.
410368873_7557748697587749_7144983145156545256_n.jpg


Some before and afters:
409318457_7557748564254429_7486412908286010956_n.jpg410439263_7557747900921162_717100737848667284_n.jpg

Then topped with two coats of Alclad II Klear Kote Matte! Time for all the electronics nonsense, and whew lads, there is going to be a lot.
 
First (mostly) finished piece! LETS GOOOOOO View attachment 339490
View attachment 339489View attachment 339488View attachment 339487

This Vallejo liquid mask is great! Just have to remember all the area you put it on... Gonna take pics of the pieces after the application so I know.

I went with two 'mini-layers' with the Tamiya Dark Green 2 (RAF).
First was the highlighting one:
View attachment 339483

Then a second layer, where I misted all over it.
View attachment 339484

Some before and afters:
View attachment 339485View attachment 339486

Then topped with two coats of Alclad II Klear Kote Matte! Time for all the electronics nonsense, and whew lads, there is going to be a lot.
solid paint job! good mix of colors to give it dimension.
 
yes great job with the shading, it will pop even more when you weather it. this is like reading a good novel you just want to jump to the end because you cant wait lol
 
This thread is more than 11 months old.

Your message may be considered spam for the following reasons:

  1. This thread hasn't been active in some time. A new post in this thread might not contribute constructively to this discussion after so long.
If you wish to reply despite these issues, check the box below before replying.
Be aware that malicious compliance may result in more severe penalties.
Back
Top