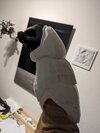
Build-A-Spartan with OFiveTwo!

What armor do you want to see me make?!

  • Mk. VII

    Votes: 8 12.1%
  • MK VI

    Votes: 4 6.1%
  • MK V(b)

    Votes: 19 28.8%
  • MK IV

    Votes: 7 10.6%
  • MIRAGE

    Votes: 7 10.6%
  • ODST

    Votes: 16 24.2%
  • RAKSHASA

    Votes: 5 7.6%

  • Total voters
    66
  • Poll closed .
Have a question for those who have printed their armor before. What would a general ball park estimate be for how many rolls of 1kg filament used for a full set of armor?

Progress update, my first forearm peice is about 2/3rds done and the last bit should be done sometime during the night.
For a mostly completed MKVII I worked on last year I used somewhere between 6-10 spools. I had some issues with things printing at the wrong scale which led to some waste. I think it would also vary depending on the suit. A Rakshasa build could use less filament than some others. Infill and supports are also going to eat up a lot of filament. What I did is put all my scaled files in my slicing software, generated supports, got everything ready for the printer and then add up the estimated filament for each piece. That gave me a rough idea of what I needed.
 
For a mostly completed MKVII I worked on last year I used somewhere between 6-10 spools. I had some issues with things printing at the wrong scale which led to some waste. I think it would also vary depending on the suit. A Rakshasa build could use less filament than some others. Infill and supports are also going to eat up a lot of filament. What I did is put all my scaled files in my slicing software, generated supports, got everything ready for the printer and then add up the estimated filament for each piece. That gave me a rough idea of what I needed.
I’d love to hear what other people use though. I could be wildly off due to that being my first experience making armor.
 
I’d love to hear what other people use though. I could be wildly off due to that being my first experience making armor.
Ive got 4 rolls currently and im sure I'll need more. Was curious how many more i should get on the way. When the whole project is over, I'll post the total used, including any failed prints.
 
Update 3/13/24

After attempting to print my first forearm of the build, my printer decided to give me some troubles.. I narrowed it down at first to a cleaning issue and gave it some TCL. After cleaning it out as good as I could at 1 am, I gave in to my need to start it back up asap and put a new nozzle in the hotend. After tightening it back up and giving it one last look I noticed that the nozzle looked a little crooked.. turns out the hotend block was a little more dirty then I thought, and it had cooled down before I tried putting in the new nozzle. Since I tightened the nozzle with the strength of Thor I ended up cross threading the block..
1000004904.jpg
1000004899.jpg


After some Amazon review reading and figuring out how to disassemble the hotend. I found a part to replace the block and ordered it! (Also ordered and upgrade for my CR-10s that I will try and also use for this project) After waiting hopelessly for 2 days I finally got my part and was ready to install! After getting my tools ready once again and opening the part.. I tried installing it when I ran into a problem.. my thermistor didnt work with this block..

Now I sit and wait hopelessly once again for a new hotend assembly since I could not find the correct block..

Im sorry brother.. my homework will be a little late but ill have it fixed in no time!
 
Update 3/13/24

After attempting to print my first forearm of the build, my printer decided to give me some troubles.. I narrowed it down at first to a cleaning issue and gave it some TCL. After cleaning it out as good as I could at 1 am, I gave in to my need to start it back up asap and put a new nozzle in the hotend. After tightening it back up and giving it one last look I noticed that the nozzle looked a little crooked.. turns out the hotend block was a little more dirty then I thought, and it had cooled down before I tried putting in the new nozzle. Since I tightened the nozzle with the strength of Thor I ended up cross threading the block..
View attachment 344107View attachment 344108

After some Amazon review reading and figuring out how to disassemble the hotend. I found a part to replace the block and ordered it! (Also ordered and upgrade for my CR-10s that I will try and also use for this project) After waiting hopelessly for 2 days I finally got my part and was ready to install! After getting my tools ready once again and opening the part.. I tried installing it when I ran into a problem.. my thermistor didnt work with this block..

Now I sit and wait hopelessly once again for a new hotend assembly since I could not find the correct block..

Im sorry brother.. my homework will be a little late but ill have it fixed in no time!
I had the same issue with my stock hotend on my Ender 3v2 and after tinkering with it for a week I just ordered a new one (from MicroSwiss) and it's doing a great job so far. Hoping you're back in action soon!
 
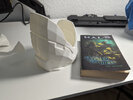
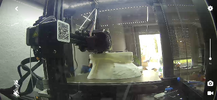
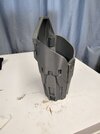
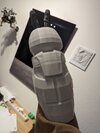
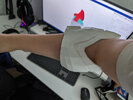
My first half of the forearm is done and the second just started printing. I won't be ready tomorrow, but I tried my best with the homework :D

edit: Other half still printing
 

Attachments

  • PXL_20240314_124727737.jpg
    PXL_20240314_124727737.jpg
    68.1 KB · Views: 72
  • PXL_20240314_124846382.jpg
    PXL_20240314_124846382.jpg
    60.9 KB · Views: 73
  • Screenshot_20240315-095448.png
    Screenshot_20240315-095448.png
    2.7 MB · Views: 72
Last edited:
I am currently in the process of printing my first set of MK.IV armor and i love how easy it is to fallow along with the process; I am using the files from Galactic Armory and i was wondering what slicer everyone uses?
 
I am currently in the process of printing my first set of MK.IV armor and i love how easy it is to fallow along with the process; I am using the files from Galactic Armory and i was wondering what slicer everyone uses?
Im using bambu lab for my slicer, but im doing the scaled sizes exported from armorsmith.
 
I am having issues changing the width of the feet on my model in armorsmith. I know I'm supposed to be able to click something and literally scale the feet to the size I need. However, I can't find the setting! My chic looks like she has weird duck feet right now
 
I am having issues changing the width of the feet on my model in armorsmith. I know I'm supposed to be able to click something and literally scale the feet to the size I need. However, I can't find the setting! My chic looks like she has weird duck feet right now
There will be a box in the bottom right or bottom left to enter a measurement for the size of the body part. I'll try to remember to send a screenshot tonight

edit: here's the edit box
1710547697712.png
 
Last edited:
Hey everybody! I've decided to push Episode 3 of the tutorial to next Friday so I can get caught up on my C2E2 projects this week.
Thank you in advance for your patience, I promise the next episode is worth the wait!

If you're looking for the next step in the meantime, print your other forearm! Otherwise, keep troubleshooting and I'll pop in here to help!
Look forward to see what you got in store! Hope all goes according to plan for your C2E2 project!
 
There will be a box in the bottom right or bottom left to enter a measurement for the size of the body part. I'll try to remember to send a screenshot tonight

edit: here's the edit box
Thank you so much! When I double click on the feet and hands, the box to alter the size doesn't come up. It's odd, because these are the only two parts I can't scale.
 
Thank you so much! When I double click on the feet and hands, the box to alter the size doesn't come up. It's odd, because these are the only two parts I can't scale.
So the length of the feed don't show up like this?

1710707203700.png


Hands don't have any measurements for me either, btw.
 
Anyone have advice on scaling without armorsmith? I’m using Bambu slicer which as far as I know has no proper measuring tool, however it does still allow you to scale it just only notes the largest parts of the pieces. Scaling is a bit tricky for the forearms because of this but most everything else is going well so far.
Also anyone know how to make a visor for the helmet? I’ve seen people vacuum form them but since this is my first set of armor I’m not sure if I want to get into all of that yet.
Here is a good tutorial for scaling without armoursmith

There are a lot of tutorials for making different kinds of visors, Check out the tutorial index and scroll to the "visor" section to find them:
 
I am having issues changing the width of the feet on my model in armorsmith. I know I'm supposed to be able to click something and literally scale the feet to the size I need. However, I can't find the setting! My chic looks like she has weird duck feet right now
if you right click on the part you want to size there will be a menu, third from the bottom is scaling. then you choose how you want to scale and whollah you can now not have duck feet.
 
This thread is more than 3 months old.

Your message may be considered spam for the following reasons:

  1. This thread hasn't been active in some time. A new post in this thread might not contribute constructively to this discussion after so long.
If you wish to reply despite these issues, check the box below before replying.
Be aware that malicious compliance may result in more severe penalties.
Back
Top