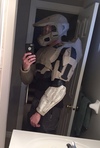
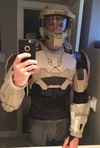
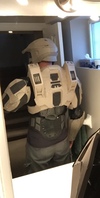
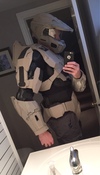
Jme's H3 MKVI Foam build

Status
Not open for further replies.
You should find out when/if they are going to get rid of it, give them your name and number and it's yours when they do.......tip the manager a bit...it helps.
 
Haha, i would love it.

My wife, not so much.


"I don't know what's weirder, that you're fighting a stuffed animal, or that you seem to be losing" - Suzie
 
Sorry, this should have been an edit...

Update time!

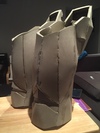
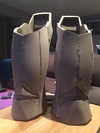
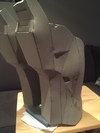
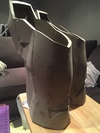
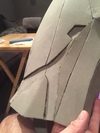
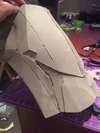
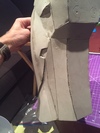
Thighs are done!

6475392c94e4c64c536866059cd18349.jpg

fcfa47133b7fcb5e99bba7d6be710c24.jpg

5f4bc19619daa7b94b7804cf9d72fb47.jpg

60170ded02589a1ccd7a06c65e4f0a47.jpg


You can see that on the inside of the thigh I built a pocket that my phone will fit into. It is a great fit (the phone won't slide out).

I am going to put a similar one on the other thigh for my wallet.

The fit is good lengthwise. I am going to have to put in a fair bit of padding as my legs don't exactly fill out the thigh...

53abe79e90450f23bddc538998bead75.jpg


"I don't know what's weirder, that you're fighting a stuffed animal, or that you seem to be losing" - Suzie
 

Attachments

  • 6475392c94e4c64c536866059cd18349.jpg
    6475392c94e4c64c536866059cd18349.jpg
    338.9 KB · Views: 187
  • fcfa47133b7fcb5e99bba7d6be710c24.jpg
    fcfa47133b7fcb5e99bba7d6be710c24.jpg
    295.3 KB · Views: 184
  • 60170ded02589a1ccd7a06c65e4f0a47.jpg
    60170ded02589a1ccd7a06c65e4f0a47.jpg
    305.6 KB · Views: 203
  • 5f4bc19619daa7b94b7804cf9d72fb47.jpg
    5f4bc19619daa7b94b7804cf9d72fb47.jpg
    292.4 KB · Views: 210
  • 53abe79e90450f23bddc538998bead75.jpg
    53abe79e90450f23bddc538998bead75.jpg
    206.7 KB · Views: 185
Sorry, this should have been an edit...

Update time!

Thighs are done!

http://uploads.tapatalk-cdn.com/20160625/6475392c94e4c64c536866059cd18349.jpg
http://uploads.tapatalk-cdn.com/20160625/fcfa47133b7fcb5e99bba7d6be710c24.jpg
http://uploads.tapatalk-cdn.com/20160625/5f4bc19619daa7b94b7804cf9d72fb47.jpg
http://uploads.tapatalk-cdn.com/20160625/60170ded02589a1ccd7a06c65e4f0a47.jpg

You can see that on the inside of the thigh I built a pocket that my phone will fit into. It is a great fit (the phone won't slide out).

I am going to put a similar one on the other thigh for my wallet.

The fit is good lengthwise. I am going to have to put in a fair bit of padding as my legs don't exactly fill out the thigh...

http://uploads.tapatalk-cdn.com/20160625/53abe79e90450f23bddc538998bead75.jpg


"I don't know what's weirder, that you're fighting a stuffed animal, or that you seem to be losing" - Suzie
nice job so far
bye the way if you have a pistole you can attach it to your thigh by putting a pice of metal in the gun thin putting a strong magnet In the high
it creates the effect that you seen in halo 5 chief tralier
 
  • Like
Reactions: Jme
nice job so far
bye the way if you have a pistole you can attach it to your thigh by putting a pice of metal in the gun thin putting a strong magnet In the high
it creates the effect that you seen in halo 5 chief tralier

I totally want to do that. I am having some trouble getting the rare earth magnets I bought to adhere to the foam though. I was going to use them on the chest and cod piece as attachment points but so far hot glue, super glue and contact cement have failed to work. I do have some Gorilla Glue that I may try.


"I don't know what's weirder, that you're fighting a stuffed animal, or that you seem to be losing" - Suzie
 
Peter

Thanks so much. I will definitely sand off the outer later and give it a whirl.


"I don't know what's weirder, that you're fighting a stuffed animal, or that you seem to be losing" - Suzie
Or if that doesn't work ( which there is a very low chance of in not working) you could cut a hole out of the foam then put the magnet in then fill it up. But that would be a worst case Sanrio. But preterthethinker idea will probly work
 
  • Like
Reactions: Jme
Jme, great job on the thighs.......smooth clean lines and I love the detailing. Once painted it going to look killer!!! Suit is coming out FANTASTIC!!!!
 
Last edited by a moderator:
Jme, great job on the thighs.......smooth clean lines and I love the detailing. Once painted it going to look killer!!! Suit is coming out FANTASTIC!!!!

Thanks man. I am starting to get excited about the prospect of spackle and sanding.

Just the shins and boots to go!


"I don't know what's weirder, that you're fighting a stuffed animal, or that you seem to be losing" - Suzie
 
Last edited by a moderator:
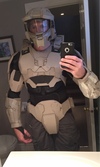
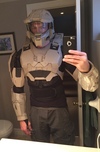
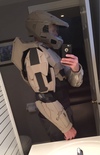
Upper body test fit.

I was finally able to get my buckles attached to the chest piece and cod piece and figured it was time for a test fit with under armour.

Nothing is velcroed in place yet, so things are slightly mis-aligned but I am ecstatic about the fit. There should be room in the chest piece for my voice amplifier and all the parts seem to have room for lighting elements.

634523f72049bf0ef3a37b202e600e36.jpg

a38a7d27a4c36d6b9a5b831831f9e4f2.jpg
2e9b694eb597d8c30e3d340df5a32507.jpg
0fe2f79d4ae475b4fba57ba173be19ee.jpg
6c69394c6b140594b55e1f83945221b7.jpg


You can see an extra piece of foam I had to insert in the upper left shoulder of the chest piece to make room for the buckle and magnets. I will have to add a similar piece on the other side to even it out.

With the cod piece.

c6e3a690225151173b85cfe97828336e.jpg

e19422bb4ce121929548827e5c8cd2b1.jpg


Please excuse my posture as I attempted to get that last shot!

Really happy. It is starting to look like armour.

Edit

I think I may paint the lower portion of the front under armour piece the same as the armour itself. It really seems to fit right with the armour and should give a good effect.

And, no padding in the helmet yet which is why it is sitting a little too high.

"I don't know what's weirder, that you're fighting a stuffed animal, or that you seem to be losing" - Suzie
 

Attachments

  • 634523f72049bf0ef3a37b202e600e36.jpg
    634523f72049bf0ef3a37b202e600e36.jpg
    330.2 KB · Views: 201
  • a38a7d27a4c36d6b9a5b831831f9e4f2.jpg
    a38a7d27a4c36d6b9a5b831831f9e4f2.jpg
    297 KB · Views: 193
  • 2e9b694eb597d8c30e3d340df5a32507.jpg
    2e9b694eb597d8c30e3d340df5a32507.jpg
    341.9 KB · Views: 195
  • 6c69394c6b140594b55e1f83945221b7.jpg
    6c69394c6b140594b55e1f83945221b7.jpg
    333.2 KB · Views: 190
  • 0fe2f79d4ae475b4fba57ba173be19ee.jpg
    0fe2f79d4ae475b4fba57ba173be19ee.jpg
    126.4 KB · Views: 201
  • e19422bb4ce121929548827e5c8cd2b1.jpg
    e19422bb4ce121929548827e5c8cd2b1.jpg
    309.5 KB · Views: 192
  • c6e3a690225151173b85cfe97828336e.jpg
    c6e3a690225151173b85cfe97828336e.jpg
    278.6 KB · Views: 190
This is really nice! Great work so far. I'm looking forward to see the finished project. May I ask you which files you used?
Thanks!

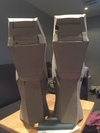
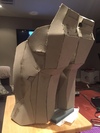
They are the Robogenesis low def files from the Halo 3/Mark vi folder in the file archive and then I added extra detail with craft foam.

The one exception is the forearms. I used the flying squirrel file for that.


"I don't know what's weirder, that you're fighting a stuffed animal, or that you seem to be losing" - Suzie
 
Shins are done.

5f9cd133e2e5843ddc0bf0c981ad08cf.jpg
4112567eefd183bf023d5de7a3ac0a94.jpg

26d354d349ba621b9d797facb30ecbeb.jpg

ee7f3c5fef10b9df4b40321ae17706de.jpg

a4059f960ea05ae6000f33d499a669a4.jpg

5a7edd60aa992e64f2699c9b8b547c17.jpg


I realized that I didn't put the layering on the side pieces. So out came the hot knife. It is going to require some extra sanding but should be fine.

d4ff8e7eb83a3a8118c1323ce1dc6262.jpg

d5a7ba04716d88ebdfc707c07f25985c.jpg

e2160c84312441803b5e5b3abf49990d.jpg


"I don't know what's weirder, that you're fighting a stuffed animal, or that you seem to be losing" - Suzie
 

Attachments

  • 5f9cd133e2e5843ddc0bf0c981ad08cf.jpg
    5f9cd133e2e5843ddc0bf0c981ad08cf.jpg
    417.3 KB · Views: 176
  • 4112567eefd183bf023d5de7a3ac0a94.jpg
    4112567eefd183bf023d5de7a3ac0a94.jpg
    425.5 KB · Views: 178
  • 26d354d349ba621b9d797facb30ecbeb.jpg
    26d354d349ba621b9d797facb30ecbeb.jpg
    451.5 KB · Views: 168
  • ee7f3c5fef10b9df4b40321ae17706de.jpg
    ee7f3c5fef10b9df4b40321ae17706de.jpg
    449 KB · Views: 171
  • 5a7edd60aa992e64f2699c9b8b547c17.jpg
    5a7edd60aa992e64f2699c9b8b547c17.jpg
    393.2 KB · Views: 170
  • a4059f960ea05ae6000f33d499a669a4.jpg
    a4059f960ea05ae6000f33d499a669a4.jpg
    437.6 KB · Views: 197
  • d4ff8e7eb83a3a8118c1323ce1dc6262.jpg
    d4ff8e7eb83a3a8118c1323ce1dc6262.jpg
    600.2 KB · Views: 186
  • d5a7ba04716d88ebdfc707c07f25985c.jpg
    d5a7ba04716d88ebdfc707c07f25985c.jpg
    536.3 KB · Views: 172
  • e2160c84312441803b5e5b3abf49990d.jpg
    e2160c84312441803b5e5b3abf49990d.jpg
    531.7 KB · Views: 164
Great job!!! Piece by piece.....it's coming together nicely!! If I may make a comment/suggestion: change or sharpen your blade more often.....I'm seeing a few spots of "jagged" edges. Not many but you eliminate the need to focus on those areas later w/ cleaner cuts to start w/. Overall....FANTASTIC!!!!
 
  • Like
Reactions: Jme
Great job!!! Piece by piece.....it's coming together nicely!! If I may make a comment/suggestion: change or sharpen your blade more often.....I'm seeing a few spots of "jagged" edges. Not many but you eliminate the need to focus on those areas later w/ cleaner cuts to start w/. Overall....FANTASTIC!!!!

The funny thing is that I sharpen it all the time. The ragged pieces on the shins are where I had to take pieces off and re-attach them (the back of one of the shins for example, I had to remove a whole piece because the shin was just too wide).

It is excellent advice though.

Just the boots to go and I can spackle and sand!


"I don't know what's weirder, that you're fighting a stuffed animal, or that you seem to be losing" - Suzie
 
Those shins look nice man. Can't wait to see more!

Thanks. I hope to get the boots done this weekend. And then the foam crafting portion is done!


"I don't know what's weirder, that you're fighting a stuffed animal, or that you seem to be losing" - Suzie
 
The funny thing is that I sharpen it all the time. The ragged pieces on the shins are where I had to take pieces off and re-attach them (the back of one of the shins for example, I had to remove a whole piece because the shin was just too wide).

If you find that you need to remove 2 pieces of foam from each other after you've glued them together use your cutting utensil and slice either right down the seam or just to the side of it then add or take away what you need. I've had the same issue before and that's how I take care of that. Great build so far. Looking forward to the completion. Keep it up.
 
  • Like
Reactions: Jme
Status
Not open for further replies.
Back
Top