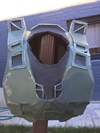
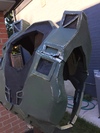
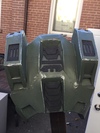
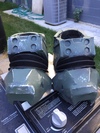
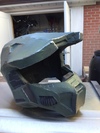
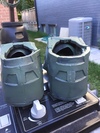
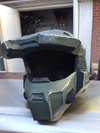
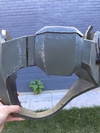
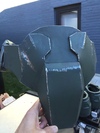
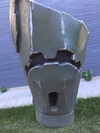
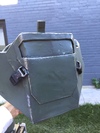
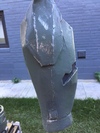
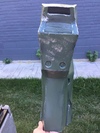
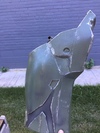
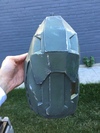
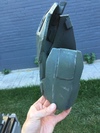
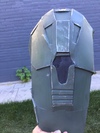
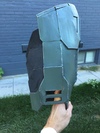
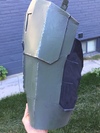
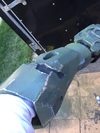
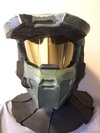
Jme's H3 MKVI Foam build

Status
Not open for further replies.
OMG!!! I needed that laugh so bad!!!! My sides hurt now......
 
  • Like
Reactions: Jme
Painting is done.

I did the black parts the other night but felt that they were too black. So todAy I did a dirt wash all over and then the highlights.

I may need to do a few touches here and there but major painting is finished.

7c065e2bc201056fd0a0189bace8683d.jpg

528fb443f7f31842823e52836c041e41.jpg

192ac9a25808616d3a408e7aa47e7402.jpg


55766a6f19ee65c179f71401a69c64b2.jpg

59ba8033b5f6de88f1d47dd0b9933858.jpg


6ce151220feca847aabe5996380d5c52.jpg

99dd133e684d7341c1b7b3fdaac7b862.jpg


c1f657db5586482e0c771911acd8a1e6.jpg

389a462078fd5daa9fb4d674decd5736.jpg

08c306e001ba793231b56d922c491cae.jpg


0ea70da26fc5e20ec0d3858315fdc6f0.jpg

7e972219fd8b15245aa7a716d3eb82b5.jpg


7f0332976cf2403f99957feed3f13318.jpg

6f28c442d07abcb894eed4e4d5f23319.jpg


756f8ff3a5e3955f7008764d51eec232.jpg

20160924bab24773961f39f4ae4f86467b67552c.jpg


"I don't know what's weirder, that you're fighting a stuffed animal, or that you seem to be losing" - Suzie
 

Attachments

  • 7c065e2bc201056fd0a0189bace8683d.jpg
    7c065e2bc201056fd0a0189bace8683d.jpg
    494.3 KB · Views: 185
  • 528fb443f7f31842823e52836c041e41.jpg
    528fb443f7f31842823e52836c041e41.jpg
    467.3 KB · Views: 182
  • 192ac9a25808616d3a408e7aa47e7402.jpg
    192ac9a25808616d3a408e7aa47e7402.jpg
    446.2 KB · Views: 178
  • 55766a6f19ee65c179f71401a69c64b2.jpg
    55766a6f19ee65c179f71401a69c64b2.jpg
    610.2 KB · Views: 178
  • 6ce151220feca847aabe5996380d5c52.jpg
    6ce151220feca847aabe5996380d5c52.jpg
    398 KB · Views: 181
  • 59ba8033b5f6de88f1d47dd0b9933858.jpg
    59ba8033b5f6de88f1d47dd0b9933858.jpg
    552.4 KB · Views: 167
  • 99dd133e684d7341c1b7b3fdaac7b862.jpg
    99dd133e684d7341c1b7b3fdaac7b862.jpg
    398.1 KB · Views: 232
  • 389a462078fd5daa9fb4d674decd5736.jpg
    389a462078fd5daa9fb4d674decd5736.jpg
    498.7 KB · Views: 162
  • c1f657db5586482e0c771911acd8a1e6.jpg
    c1f657db5586482e0c771911acd8a1e6.jpg
    440.9 KB · Views: 161
  • 0ea70da26fc5e20ec0d3858315fdc6f0.jpg
    0ea70da26fc5e20ec0d3858315fdc6f0.jpg
    493.5 KB · Views: 195
  • 08c306e001ba793231b56d922c491cae.jpg
    08c306e001ba793231b56d922c491cae.jpg
    450.8 KB · Views: 151
  • 7e972219fd8b15245aa7a716d3eb82b5.jpg
    7e972219fd8b15245aa7a716d3eb82b5.jpg
    553.2 KB · Views: 172
  • 7f0332976cf2403f99957feed3f13318.jpg
    7f0332976cf2403f99957feed3f13318.jpg
    541.7 KB · Views: 188
  • 6f28c442d07abcb894eed4e4d5f23319.jpg
    6f28c442d07abcb894eed4e4d5f23319.jpg
    561 KB · Views: 193
  • 756f8ff3a5e3955f7008764d51eec232.jpg
    756f8ff3a5e3955f7008764d51eec232.jpg
    456.9 KB · Views: 171
fc05ef333a18da020e4d56f7b9153031.jpg
3445c549bd1a53cd5180ce88af6bc6c1.jpg

510b3f29e9c3edd9d91fb5b58840c4f1.jpg

51874b326e84dd4002e400ff377cb517.jpg


Here is the forearm and glove together

1cceadb3d863c6022b8c0b63c858bbc8.jpg

56405a1c7e249e1be649692828c51c3e.jpg

ea09fc1d2f9ea9e6cf5a292ae9916644.jpg


Visor, neck seal and lights and I'm done.


"I don't know what's weirder, that you're fighting a stuffed animal, or that you seem to be losing" - Suzie
 

Attachments

  • fc05ef333a18da020e4d56f7b9153031.jpg
    fc05ef333a18da020e4d56f7b9153031.jpg
    495.7 KB · Views: 177
  • 3445c549bd1a53cd5180ce88af6bc6c1.jpg
    3445c549bd1a53cd5180ce88af6bc6c1.jpg
    426 KB · Views: 157
  • 51874b326e84dd4002e400ff377cb517.jpg
    51874b326e84dd4002e400ff377cb517.jpg
    526.2 KB · Views: 165
  • 510b3f29e9c3edd9d91fb5b58840c4f1.jpg
    510b3f29e9c3edd9d91fb5b58840c4f1.jpg
    502.4 KB · Views: 169
  • 1cceadb3d863c6022b8c0b63c858bbc8.jpg
    1cceadb3d863c6022b8c0b63c858bbc8.jpg
    422.9 KB · Views: 148
  • 56405a1c7e249e1be649692828c51c3e.jpg
    56405a1c7e249e1be649692828c51c3e.jpg
    400.5 KB · Views: 183
  • ea09fc1d2f9ea9e6cf5a292ae9916644.jpg
    ea09fc1d2f9ea9e6cf5a292ae9916644.jpg
    402.2 KB · Views: 154
wow, the highlights turned out great. Thanks for those pictures.

Thanks man. I am really happy with it.


"I don't know what's weirder, that you're fighting a stuffed animal, or that you seem to be losing" - Suzie
 
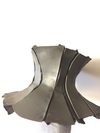
Jme, Dude!!! Looks FANTASTIC!!! I wish my suit comes out 1/2 as good. Ok, now that that was said, a quick observation. The scratches truly accent every seam you have and creates believable battle damage and I understand that it also "conceals" gaps in the armor. But you left the un-seamed areas almost completely bare of any damage at all. If you think about how a soldier moves,crawls, jumps, rolls, dives......ect....ect.....ect......then you get an idea of where "True" scratches would appear on armor. Now if you were going for the "still wet behind the ears" look, you have it. Great job man. When do we get to see the full suit on?
 
Jme, Dude!!! Looks FANTASTIC!!! I wish my suit comes out 1/2 as good. Ok, now that that was said, a quick observation. The scratches truly accent every seam you have and creates believable battle damage and I understand that it also "conceals" gaps in the armor. But you left the un-seamed areas almost completely bare of any damage at all. If you think about how a soldier moves,crawls, jumps, rolls, dives......ect....ect.....ect......then you get an idea of where "True" scratches would appear on armor. Now if you were going for the "still wet behind the ears" look, you have it. Great job man. When do we get to see the full suit on?

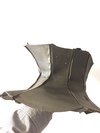
Thanks and very Good point.

I was trying to think of the high wear areas without putting in too much damage.

Perhaps I will put it on and then take a look at where I need some extra highlights.

Right now I am not planning on posting a full suit up until I have my neck seal done (working on it now)but realistically that should be this weekend...

Visor is in. Going to post a tut on the inexpensive hex pattern. It turned out pretty well for a $3 visor.


Sent from my iPhone using Tapatalk
 
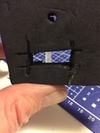
So I got my neck seal done. It was pretty easy, all things considered. I used the "easy neck seal pattern" and made it with crafting foam. I wanted to leave a little space between the pieces for effect and used strips of an old dry-fit shirt as the connector. Some plasti-dip, a little black paint and some Velcro and...

000d4c264a7af432adf4d01475714ef9.jpg

85a47a83951f375929092b3aec0d858b.jpg

2c7ede4119c0526b93e2e07d40330bd8.jpg


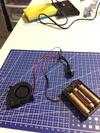
I also tried my hand with my new soldering kit by wiring up a fan.

ca715cd0e728b0833ad8cc8519dc1dd4.jpg

5852b7a947c6b9e06e51ad7dd93be46f.jpg

c1abc707f3c7f005d64bfacb1dede31d.jpg


The wires will be fixed inside the helmet and hidden after I finish all of the electronics (I plan to wire in the search lights and a wireless transmitter for my voice amp)

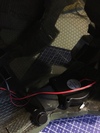
Space is a little precious inside the helmet, I had to sand down a spot for the first battery box.

edd2df14f34e0b1bc8c6b14c6556dbc8.jpg


Second battery box will go in the roof, part way into the brim.

Voice amp is a single AA so should fit beside the rear battery box.


"I don't know what is weirder - that you're fighting a stuffed animal, or that you seem to be losing." - Suzie
 

Attachments

  • 000d4c264a7af432adf4d01475714ef9.jpg
    000d4c264a7af432adf4d01475714ef9.jpg
    120.7 KB · Views: 161
  • 85a47a83951f375929092b3aec0d858b.jpg
    85a47a83951f375929092b3aec0d858b.jpg
    121.4 KB · Views: 157
  • 2c7ede4119c0526b93e2e07d40330bd8.jpg
    2c7ede4119c0526b93e2e07d40330bd8.jpg
    214.7 KB · Views: 143
  • 5852b7a947c6b9e06e51ad7dd93be46f.jpg
    5852b7a947c6b9e06e51ad7dd93be46f.jpg
    201.5 KB · Views: 174
  • ca715cd0e728b0833ad8cc8519dc1dd4.jpg
    ca715cd0e728b0833ad8cc8519dc1dd4.jpg
    359.9 KB · Views: 158
  • edd2df14f34e0b1bc8c6b14c6556dbc8.jpg
    edd2df14f34e0b1bc8c6b14c6556dbc8.jpg
    357 KB · Views: 154
  • c1abc707f3c7f005d64bfacb1dede31d.jpg
    c1abc707f3c7f005d64bfacb1dede31d.jpg
    184.5 KB · Views: 145
Looks great Jme!!...​Neck seal looks fantastic!!!...........So.....you shop at Costco eh?
 
  • Like
Reactions: Jme
Looks great Jme!!...​Neck seal looks fantastic!!!...........So.....you shop at Costco eh?

Haha, we go to Costco like twice a year but always get lots of AA batteries.

I was surprised at how easy the neck seal was to make. Very comfortable too and it is nice not to have to wear a balaclava.

I am really enjoying soldering the electronics. I did my first test run wiring lights last night and they lit up! I have to get better solder though, the stuff they sent with the kit is total crap.


"I don't know what is weirder - that you're fighting a stuffed animal, or that you seem to be losing." - Suzie
 
Does it slip over or velcro close? .....Same here w/ lights just last night also!!!! cool.
 
  • Like
Reactions: Jme
It velcros closed and fits together so well that I have trouble finding where the Velcro is!


"I don't know what is weirder - that you're fighting a stuffed animal, or that you seem to be losing." - Suzie
 
Ok so now to the helmet, did you make any vent holes or left it solid?
 
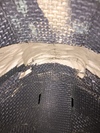
I left vent holes in the top and around the tubing at the front (I didn't completely seal
In the accordion tubing). As well, the visor isn't completely flush all the way around.

I was actually testing for fogging when I snapped the photo with the neck seal and the 5v blower fan does a perfect job or keeping the visor clear.

These holes are smaller now that everything is sealed and painted but it is the only shot I have on my phone right now that shows them.

Edit - the blower fan is located directly over one of the accordion tube openings to draw fresh air into the helmet.

98f5d89f8f19faaab93b119f7d18e67c.jpg
d0685e92b2495975a4e0ad52145f9e67.jpg


"I don't know what is weirder - that you're fighting a stuffed animal, or that you seem to be losing." - Suzie
 

Attachments

  • 98f5d89f8f19faaab93b119f7d18e67c.jpg
    98f5d89f8f19faaab93b119f7d18e67c.jpg
    340.3 KB · Views: 163
  • d0685e92b2495975a4e0ad52145f9e67.jpg
    d0685e92b2495975a4e0ad52145f9e67.jpg
    314.4 KB · Views: 161
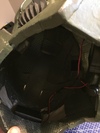
On the inside right over this tubing.

d32a9c7ba7f7b948bac4a67c9c6ed16c.jpg


It draws air in from the gaps between the tubing and the helmet. Then the blower is aimed right up at the visor.

d2d213099ecd452e558233ba3c853755.jpg


I love that picture app


"I don't know what is weirder - that you're fighting a stuffed animal, or that you seem to be losing." - Suzie
 

Attachments

  • d2d213099ecd452e558233ba3c853755.jpg
    d2d213099ecd452e558233ba3c853755.jpg
    211.7 KB · Views: 133
  • d32a9c7ba7f7b948bac4a67c9c6ed16c.jpg
    d32a9c7ba7f7b948bac4a67c9c6ed16c.jpg
    180.3 KB · Views: 157
JME, can i just say that i have followed your build and alot of the lessons you learned i have applied to my sons batman build. which is my first foam build. great work... i cant wait to try my hand at a build like yours..

fantastic work friend, FANTASTIC! Even the electronics, i have seen alot of people use those fans for Storm trooper helmets over on the 501st!

Kudos!
 
  • Like
Reactions: Jme
JME, can i just say that i have followed your build and alot of the lessons you learned i have applied to my sons batman build. which is my first foam build. great work... i cant wait to try my hand at a build like yours..

fantastic work friend, FANTASTIC! Even the electronics, i have seen alot of people use those fans for Storm trooper helmets over on the 501st!

Kudos!

Thanks very much. It means a lot to me that this thread has been in any way helpful, even if it is just in avoiding some of my mistakes!

Love the batman build for your son btw, building for the kids is awesome (my kids are helping me with their costumes this year which is so much fun).


"I don't know what is weirder - that you're fighting a stuffed animal, or that you seem to be losing." - Suzie
 
Wow, you're doing progress fast! O_O

Your costume looks great! :)
Thanks Mara!

So good news and bad news.

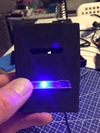
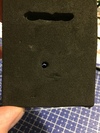
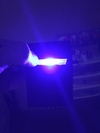
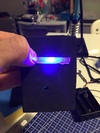
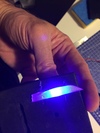
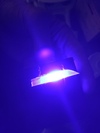
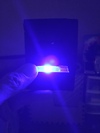
First the good news. I did a light test the other day and I think I can get away with drilling a hole for the LED and using a trench to make the port rather than cutting all the way through the armour.

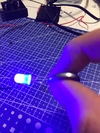
Here are my test pieces. I am using a blue led just pressed against a button light as the tester.

6d69a1c49bfe3420620a76af676f6ca1.jpg


Here with just a hole drilled in the test piece.

41e3f1dcb4921a13ec66949158ddc41a.jpg


Normal light

475230893ec53d7bb73bcca10d44fdfb.jpg


Low light

b814fceb32da82a11ea8156ed792406f.jpg


Now with the trench

b36ea9f52226f560ae6d1ef887b580a3.jpg


Normal

b1ab37a89e52ec21896bc873079f61a1.jpg


Low light

ee1c2d1e4a7879aeb57b9af119161510.jpg


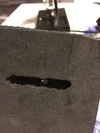
Now with a complete hole

e4798cb2b964607e0044f4c8c29906c3.jpg


Normal

cbc920b2888db88c983fef6f9ed8c8e5.jpg


Low

0ce20d0bda75defeaa23d1c291aaccf8.jpg


I think that using the trench lights up the port cover sufficiently for my purposes. The benefit is that if I find that the port doesn't show up enough I can always cut all the way through later.

Now the bad news. I was trying on my chest piece to see if my voice amp fit in the booster and the opposite side from my buckle ripped. Not completely awful as I will just add a buckle on that side but it means a new seam.


"I don't know what is weirder - that you're fighting a stuffed animal, or that you seem to be losing." - Suzie
 

Attachments

  • b814fceb32da82a11ea8156ed792406f.jpg
    b814fceb32da82a11ea8156ed792406f.jpg
    158.3 KB · Views: 154
  • 475230893ec53d7bb73bcca10d44fdfb.jpg
    475230893ec53d7bb73bcca10d44fdfb.jpg
    244 KB · Views: 144
  • 41e3f1dcb4921a13ec66949158ddc41a.jpg
    41e3f1dcb4921a13ec66949158ddc41a.jpg
    348.3 KB · Views: 151
  • 6d69a1c49bfe3420620a76af676f6ca1.jpg
    6d69a1c49bfe3420620a76af676f6ca1.jpg
    295.4 KB · Views: 162
  • ee1c2d1e4a7879aeb57b9af119161510.jpg
    ee1c2d1e4a7879aeb57b9af119161510.jpg
    159.7 KB · Views: 150
  • b1ab37a89e52ec21896bc873079f61a1.jpg
    b1ab37a89e52ec21896bc873079f61a1.jpg
    220.4 KB · Views: 141
  • b36ea9f52226f560ae6d1ef887b580a3.jpg
    b36ea9f52226f560ae6d1ef887b580a3.jpg
    202.2 KB · Views: 146
  • cbc920b2888db88c983fef6f9ed8c8e5.jpg
    cbc920b2888db88c983fef6f9ed8c8e5.jpg
    191.7 KB · Views: 142
  • e4798cb2b964607e0044f4c8c29906c3.jpg
    e4798cb2b964607e0044f4c8c29906c3.jpg
    180.3 KB · Views: 154
  • 0ce20d0bda75defeaa23d1c291aaccf8.jpg
    0ce20d0bda75defeaa23d1c291aaccf8.jpg
    141.1 KB · Views: 140
Status
Not open for further replies.
Back
Top